Managing Content
Database
Database
The database is designed to create and manage content in your application. You can create a database for news, custom forms and other actions.
No coding is required when creating a database!
To create a database and output information to applications, we need to do 3 simple steps:
- Create a database
- Add a page with the output of all information
- Add a page with the output of separate information
Note: After the publication of the application, all new information that you will add to your database will be updated online
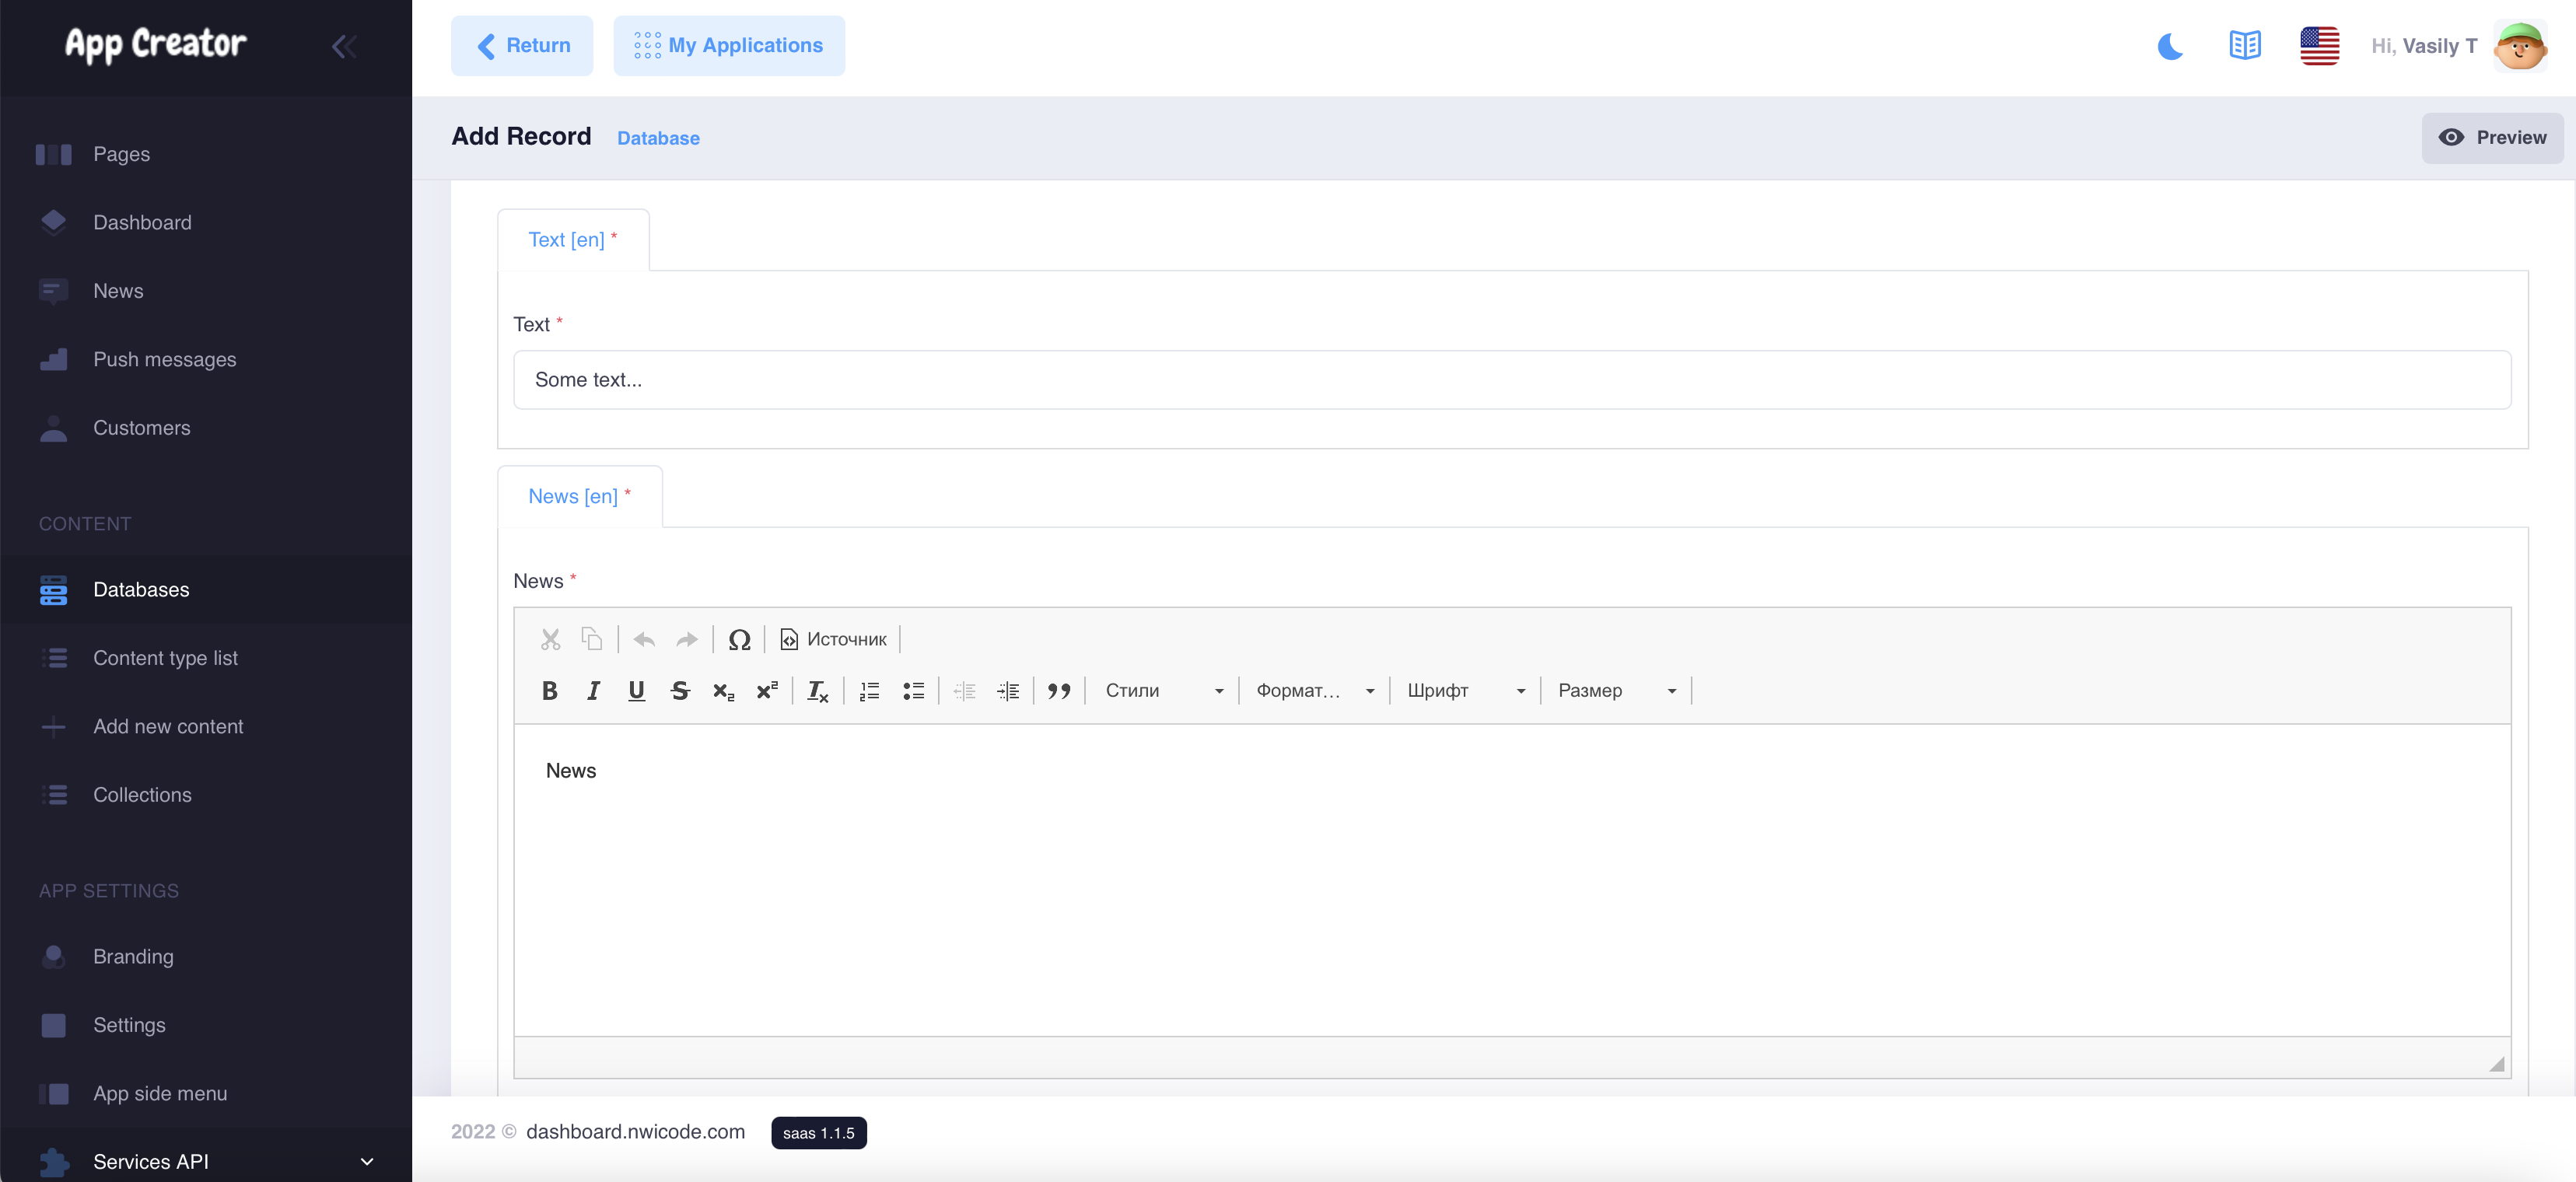
Step 1 Creating a database:
Name your database (the name is visible only to you)
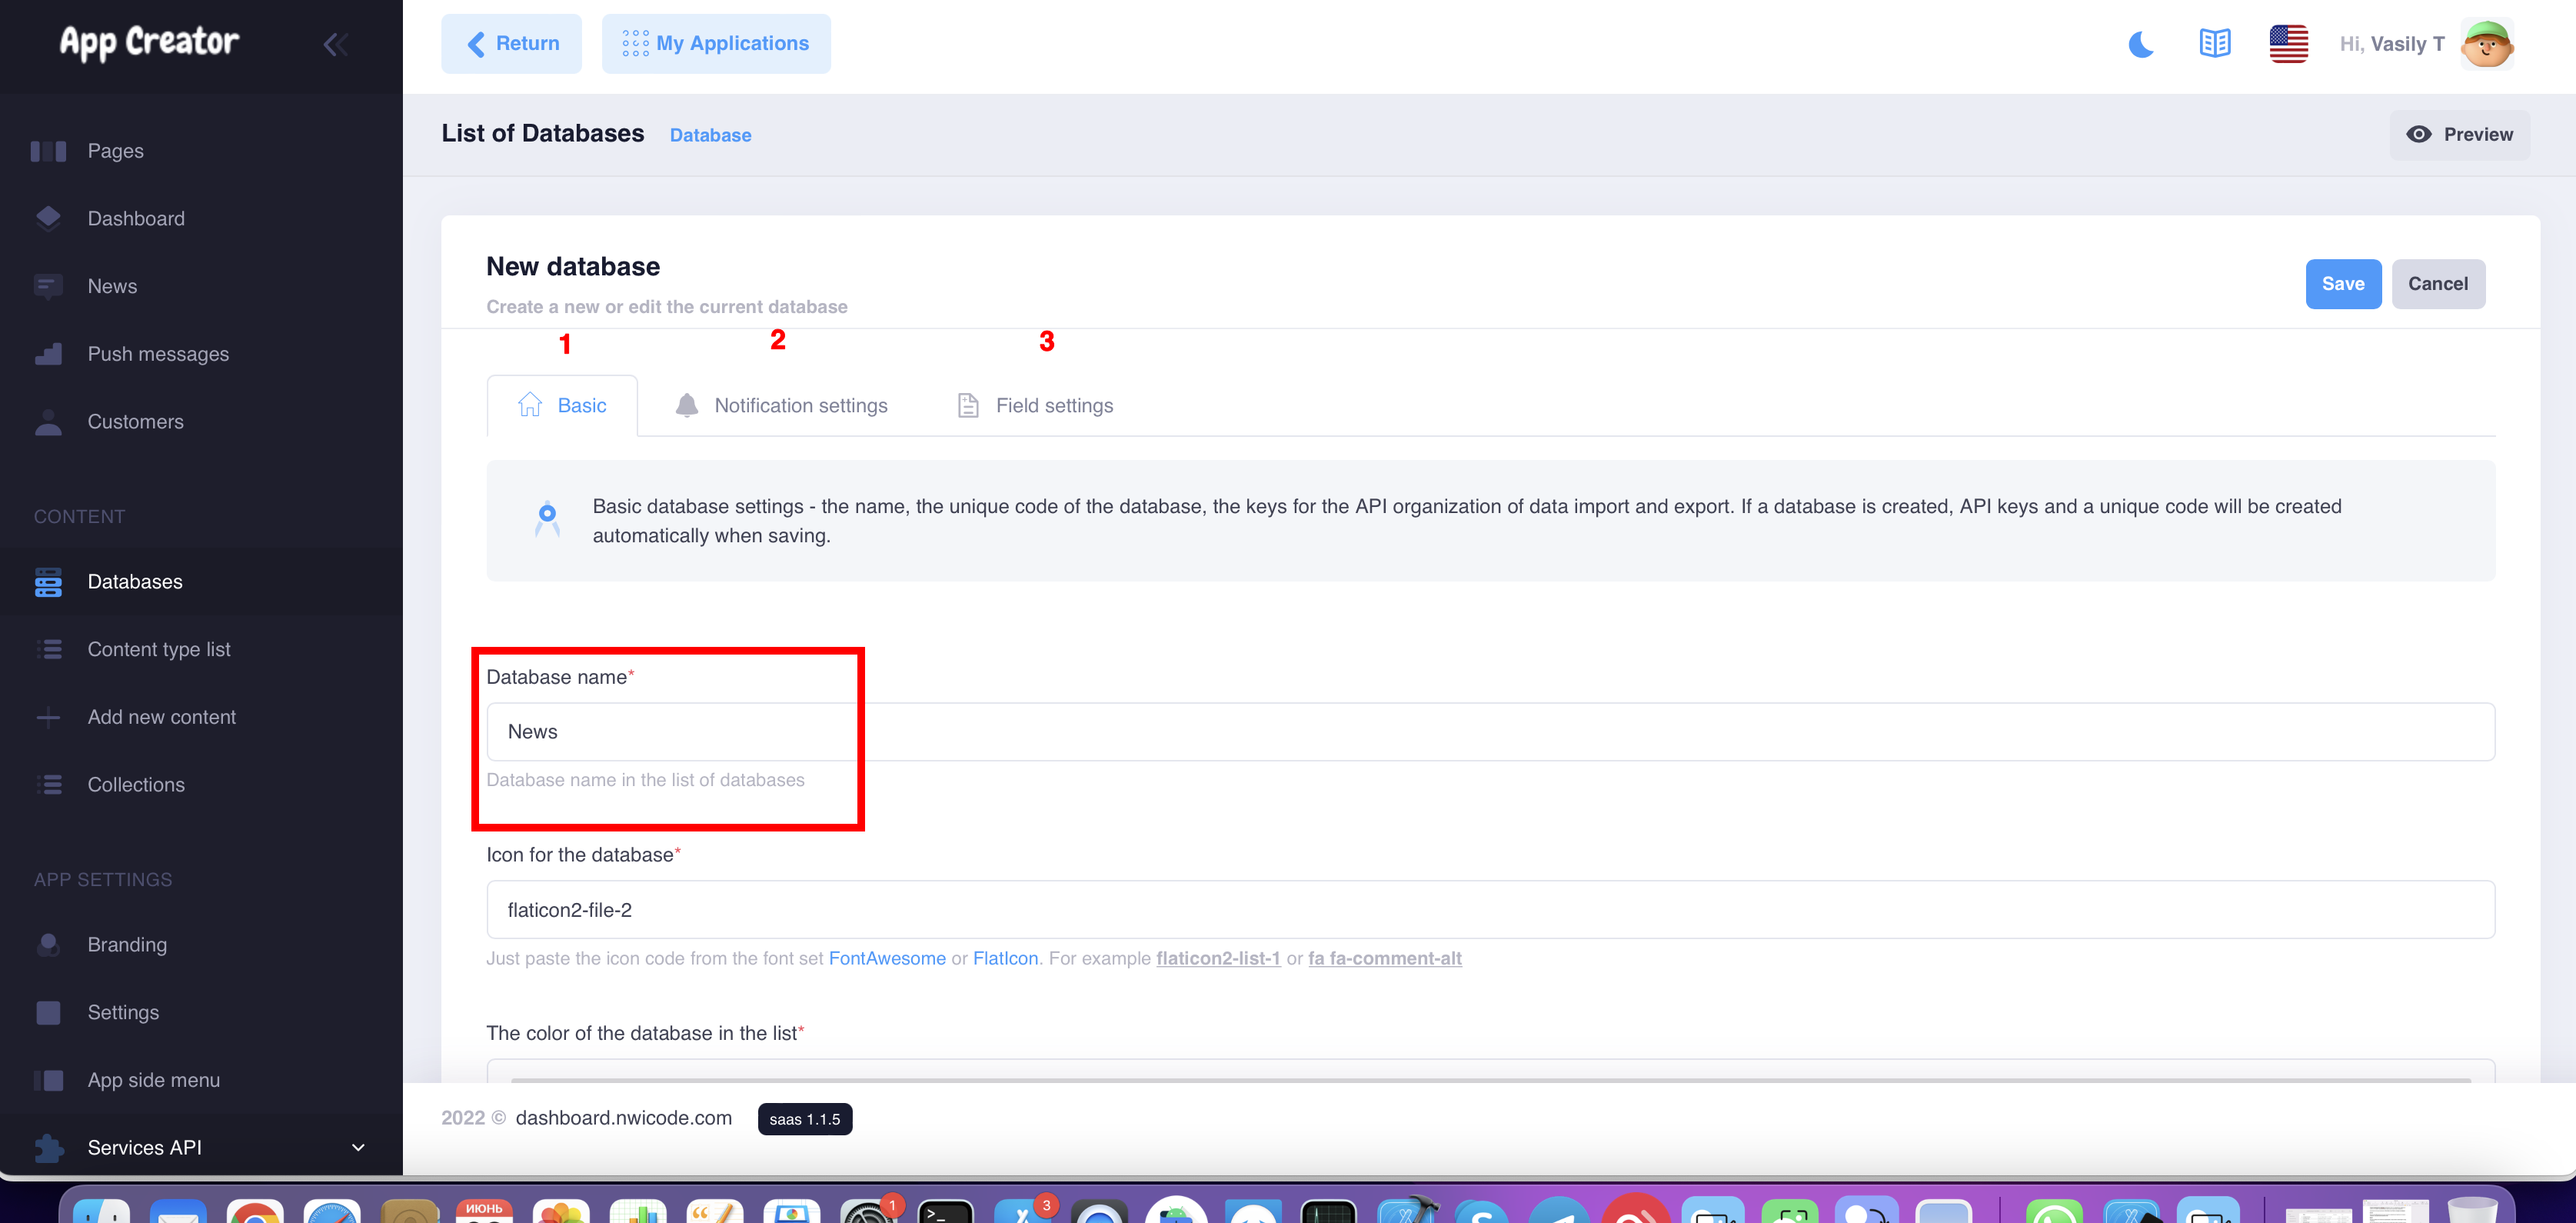
Drag the desired fields to the canvas
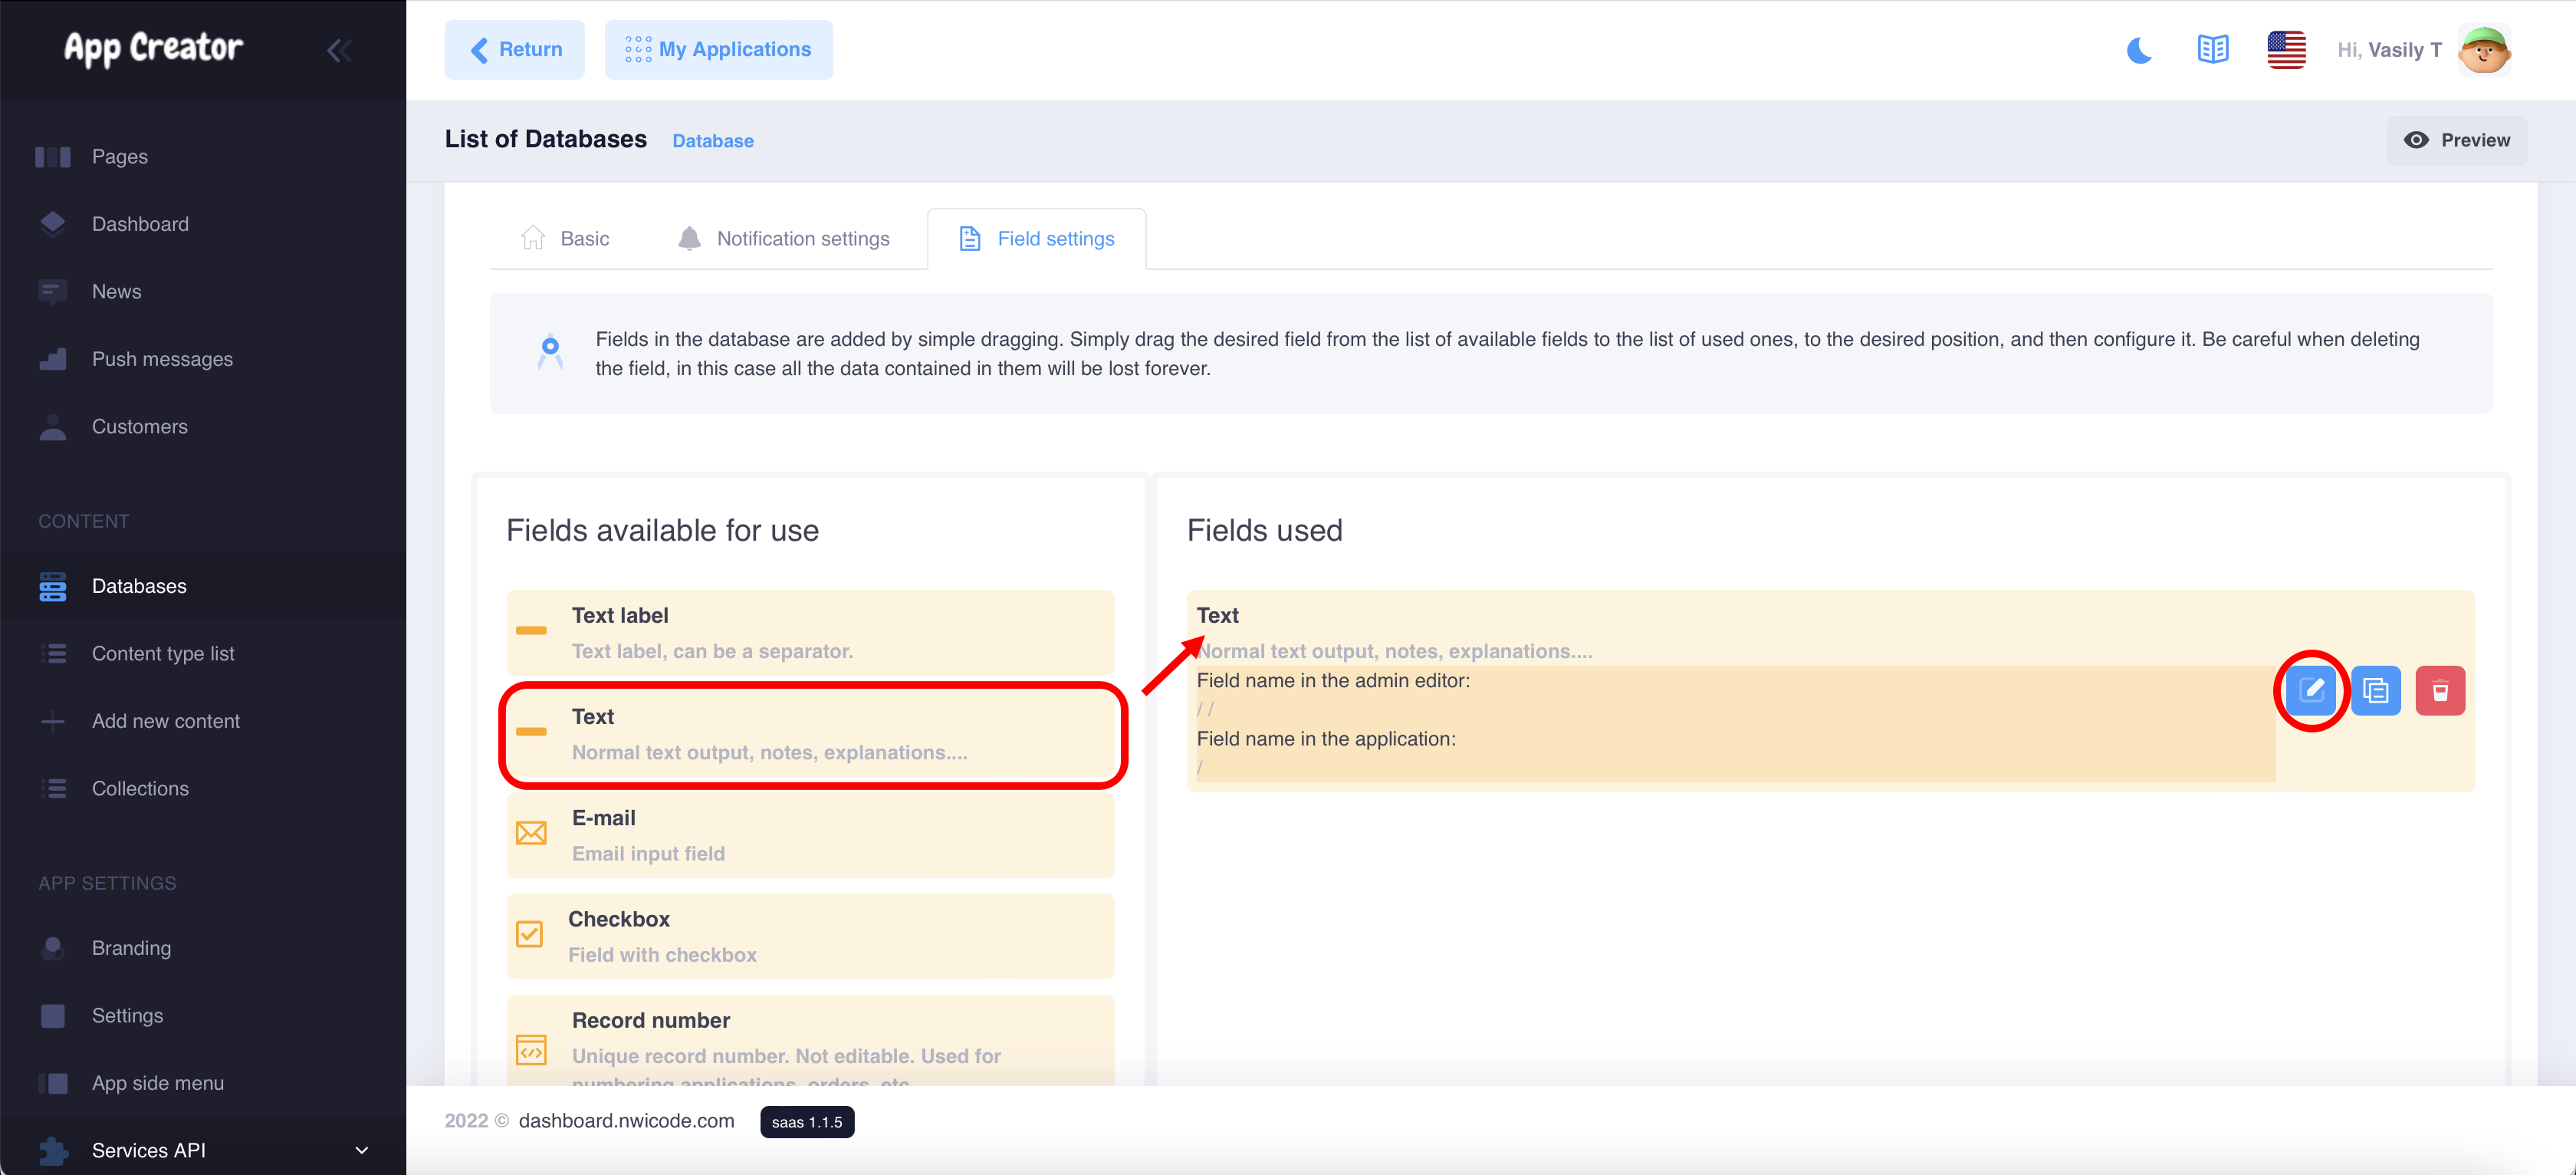
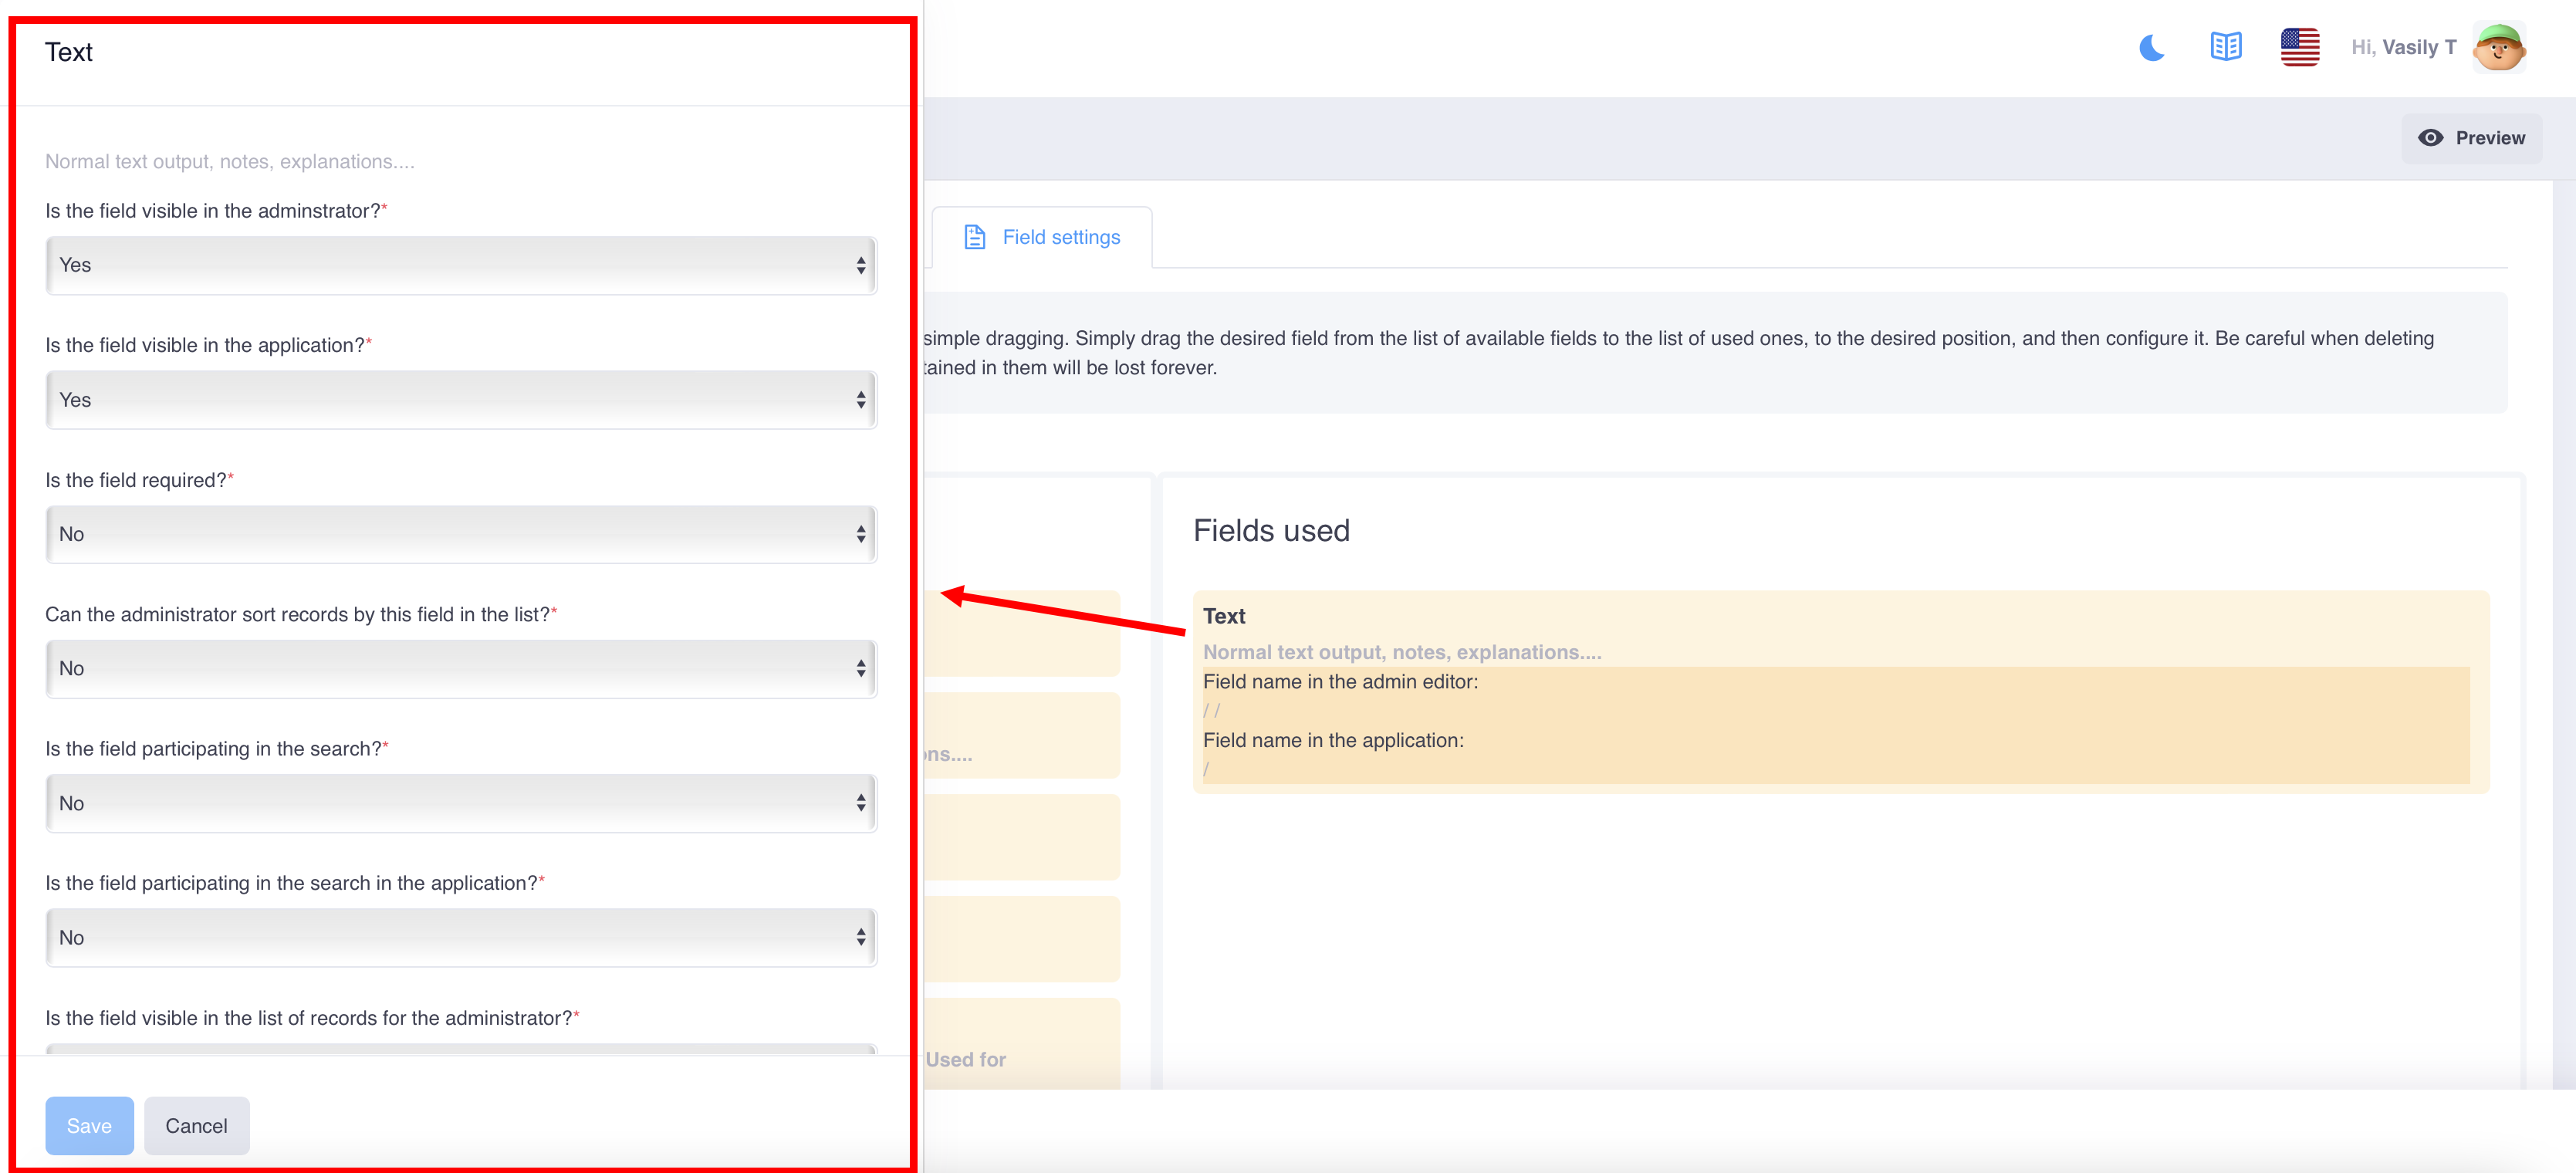
Configure the display and availability of fields
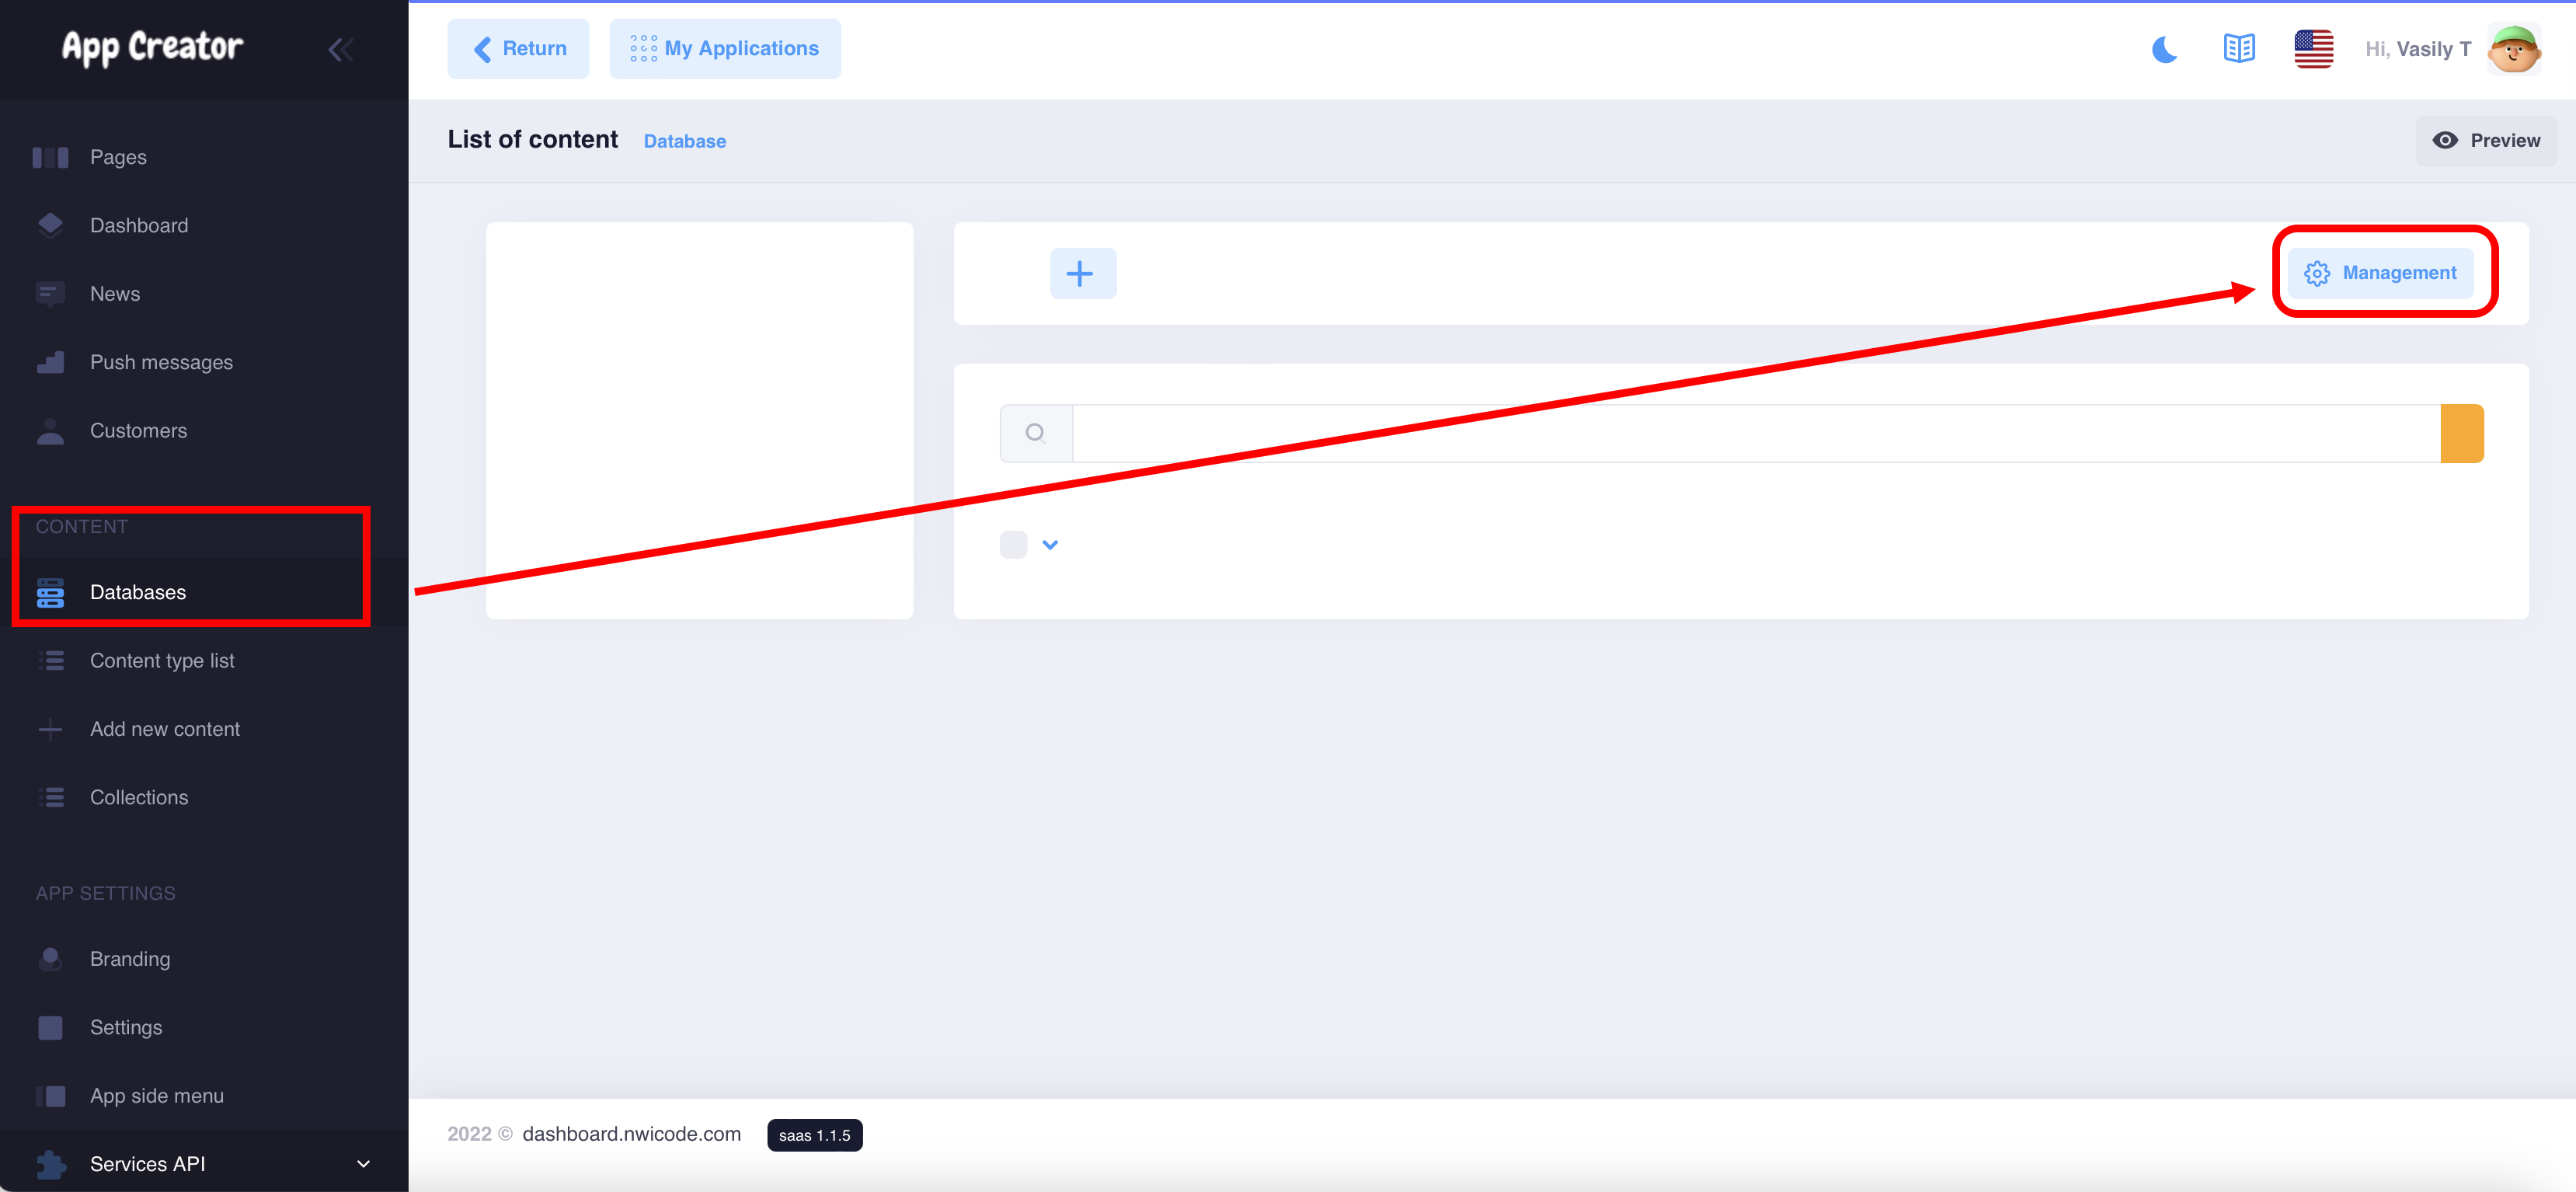
Database management:
You can create different databases with different actions and functions.
Consider an example of a database for managing news:
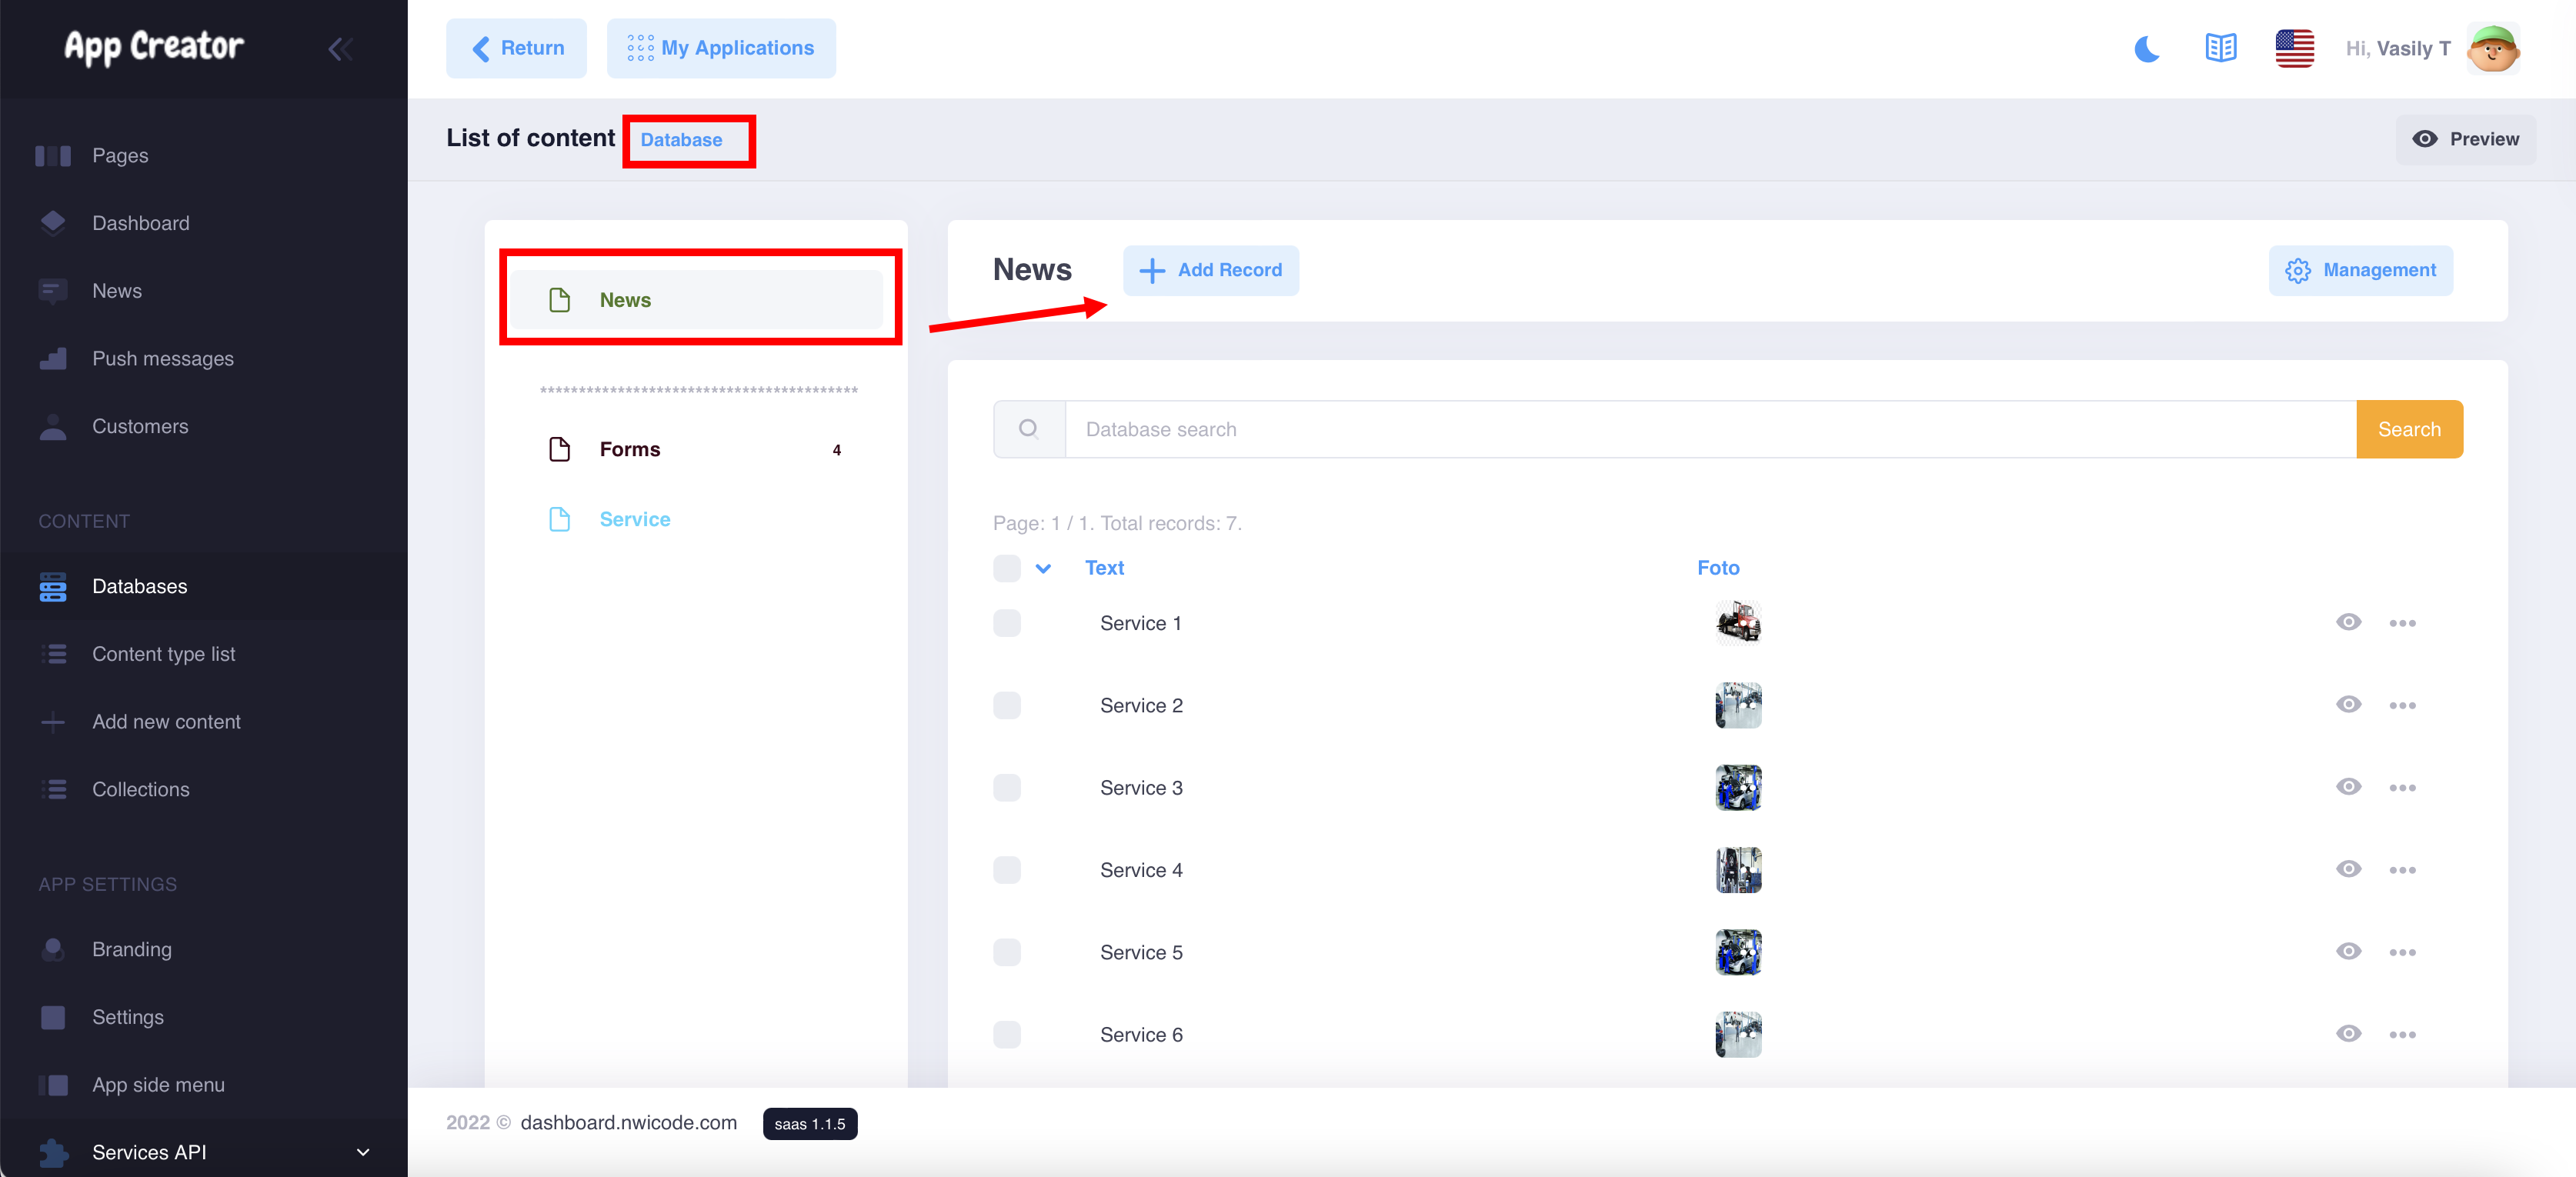
Go to the list of created databases and start adding records
Great! You have created your first database
Step 2 Creating pages in the application:
Go to the page of our canvas and add a new screen. Next, go to the components (database) and select the Row List component
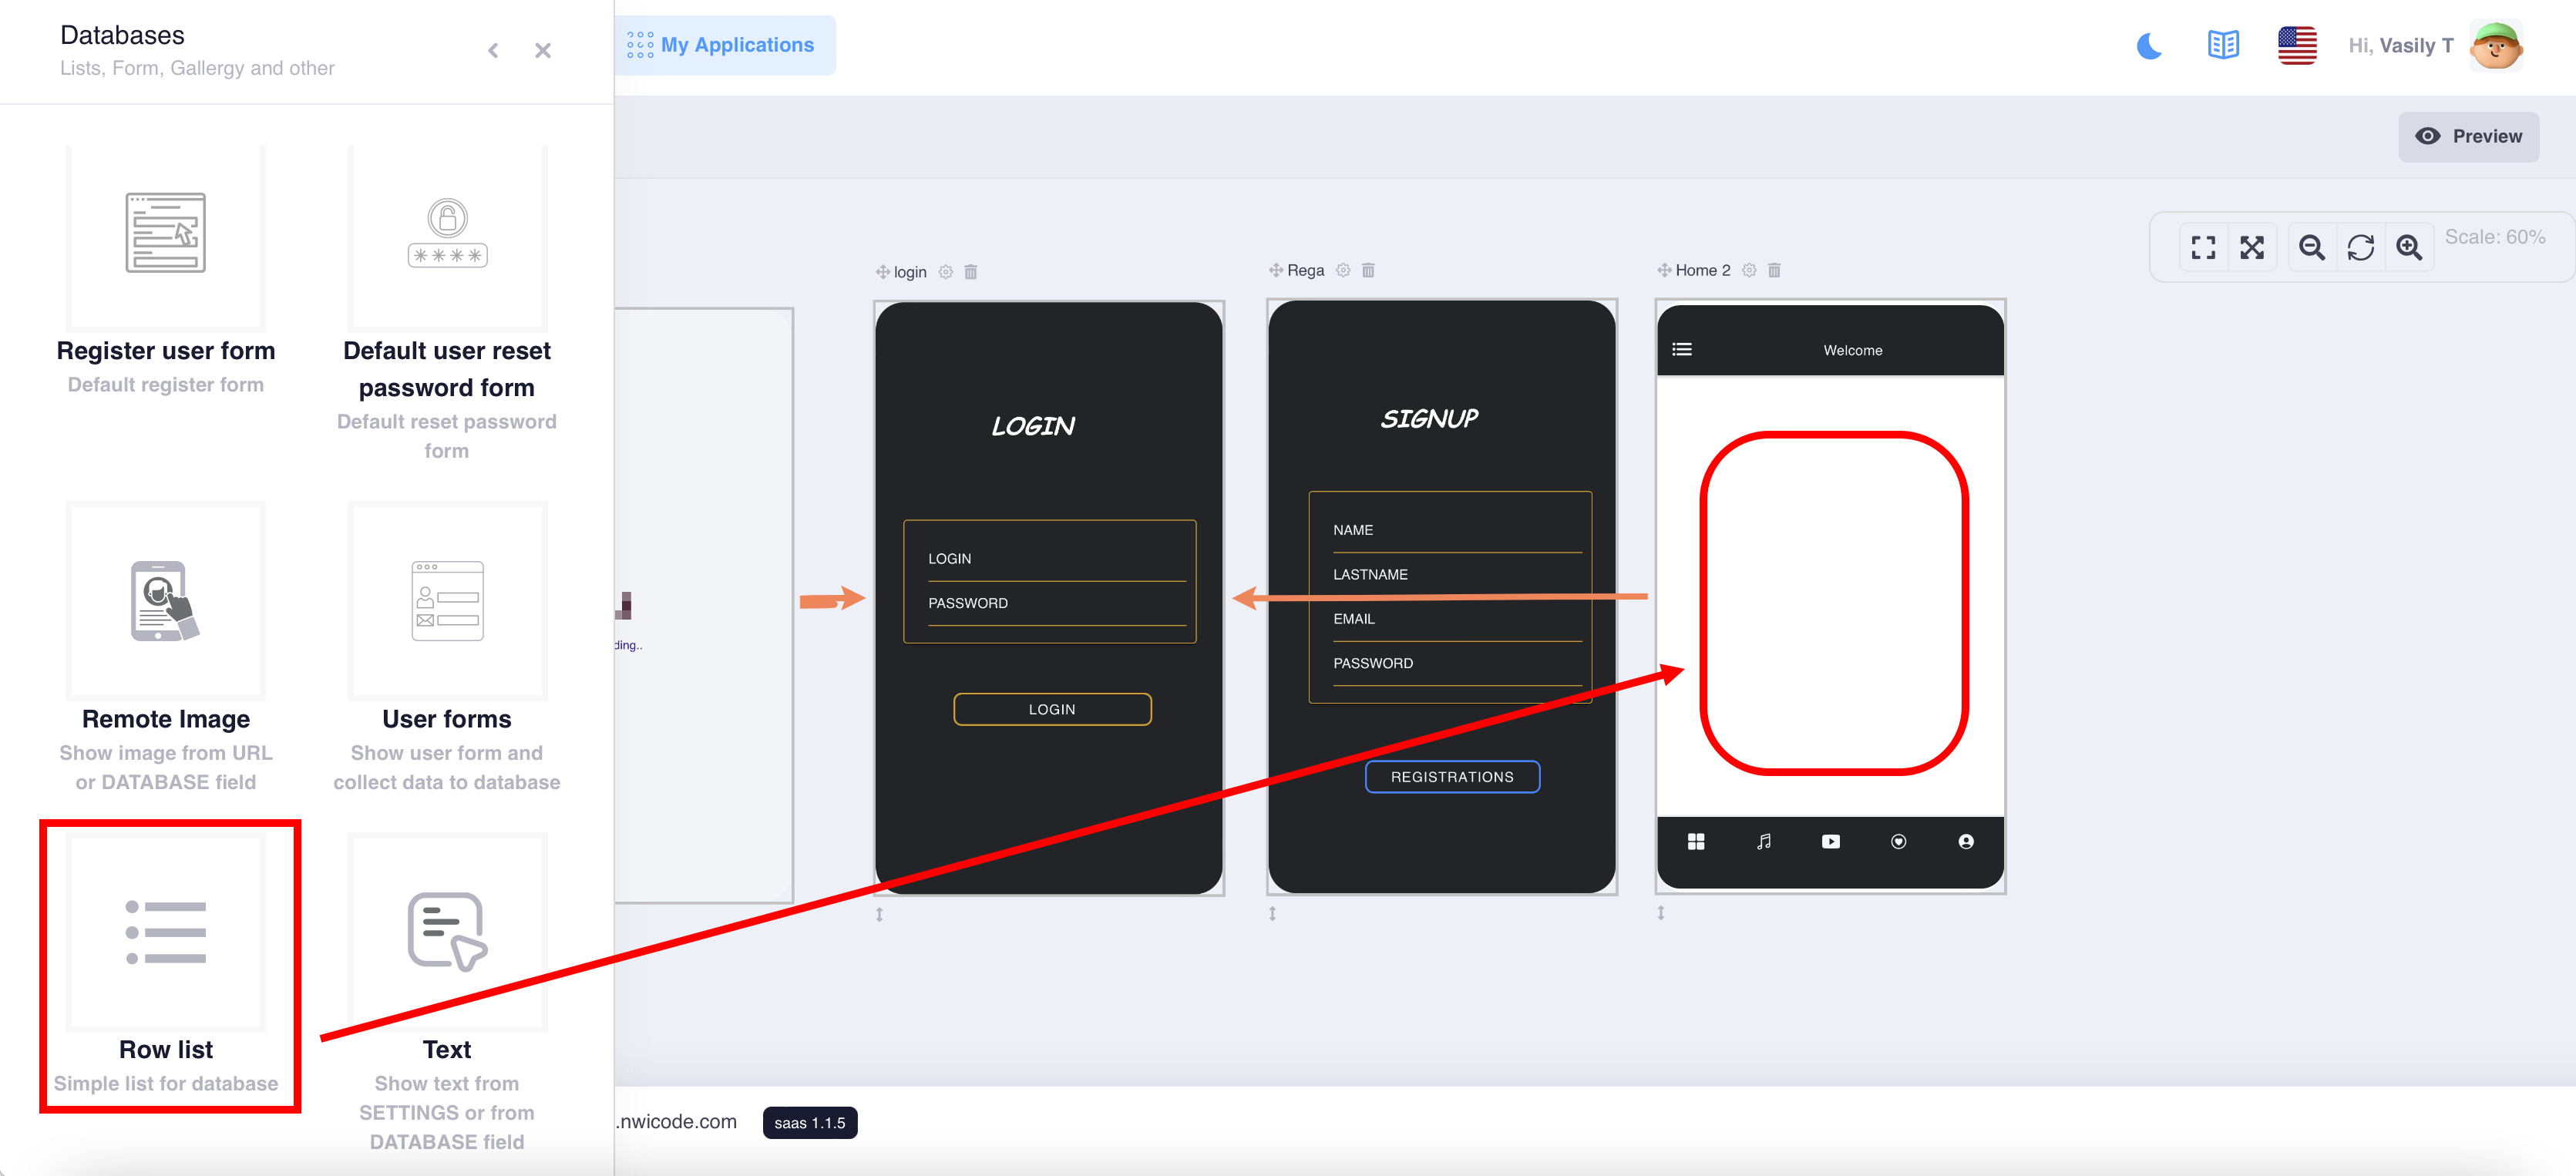
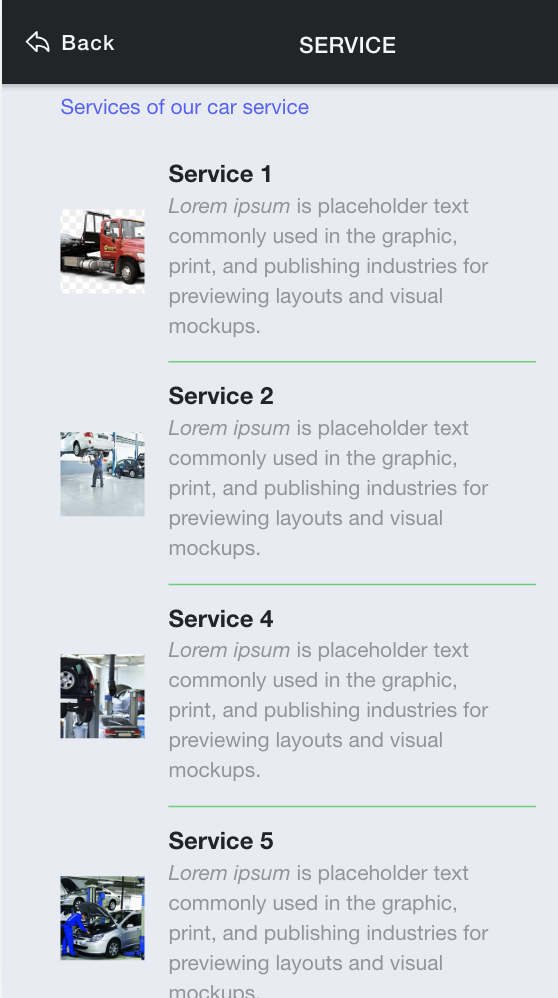
This component will display the entire list of your news on one page.
Configure the display and connect the desired database

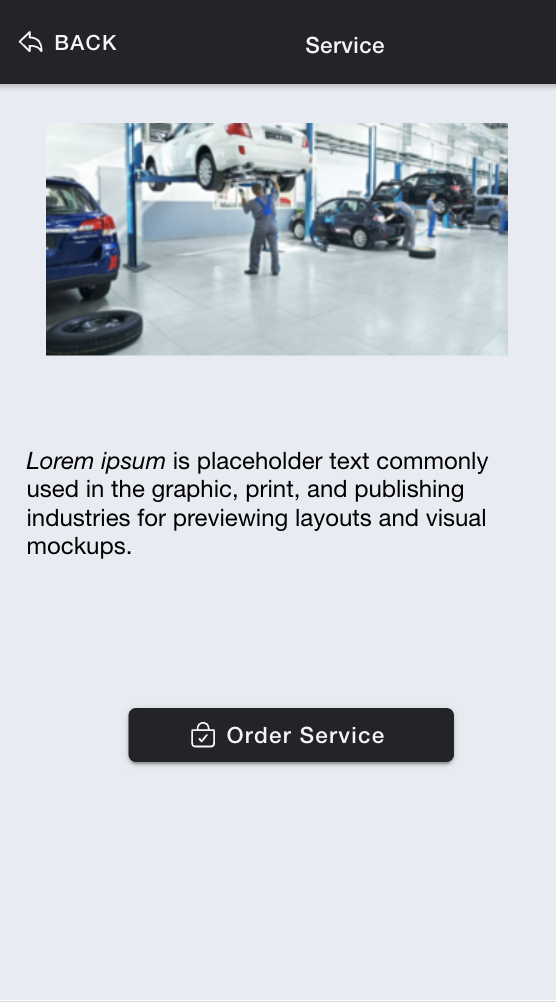
Creating a second screen to display a separate news
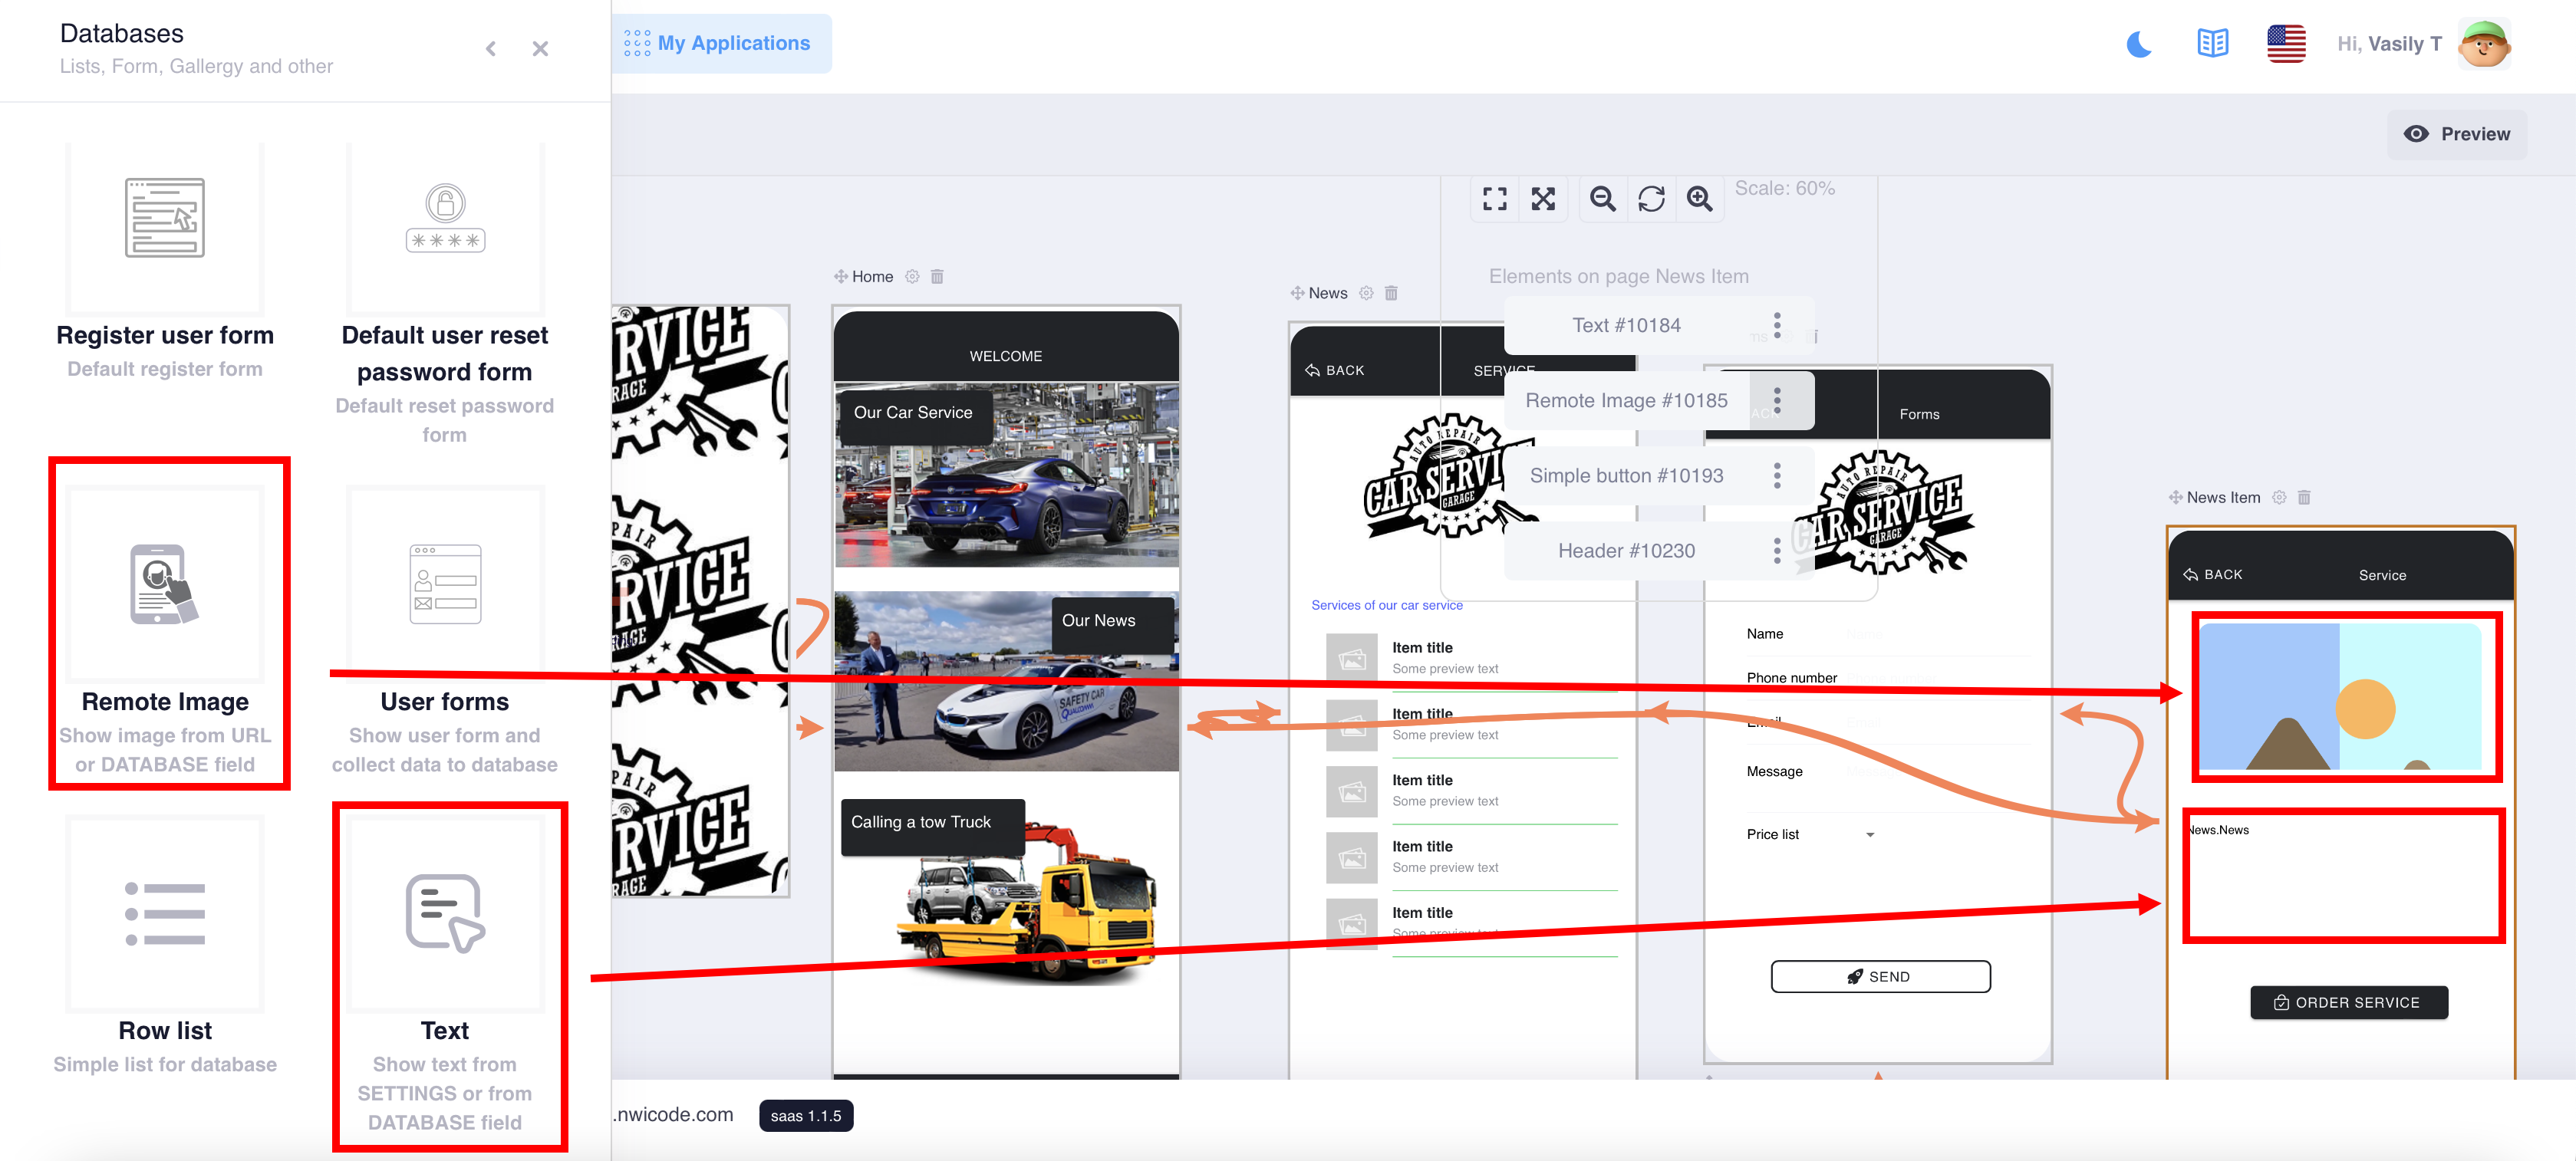
Now let's go back to the screen with the Row List component and add an action when clicking on the news
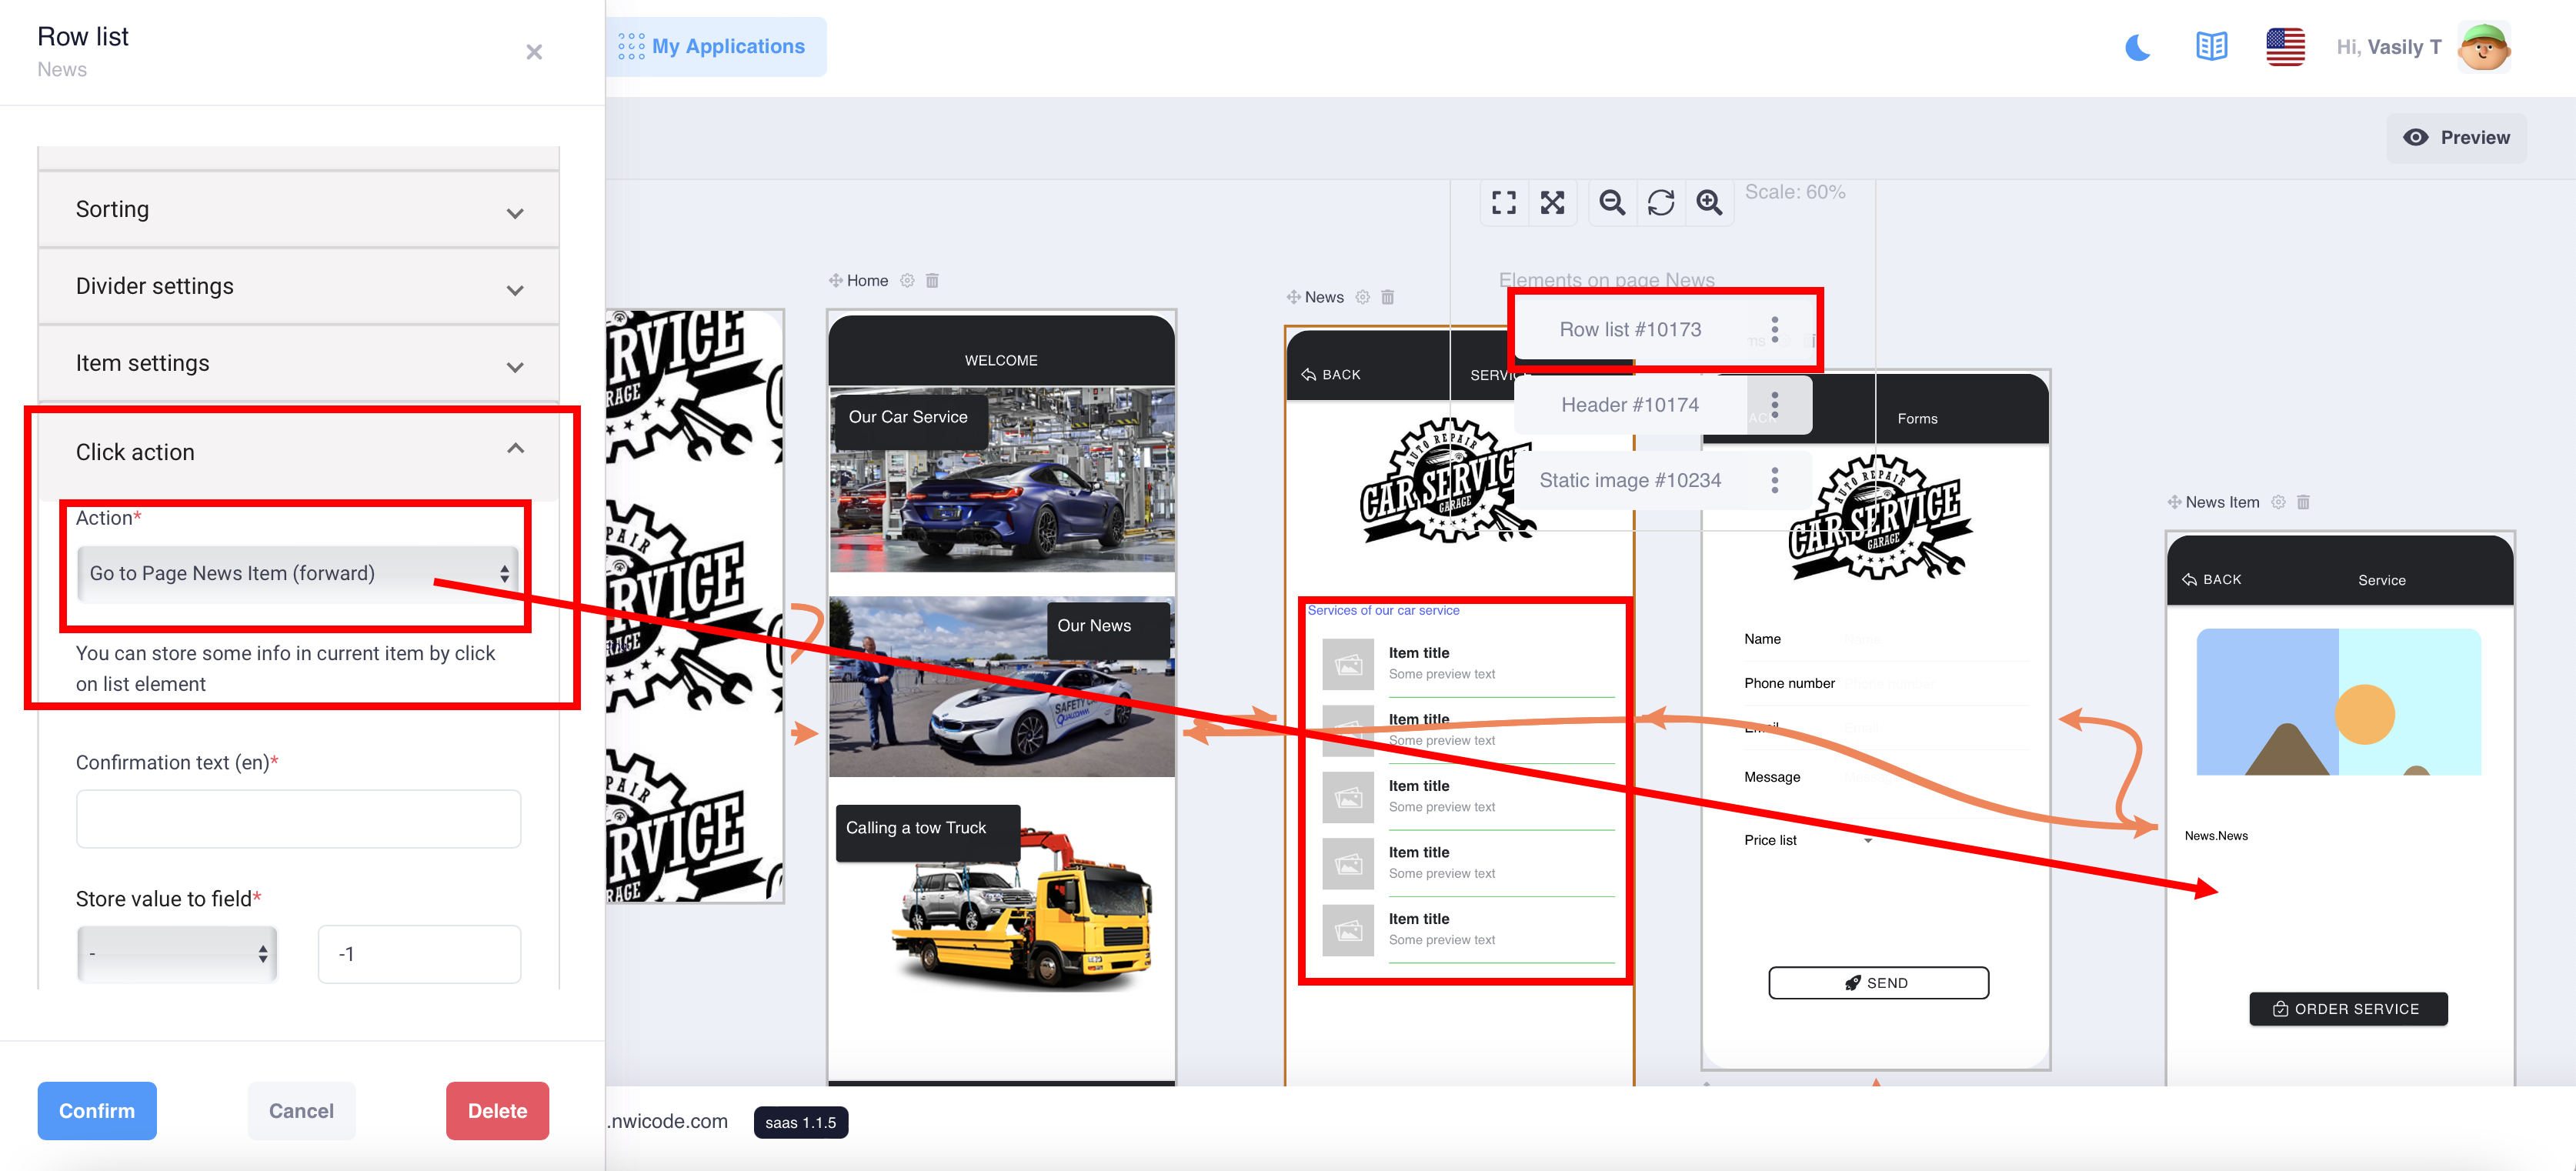
In the mobile app:
Setup your integration
Airtable is a collaborative low-code platform that lets users build databases using spreadsheets.
Get the best of both worlds with Airtable’s intuitive, powerful database and Moxly’s custom logic and flexible UI builder.
Get Api Keys and Project Token
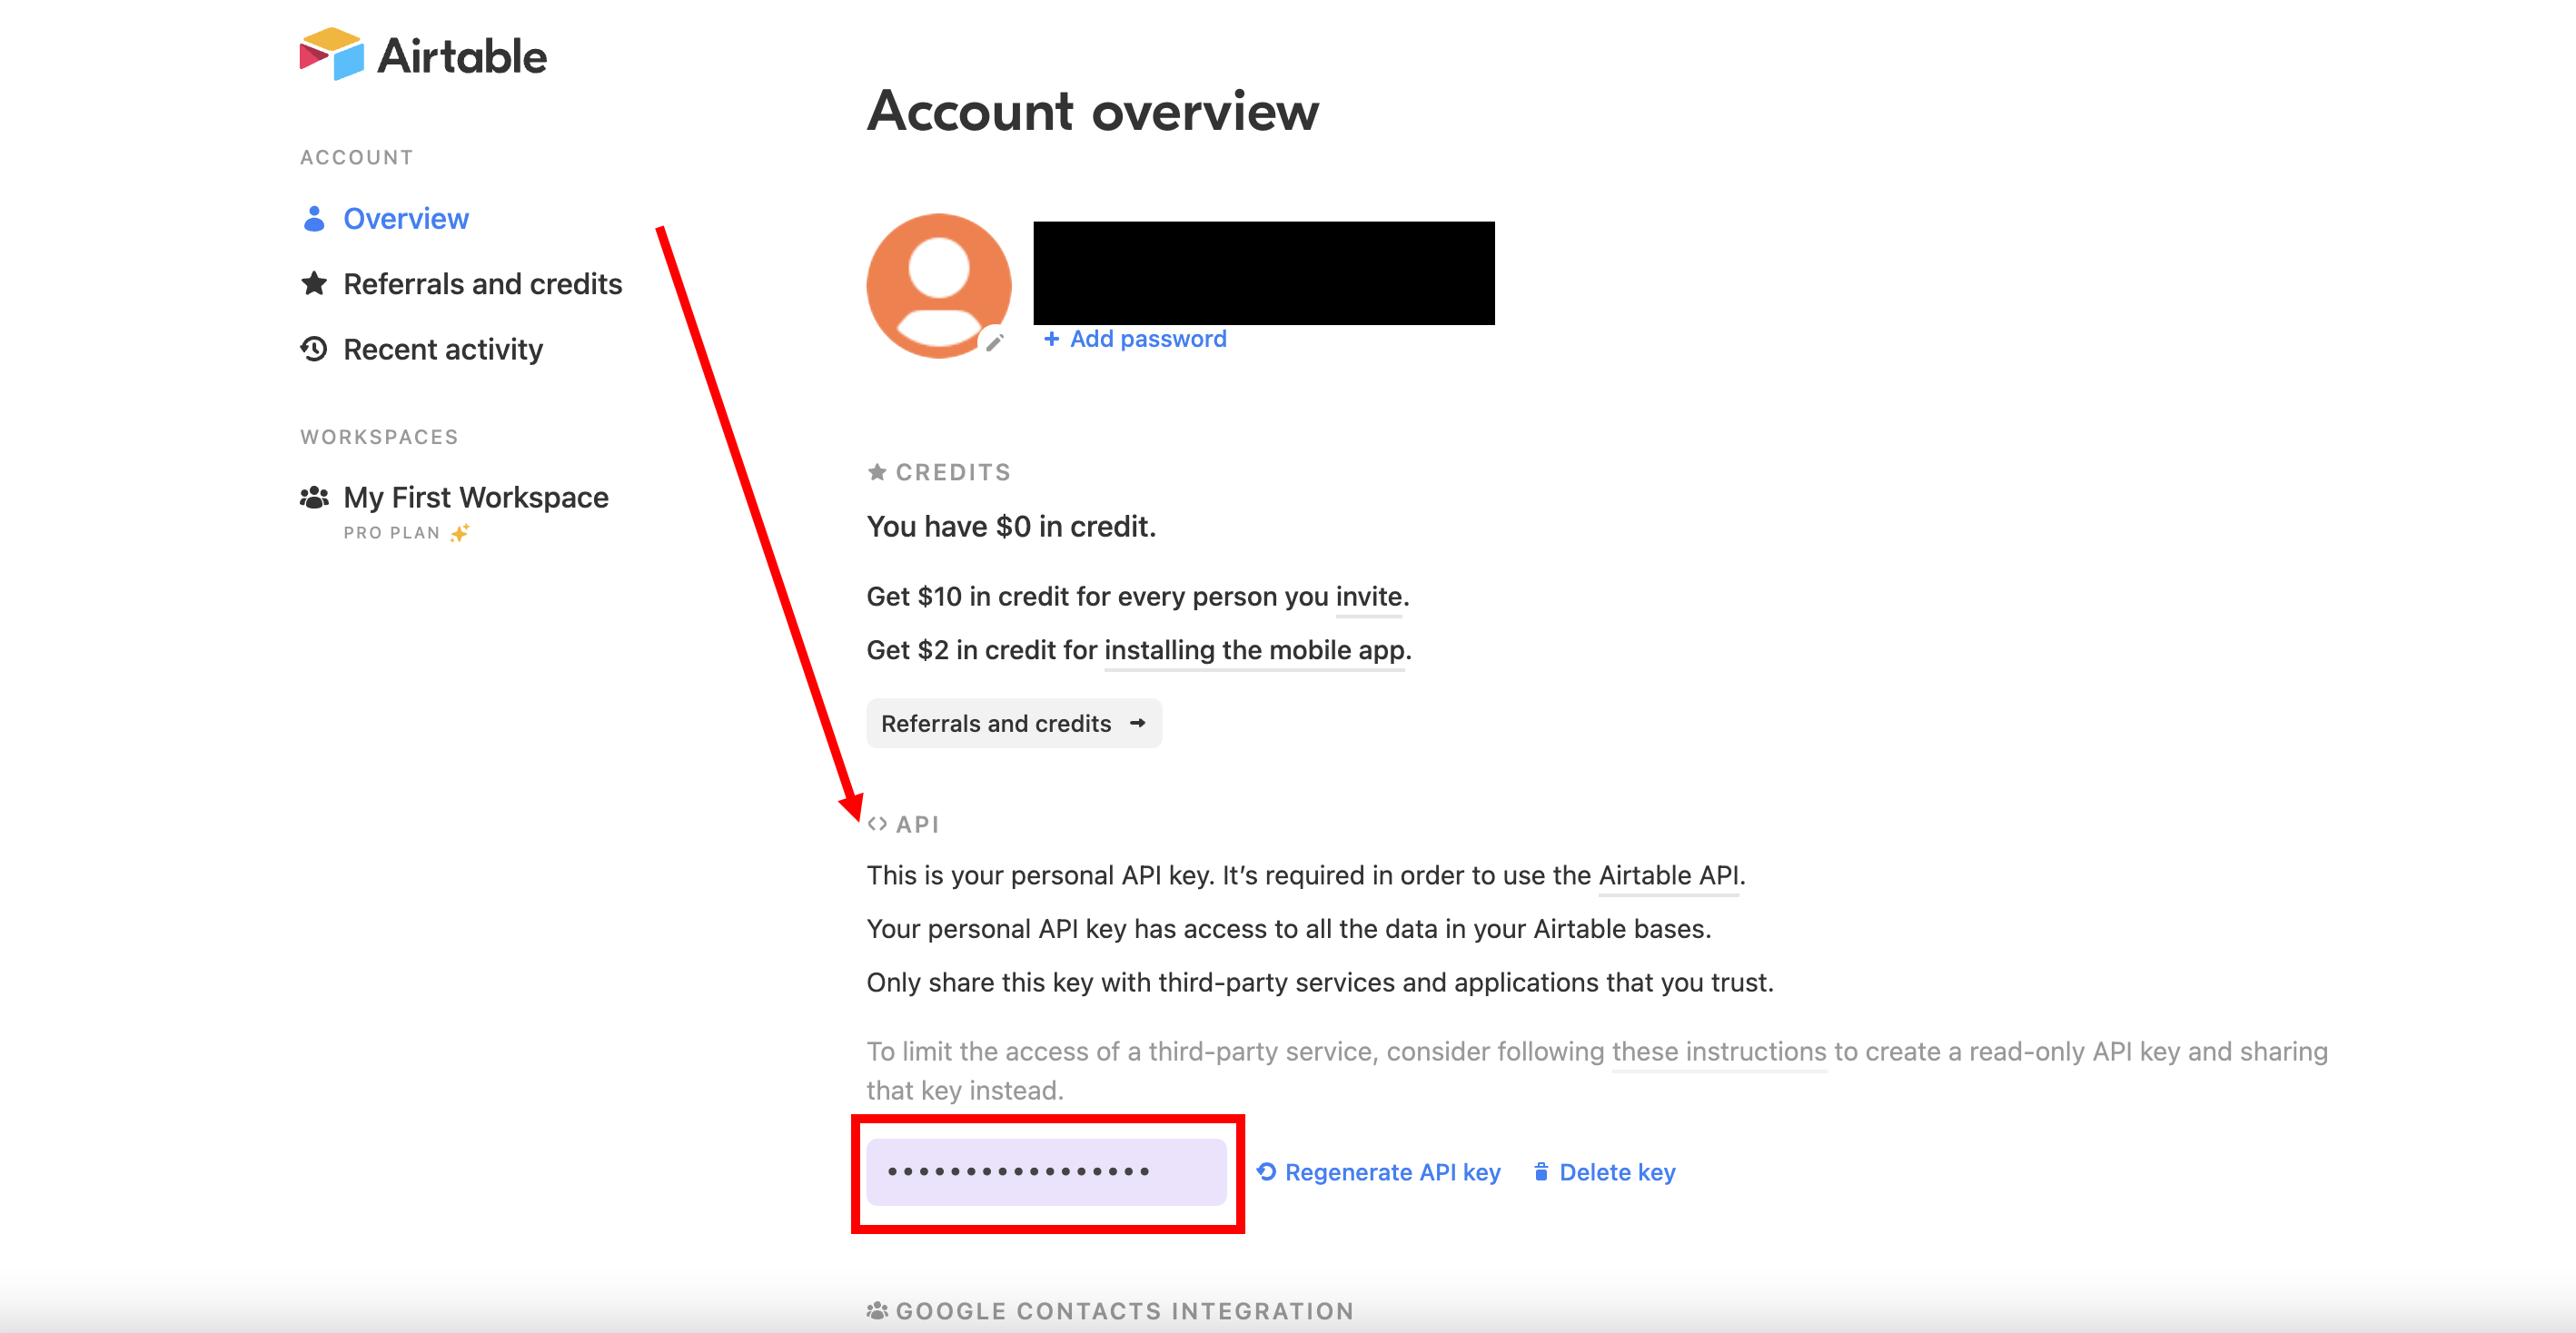
Go to the Airtable website and register your account if you are using the platform for the first time
Go to your account settings and copy your API key
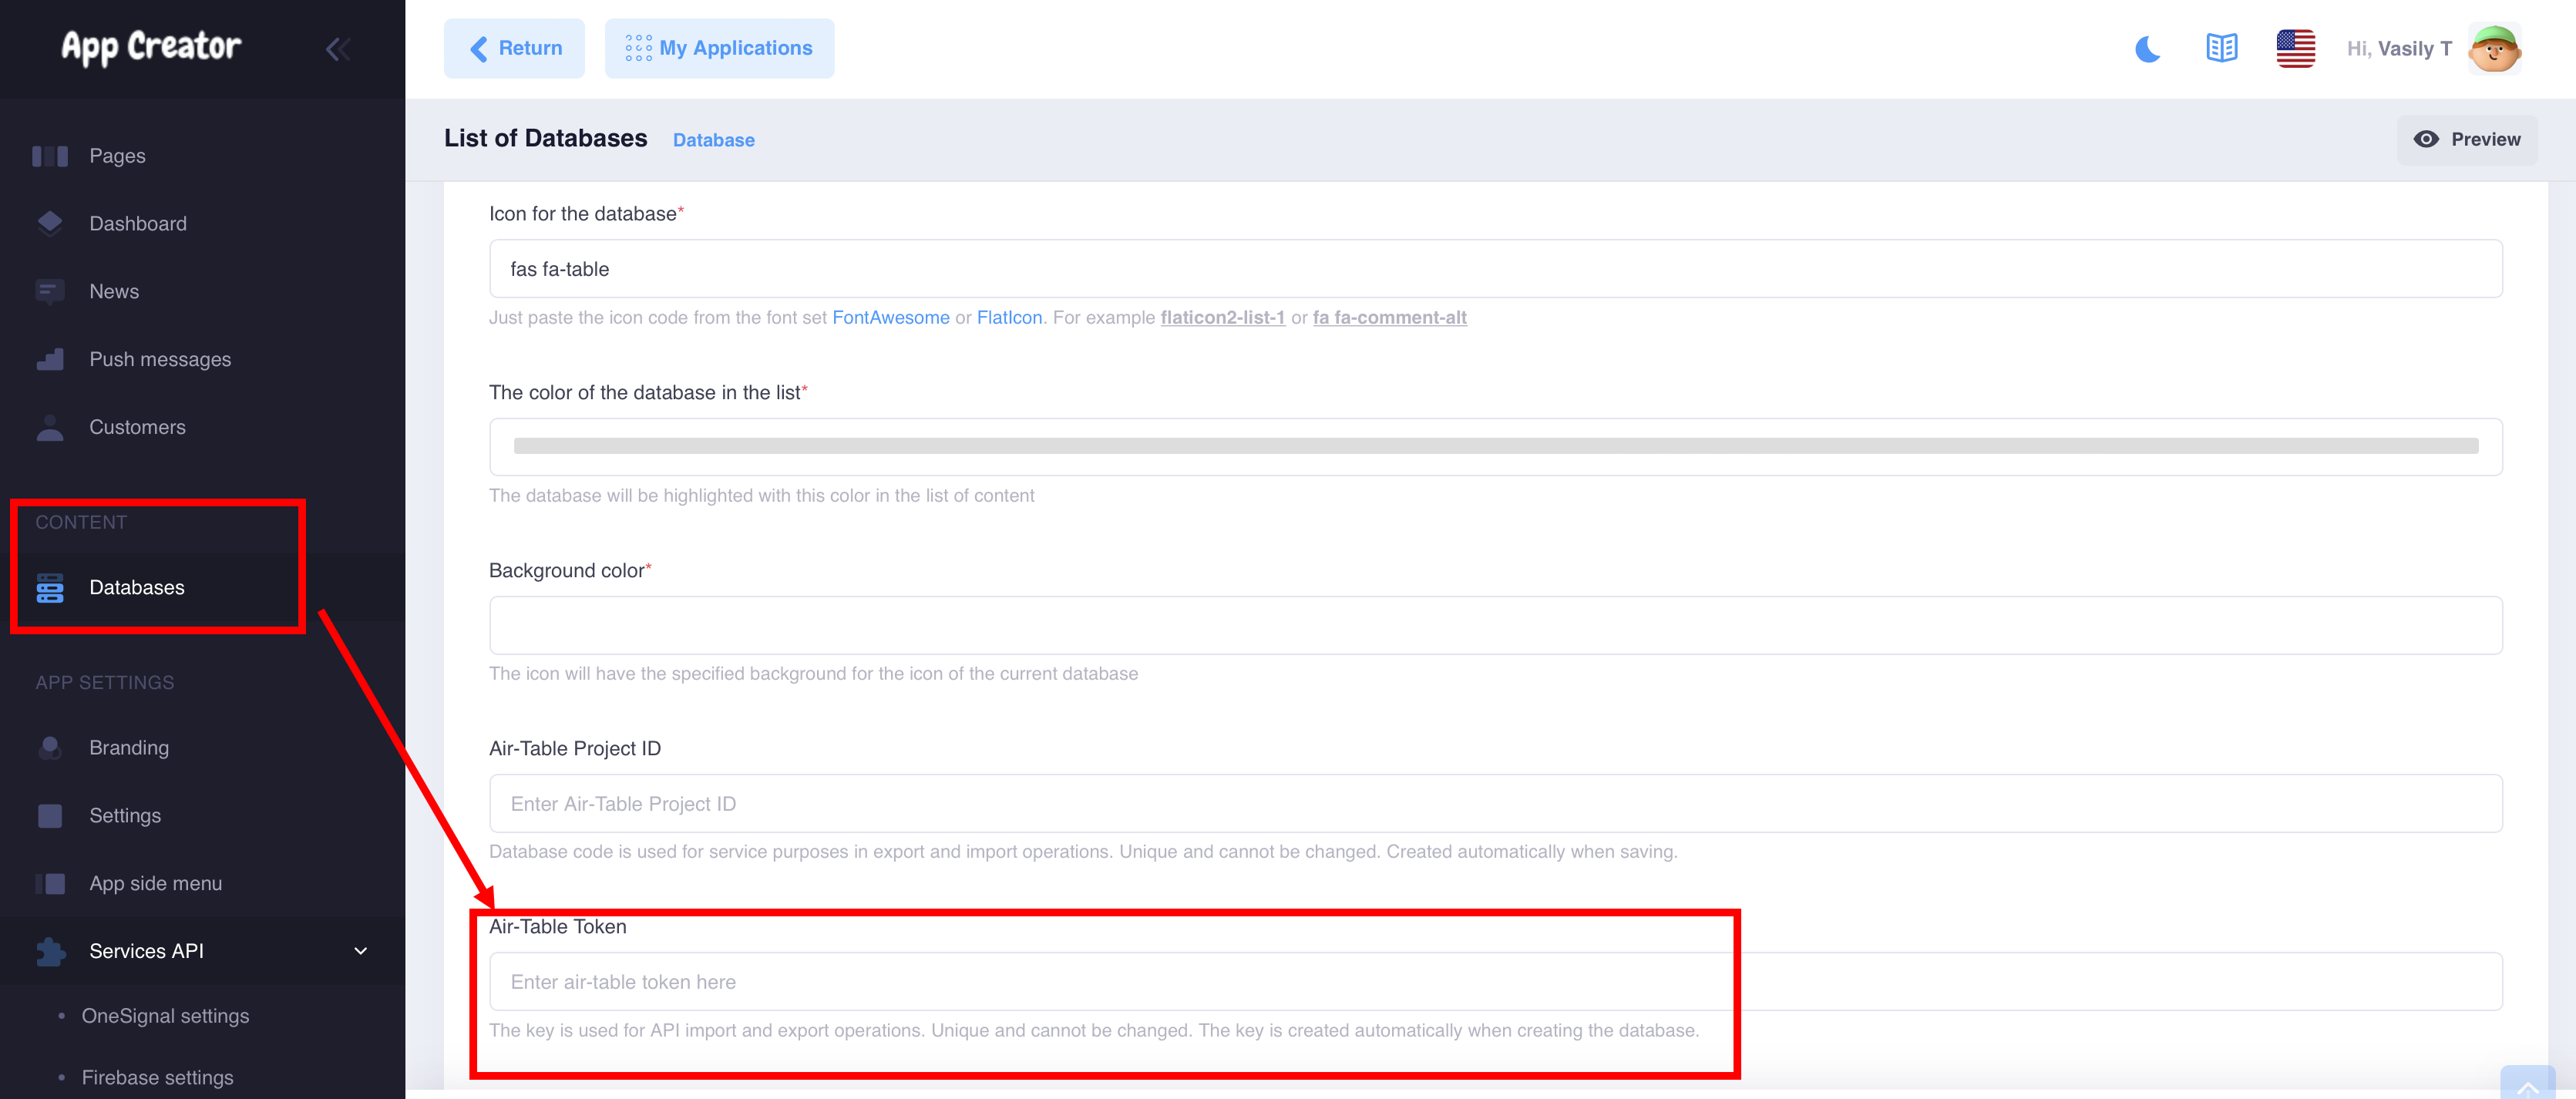
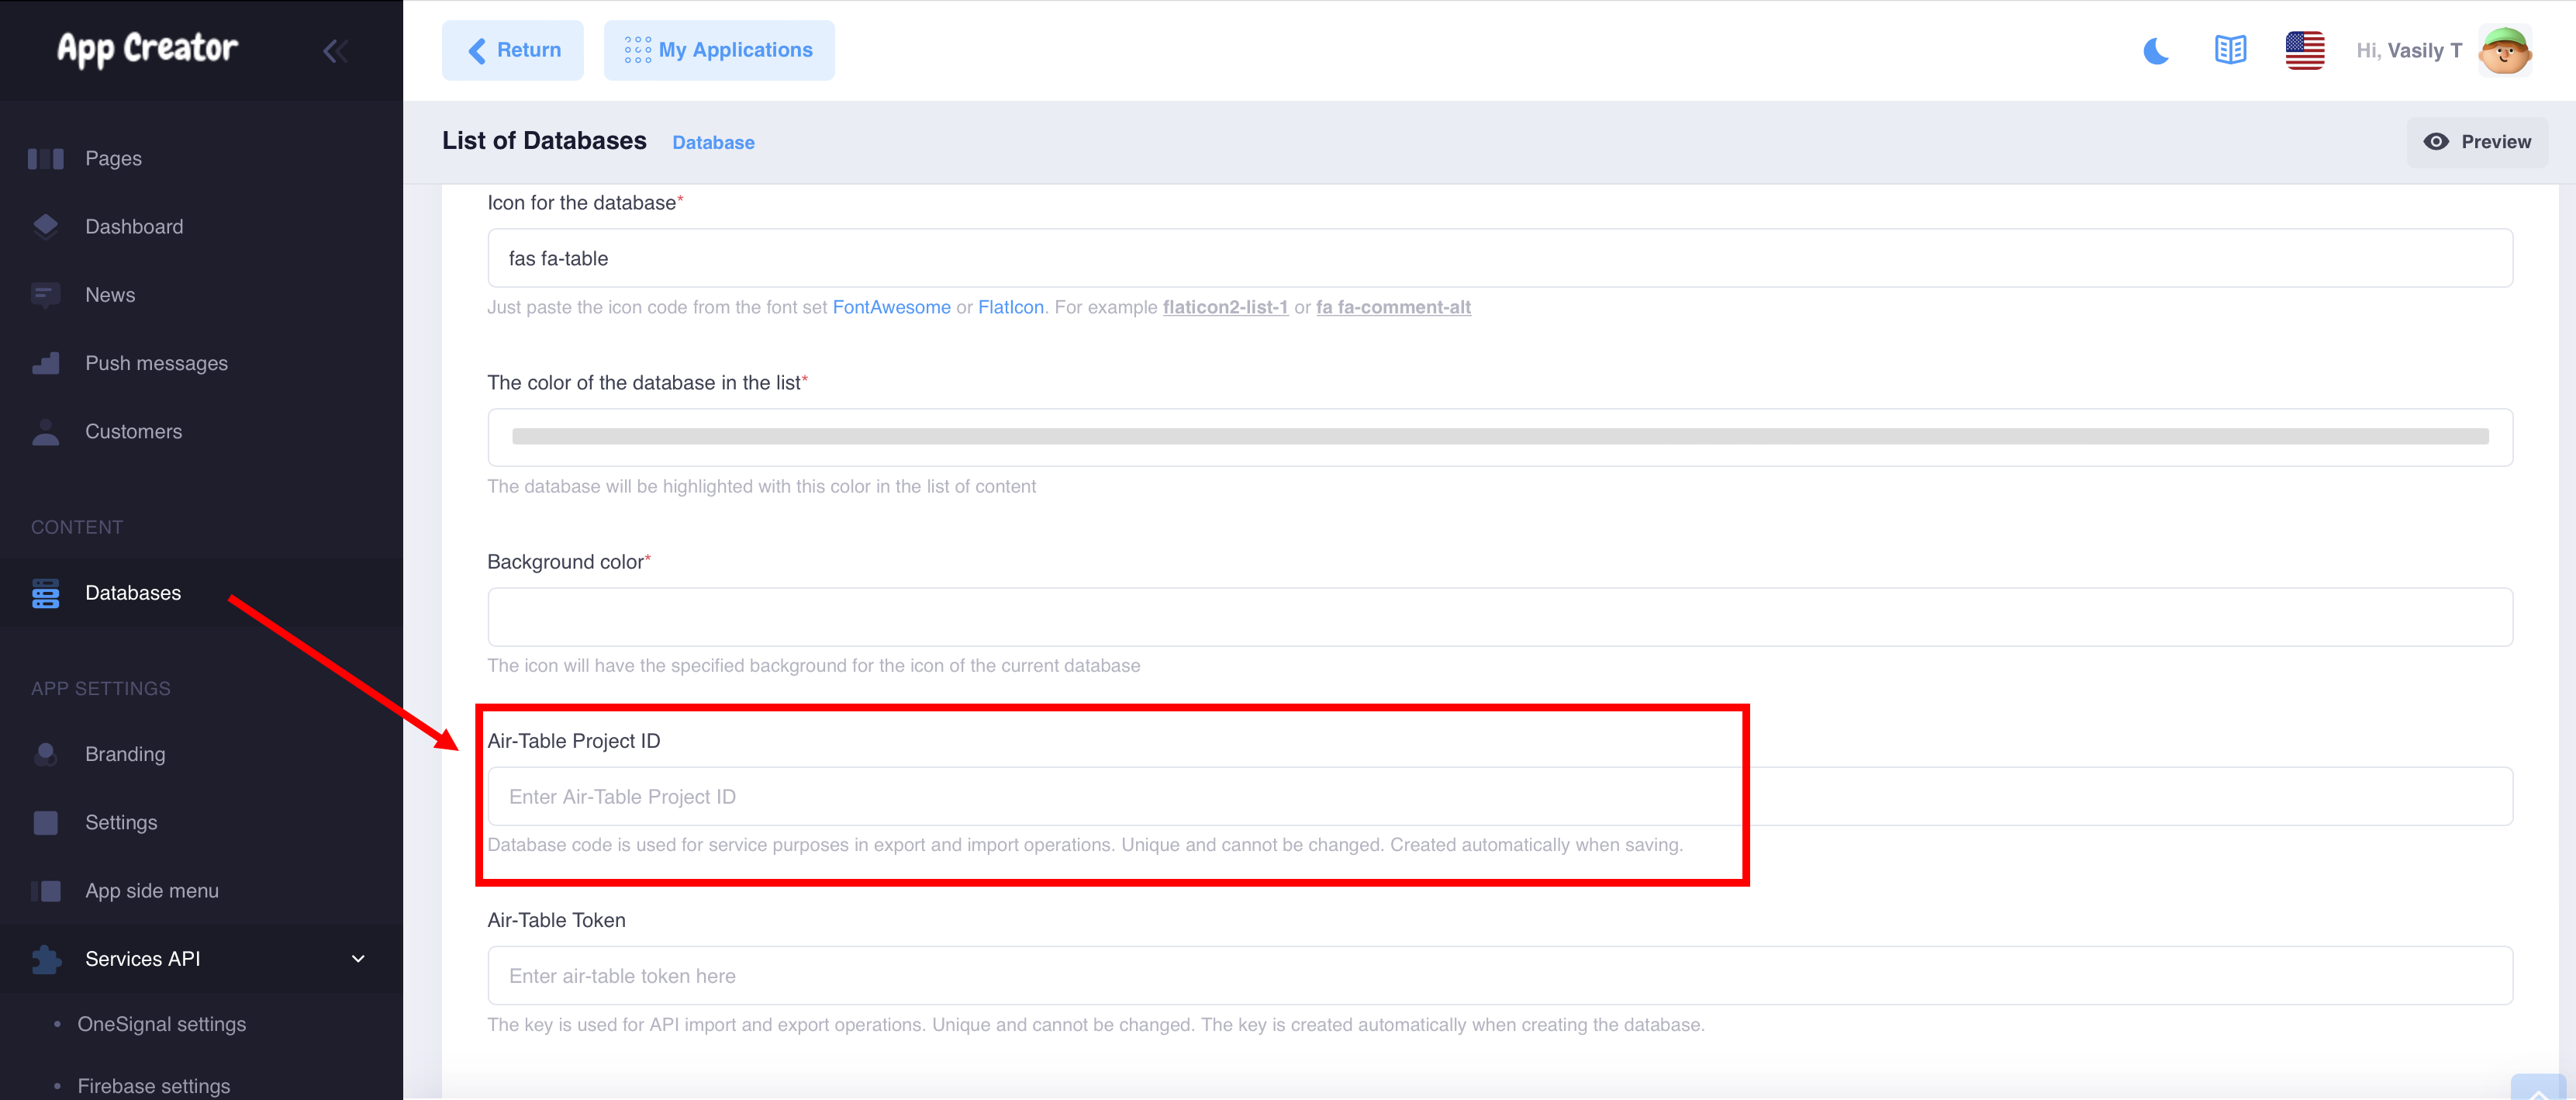
In the settings of the new Airtable database at the very bottom of the page there are 2 fields for adding a key and a token
Go to your Airtable project and copy the token in the browser
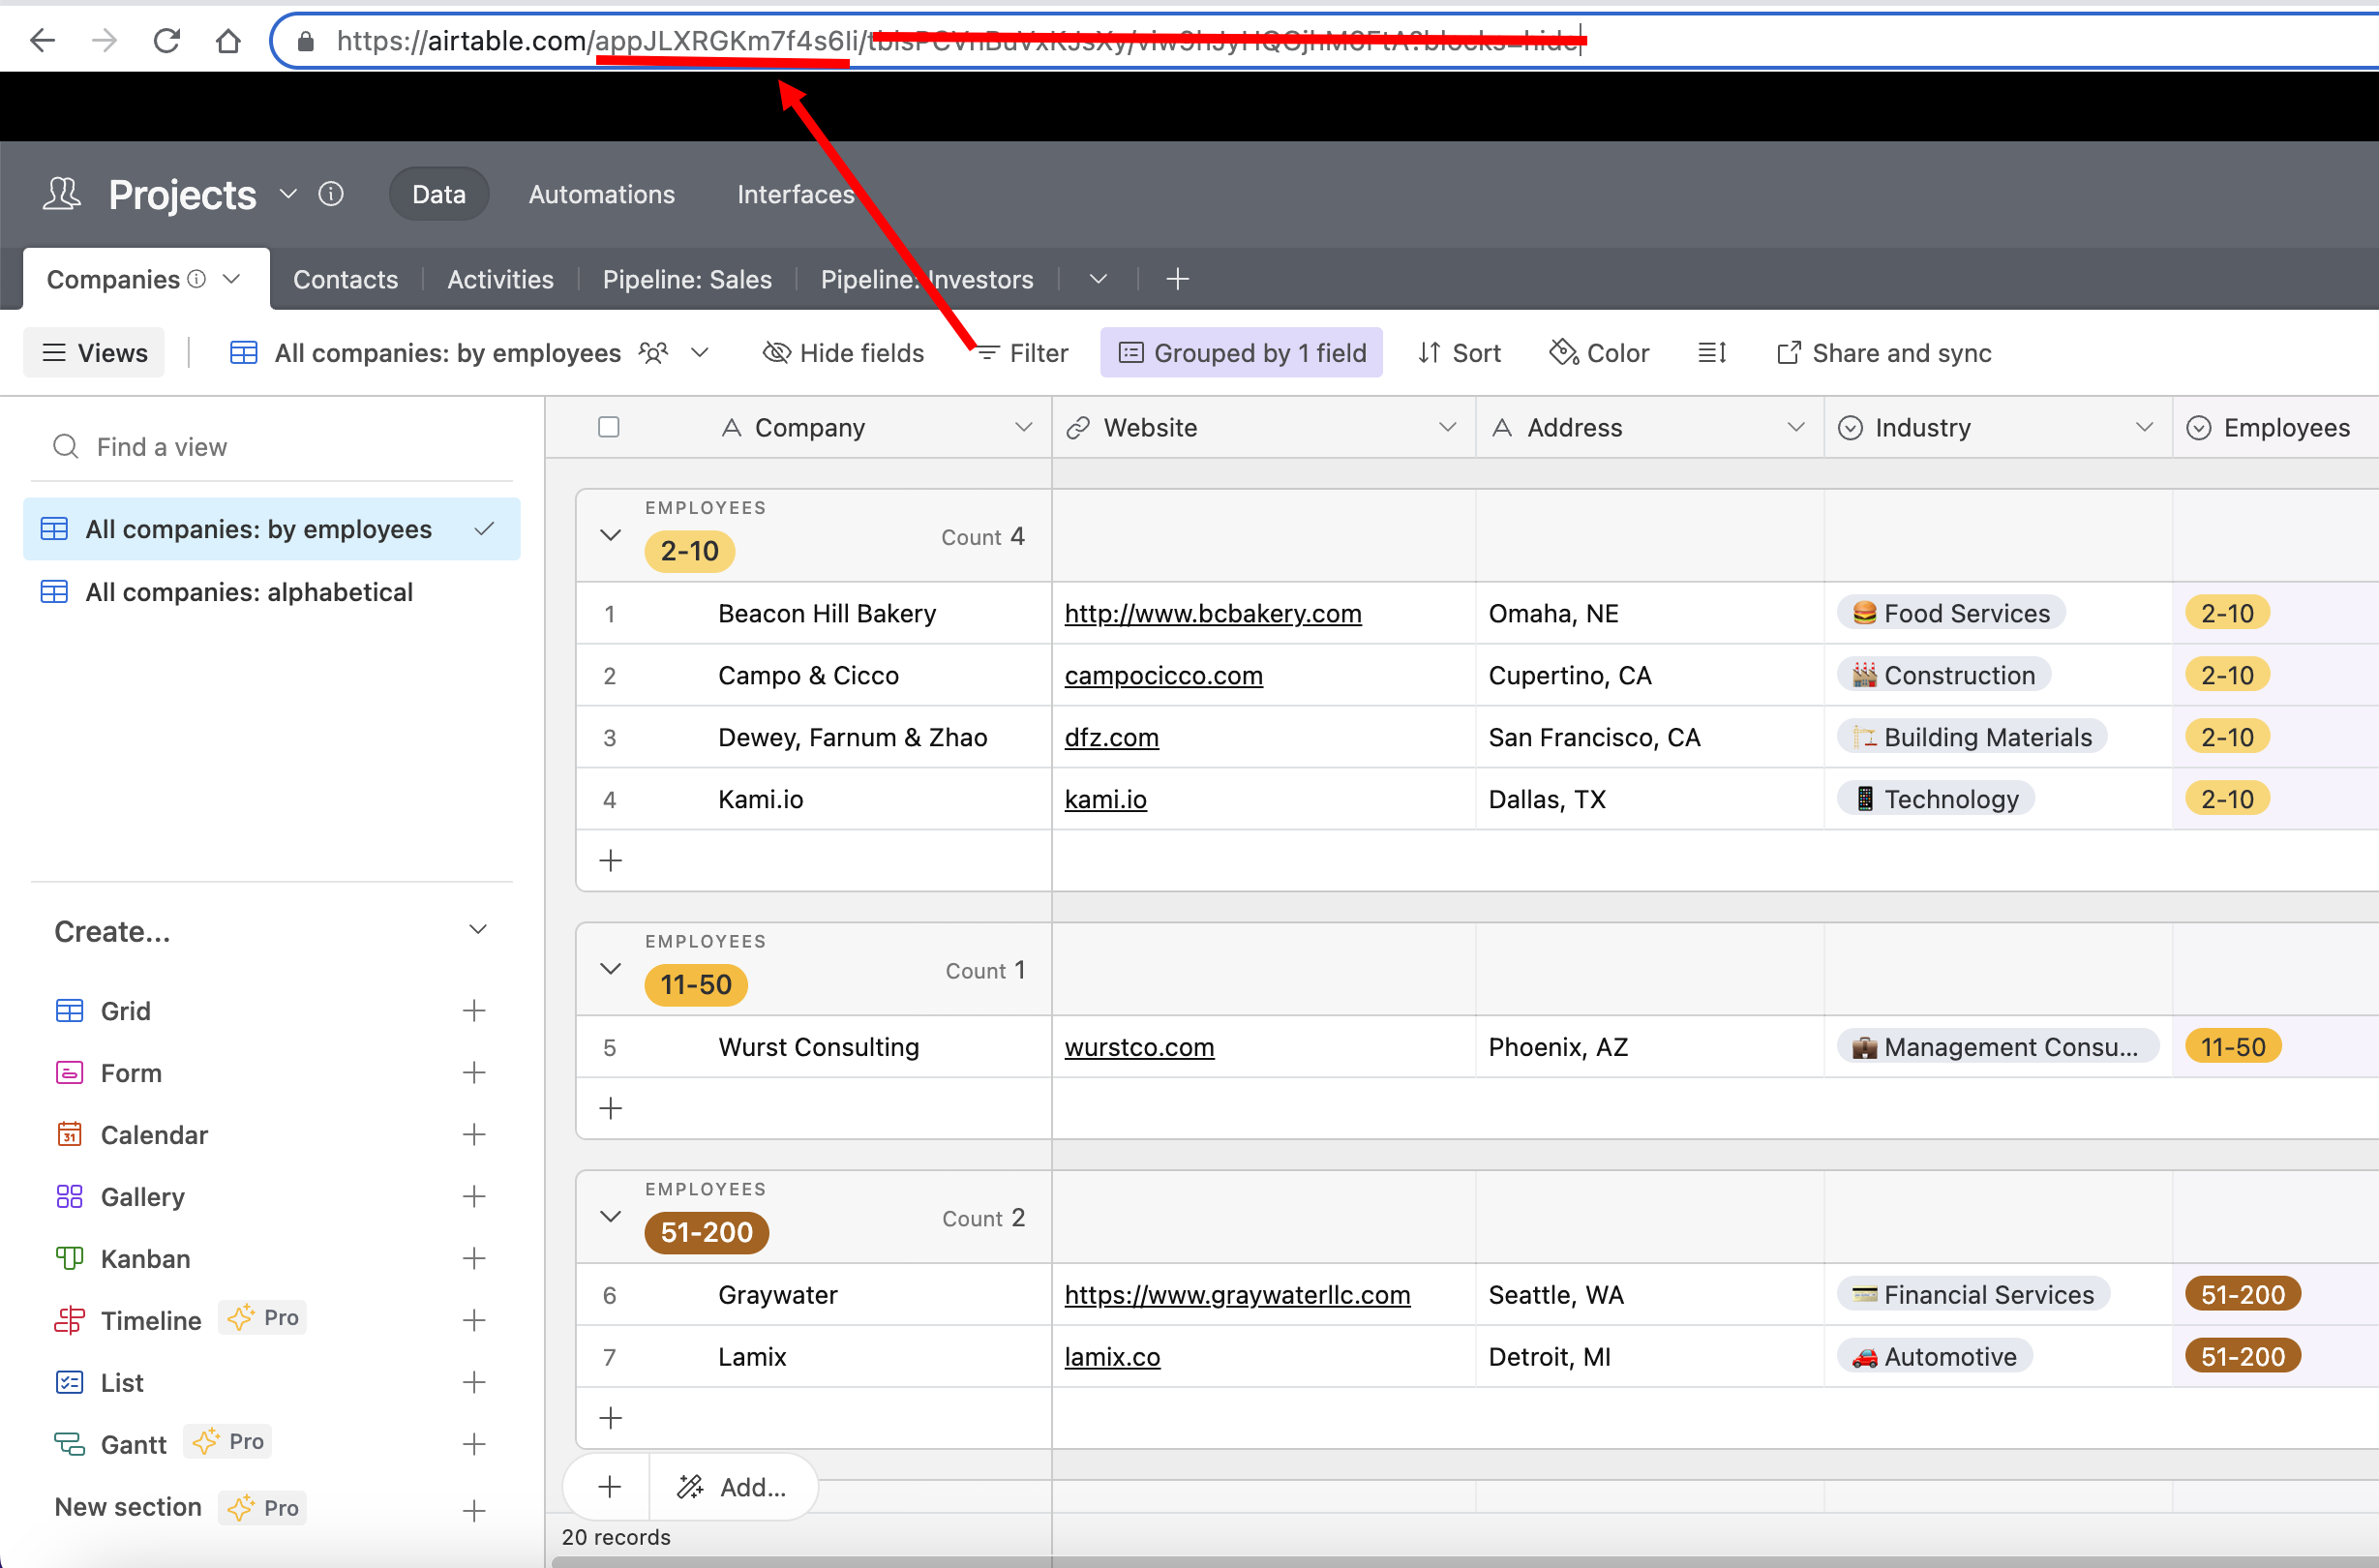
Add it to your database settings along with the name of your project, it should be like this: appJLXRGKm7f4s6Ii/MyProjects ( MyProjects - name of your project)
If you have done everything correctly, click the save button and in the "Field Settings" tab you will see all the fields from your table in Airtable.
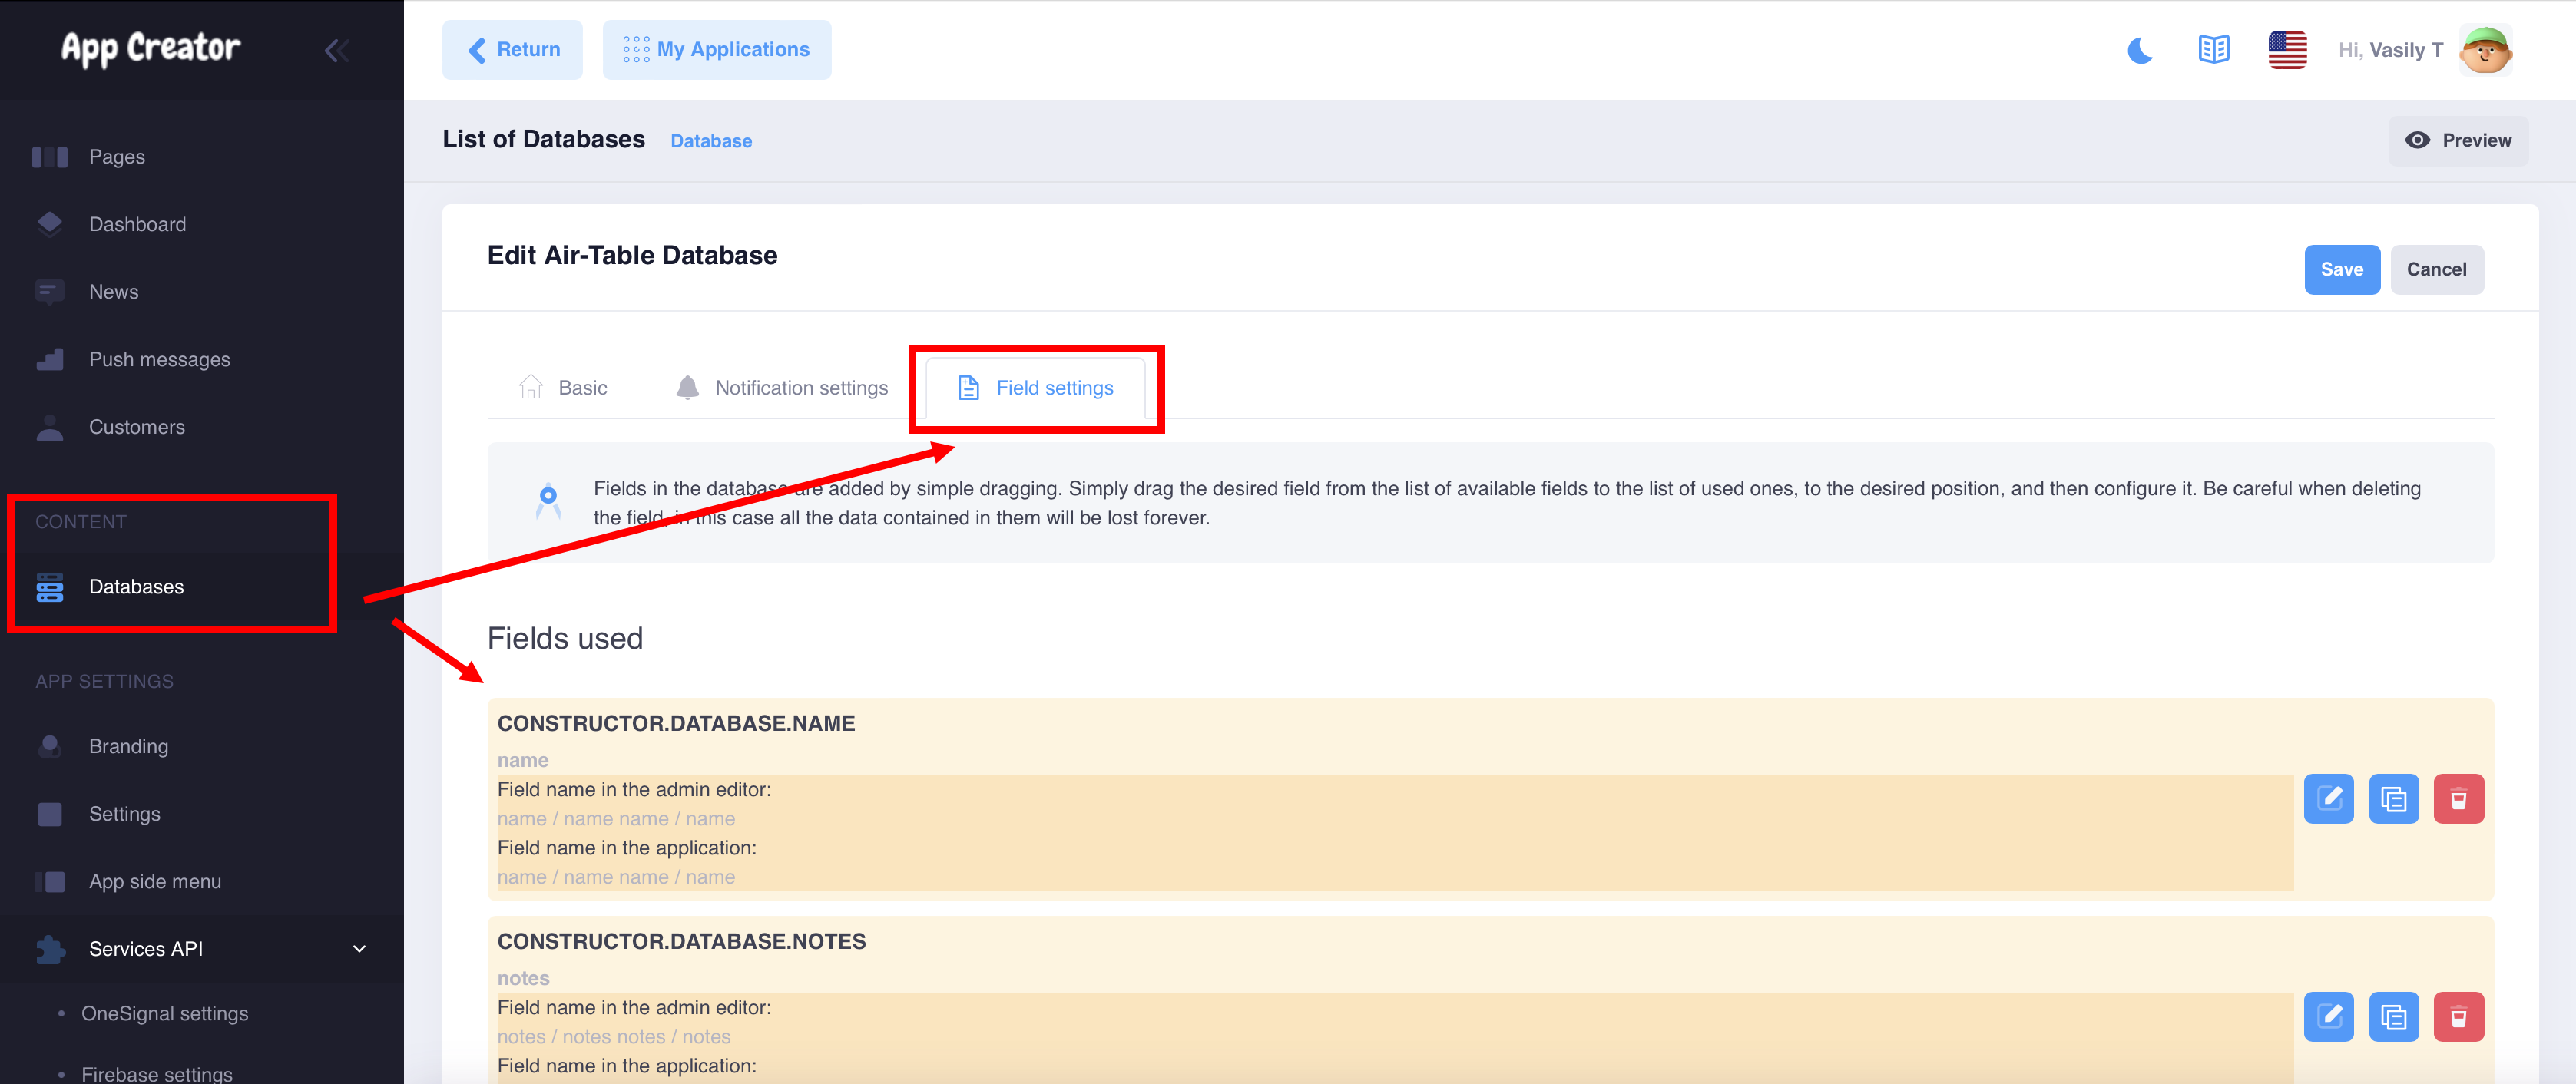
Please note, no settings are required, you do all the settings in Airtable.
Display on pages
The further process of displaying your information on the application screens is the same as with the operation of the internal database
Google Sheets is a free, web-based spreadsheet program that lets you create and format spreadsheets and work with other people. Use it to access and manage your data.
Create powerful, no-code, data-driven apps connected directly to Google Sheets.
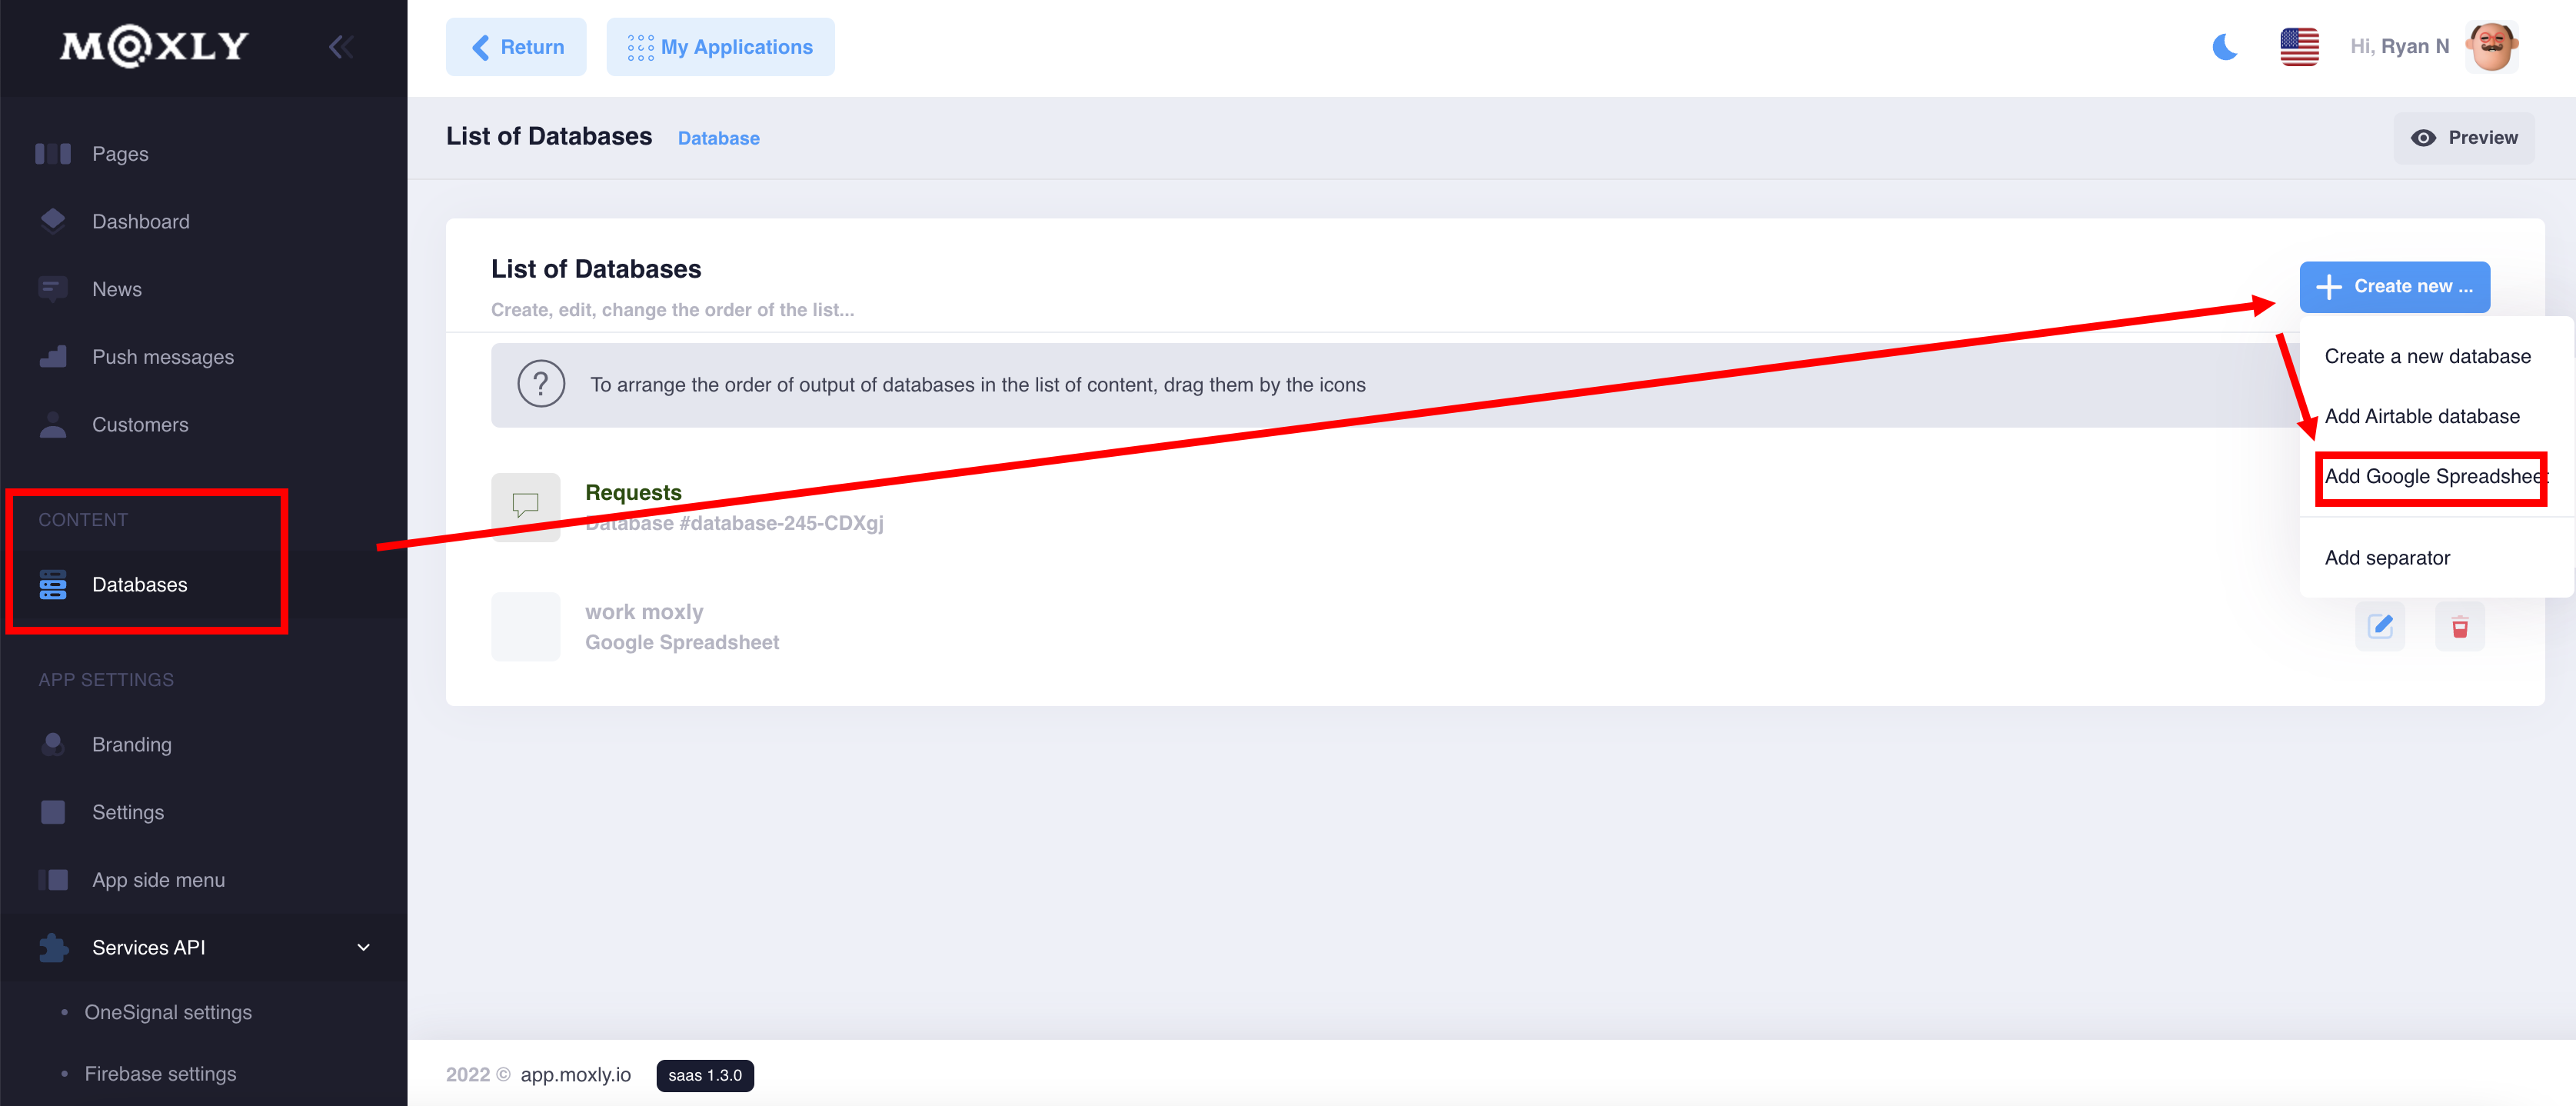
Go to manage your databases and create a new one using the connection to Google Sheets
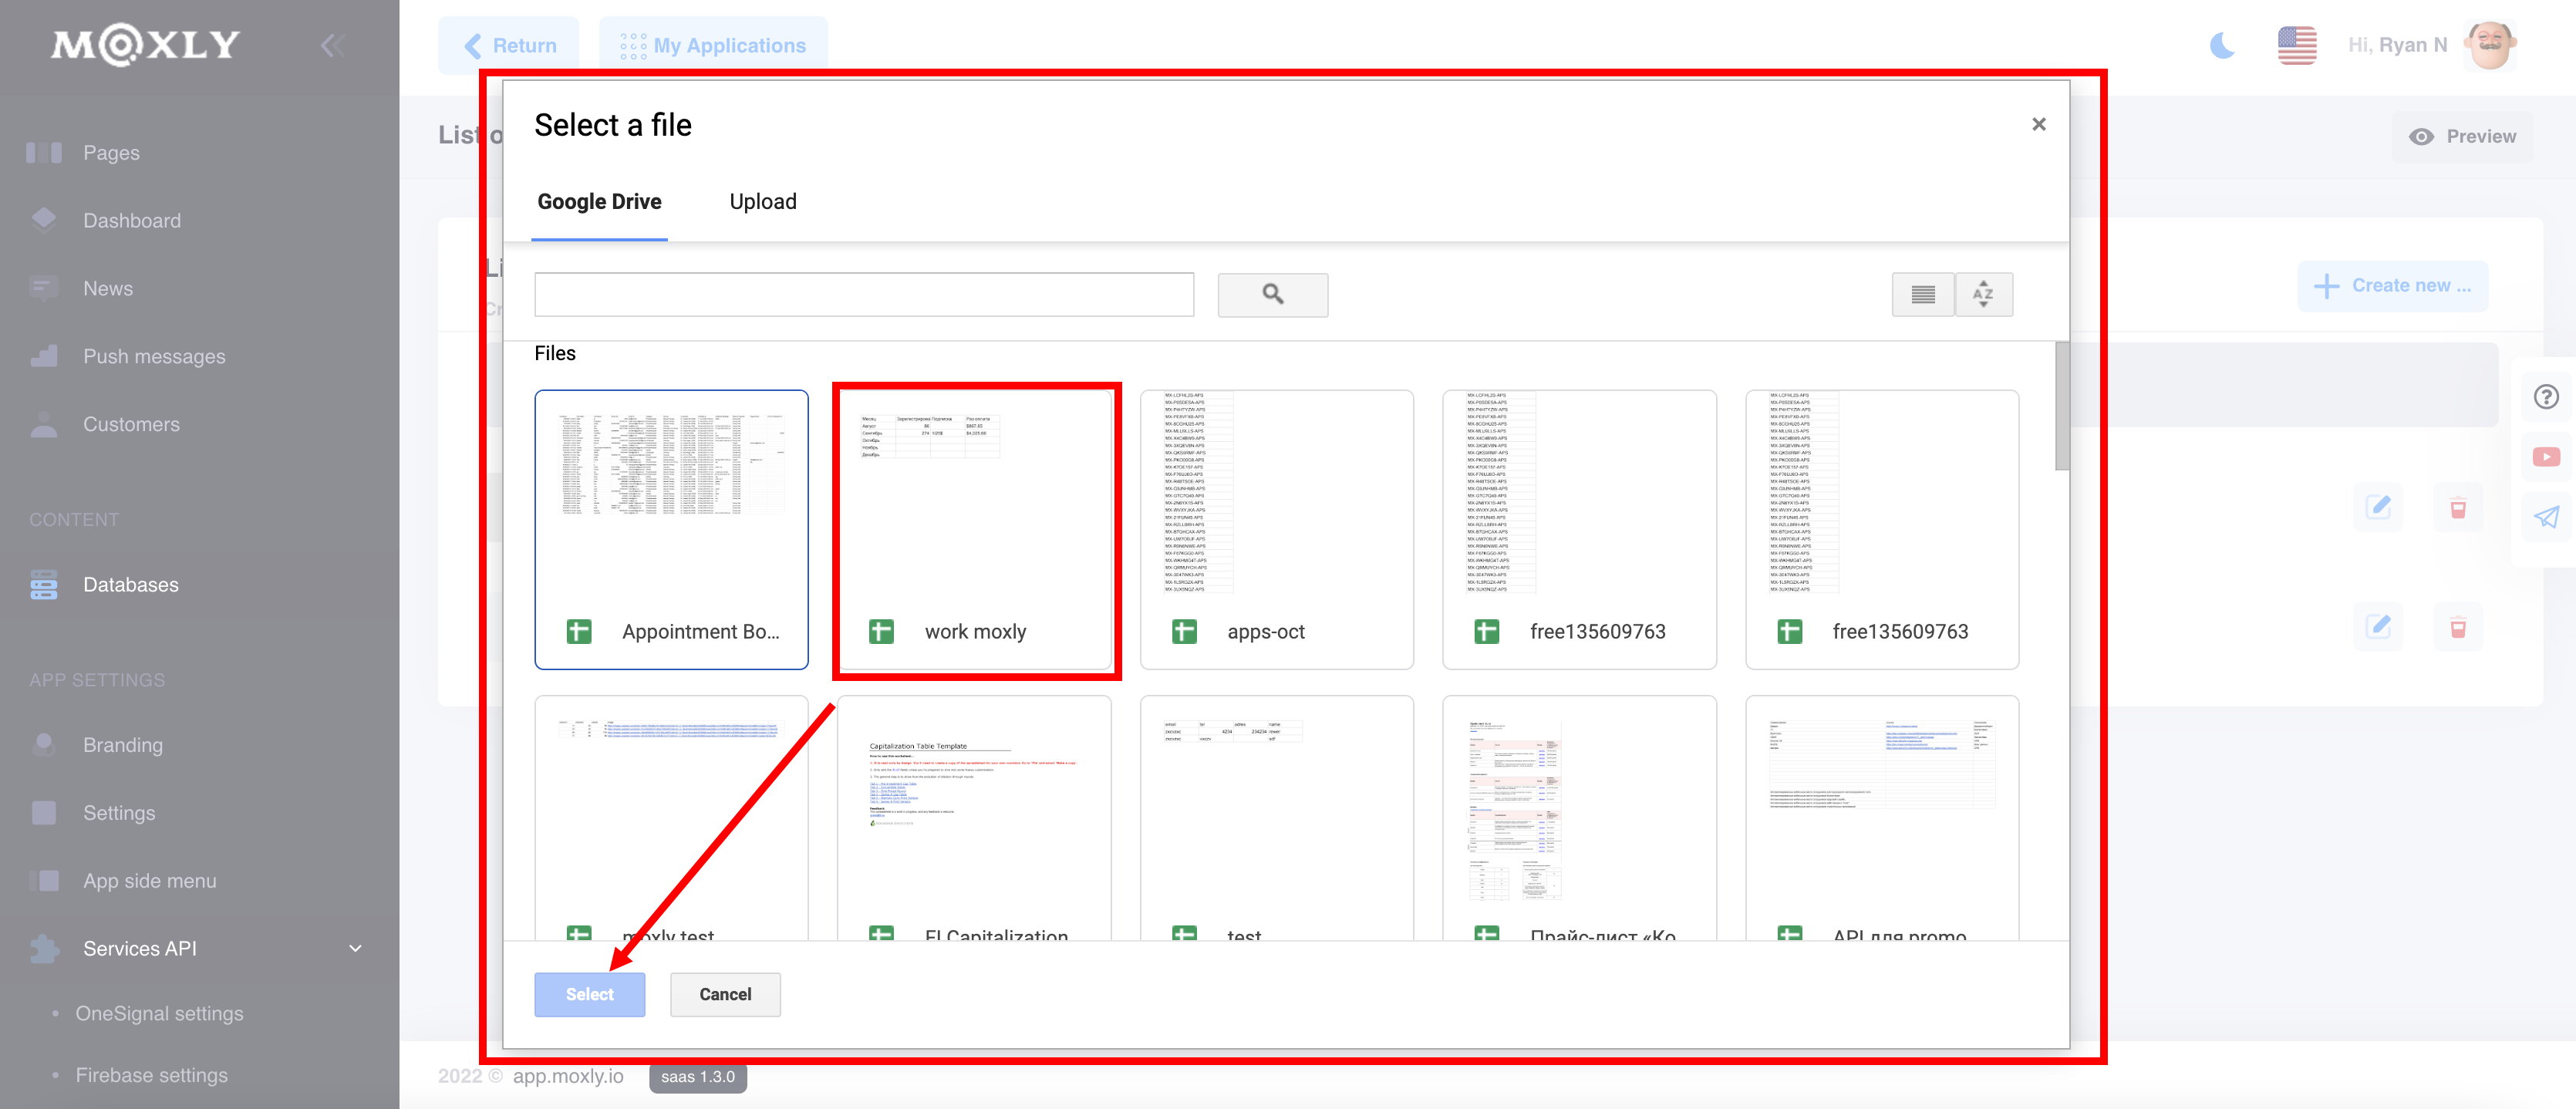
Log in with your Google account and grant access to the Moxly platform
Select the table you need and save. You did it!
Display on pages
The further process of displaying your information on the application screens is the same as with the operation of the internal database
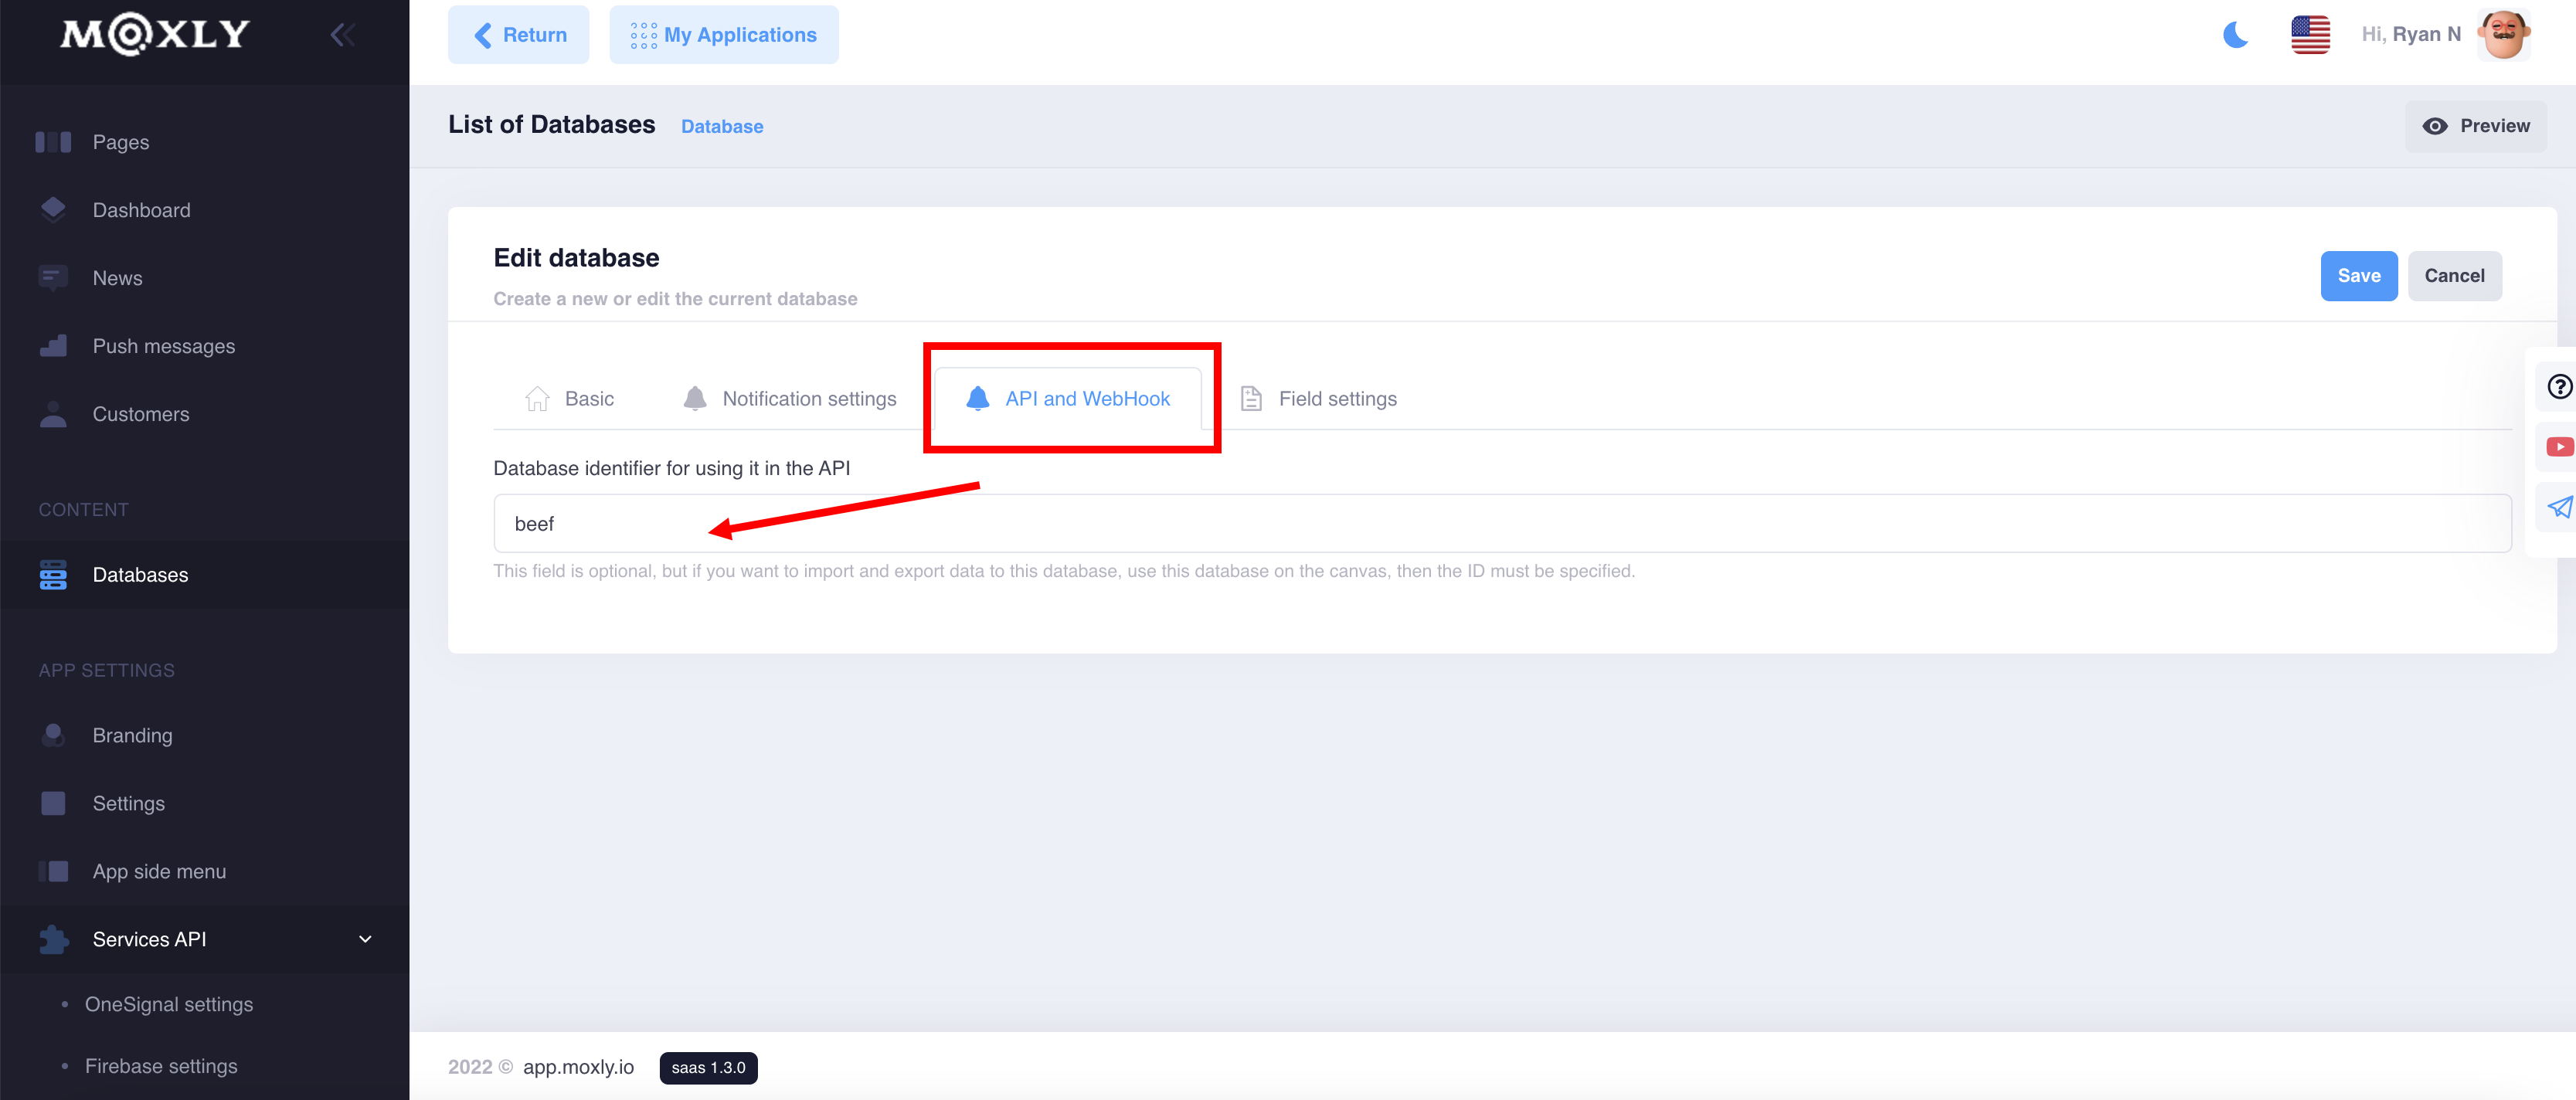
When creating a new database, the ability to work with the API is automatically created, the identifier will be created and you can edit it.
The macro to use the component looks like this [@value]
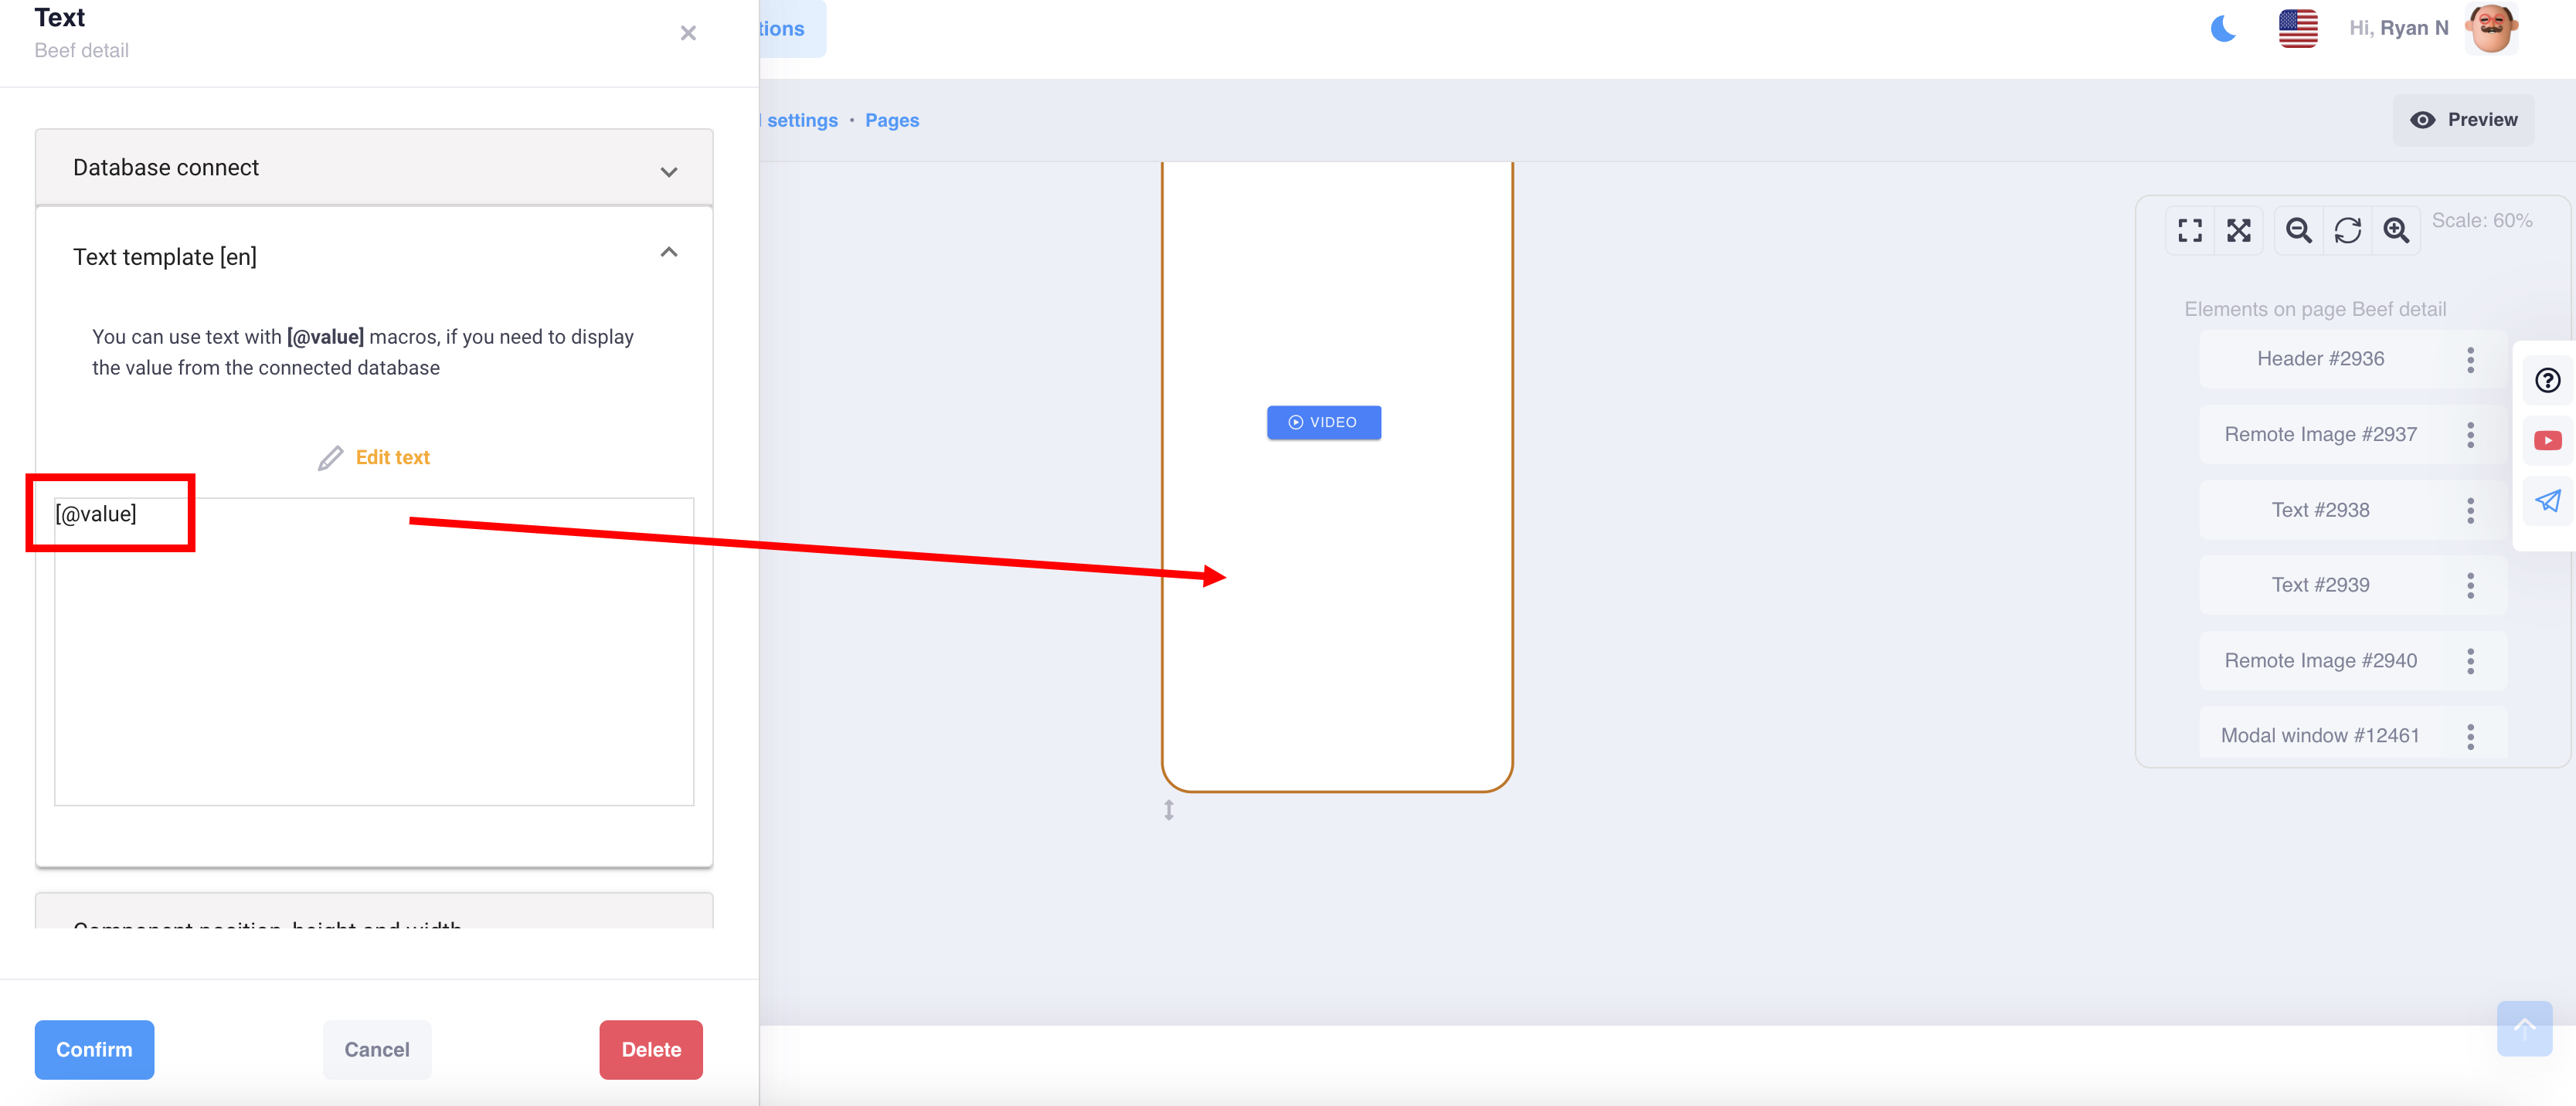
For example, in any component (text, video, etc.) you can enter a macro with the name of your database
For example, in any component (text, video, etc.) you can enter a macro with the name of your database, then you can display your content from the database in any order on the page
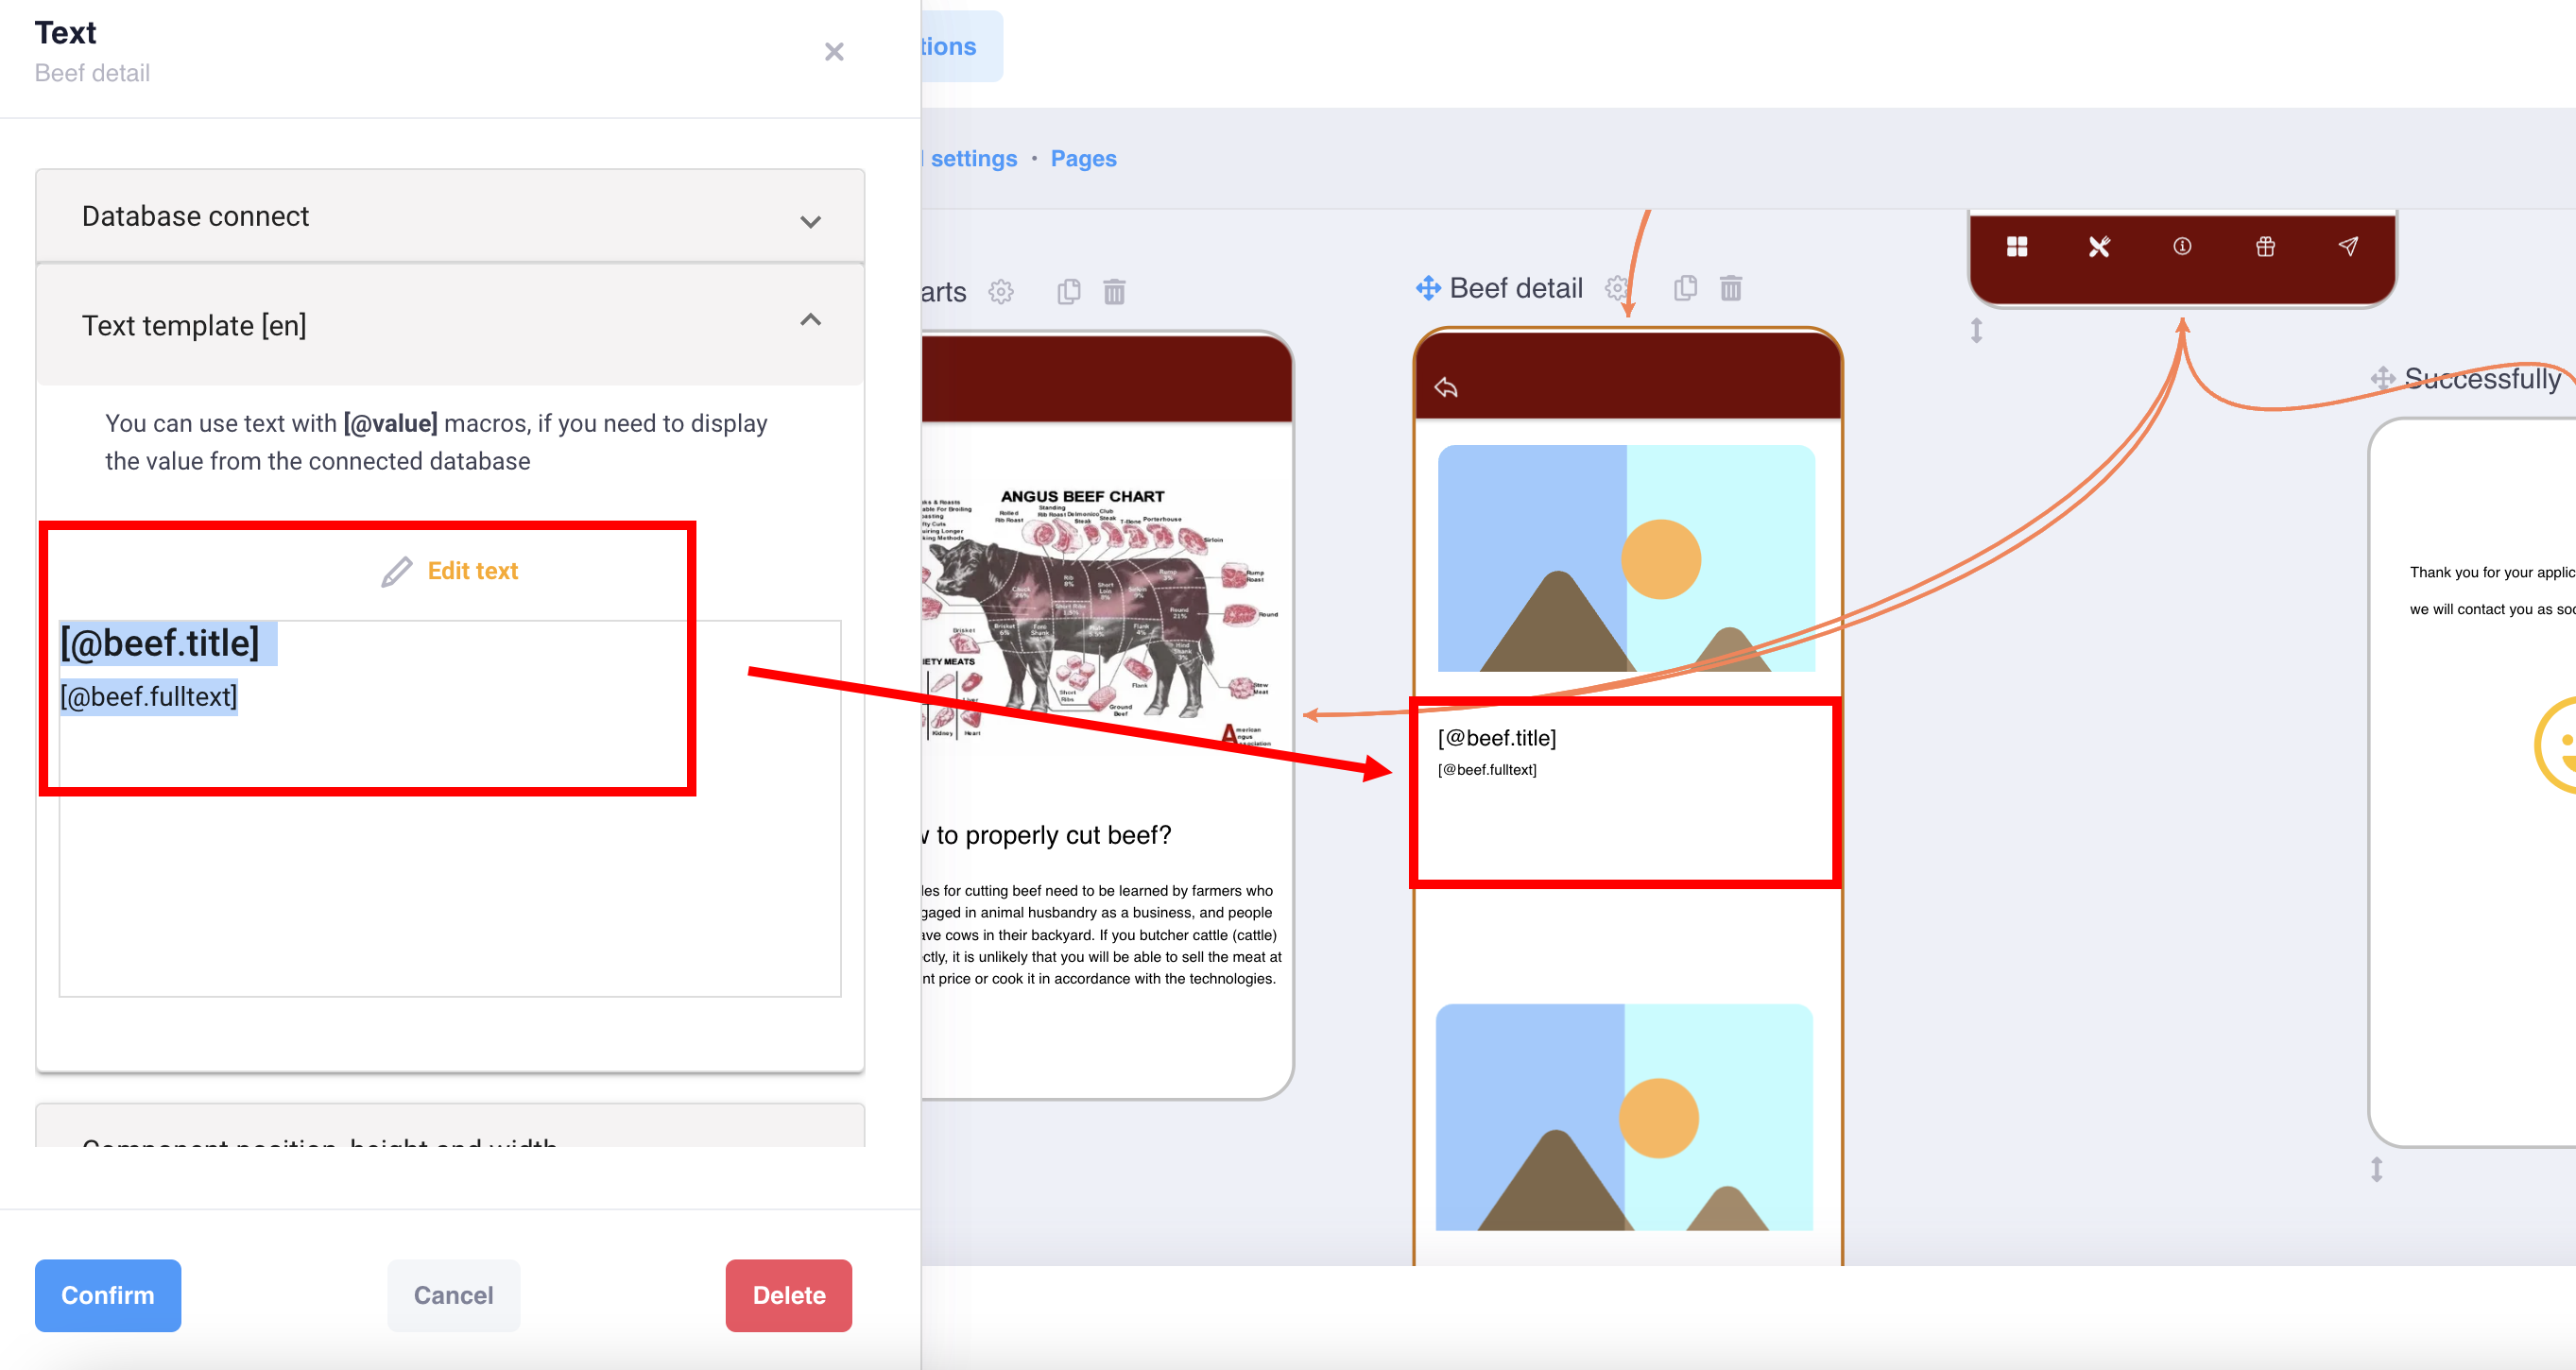
When you added new fields in the database, you wrote the name for the API everywhere, now use them in the components
for example, our api of the entire database looks like this in the form of a macro [@value], and to add individual fields, just put a dot and the name of your field api [@value.field]
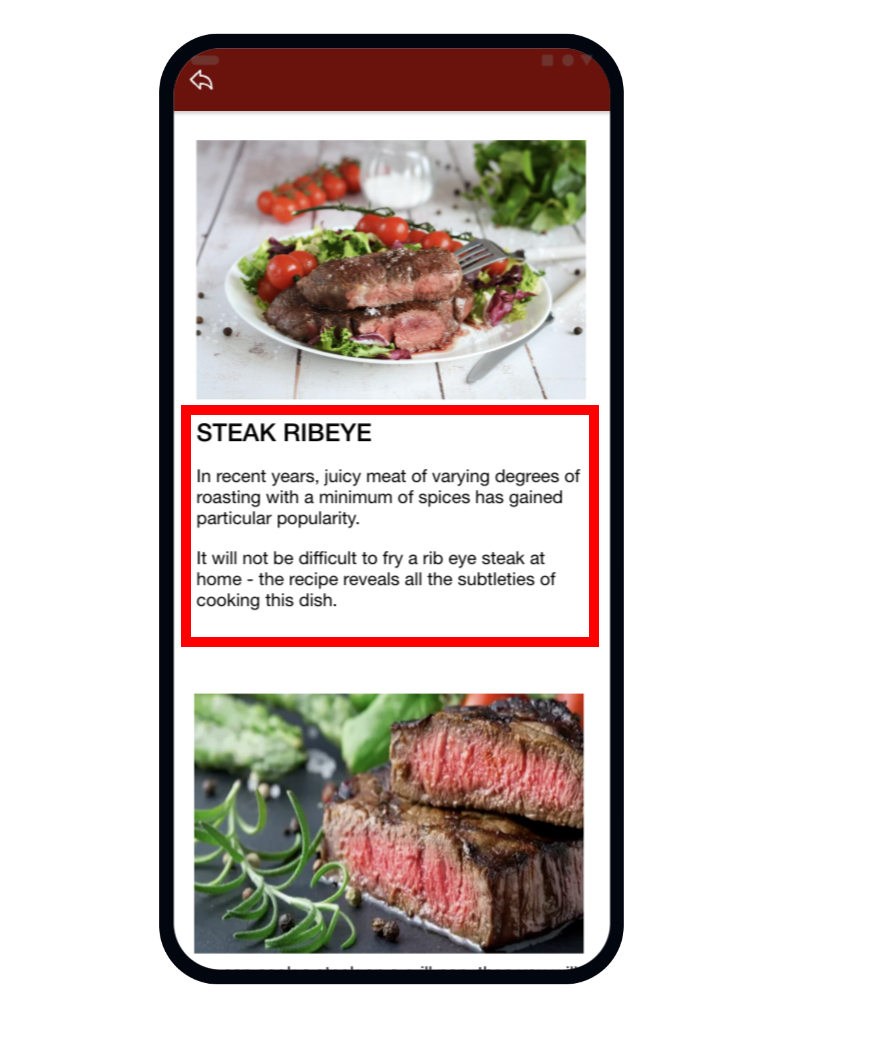
As a result, all your content will be displayed on the screen in the order in which you configured it.
In some components, such as video or audio, a macro is added to the link or ID field
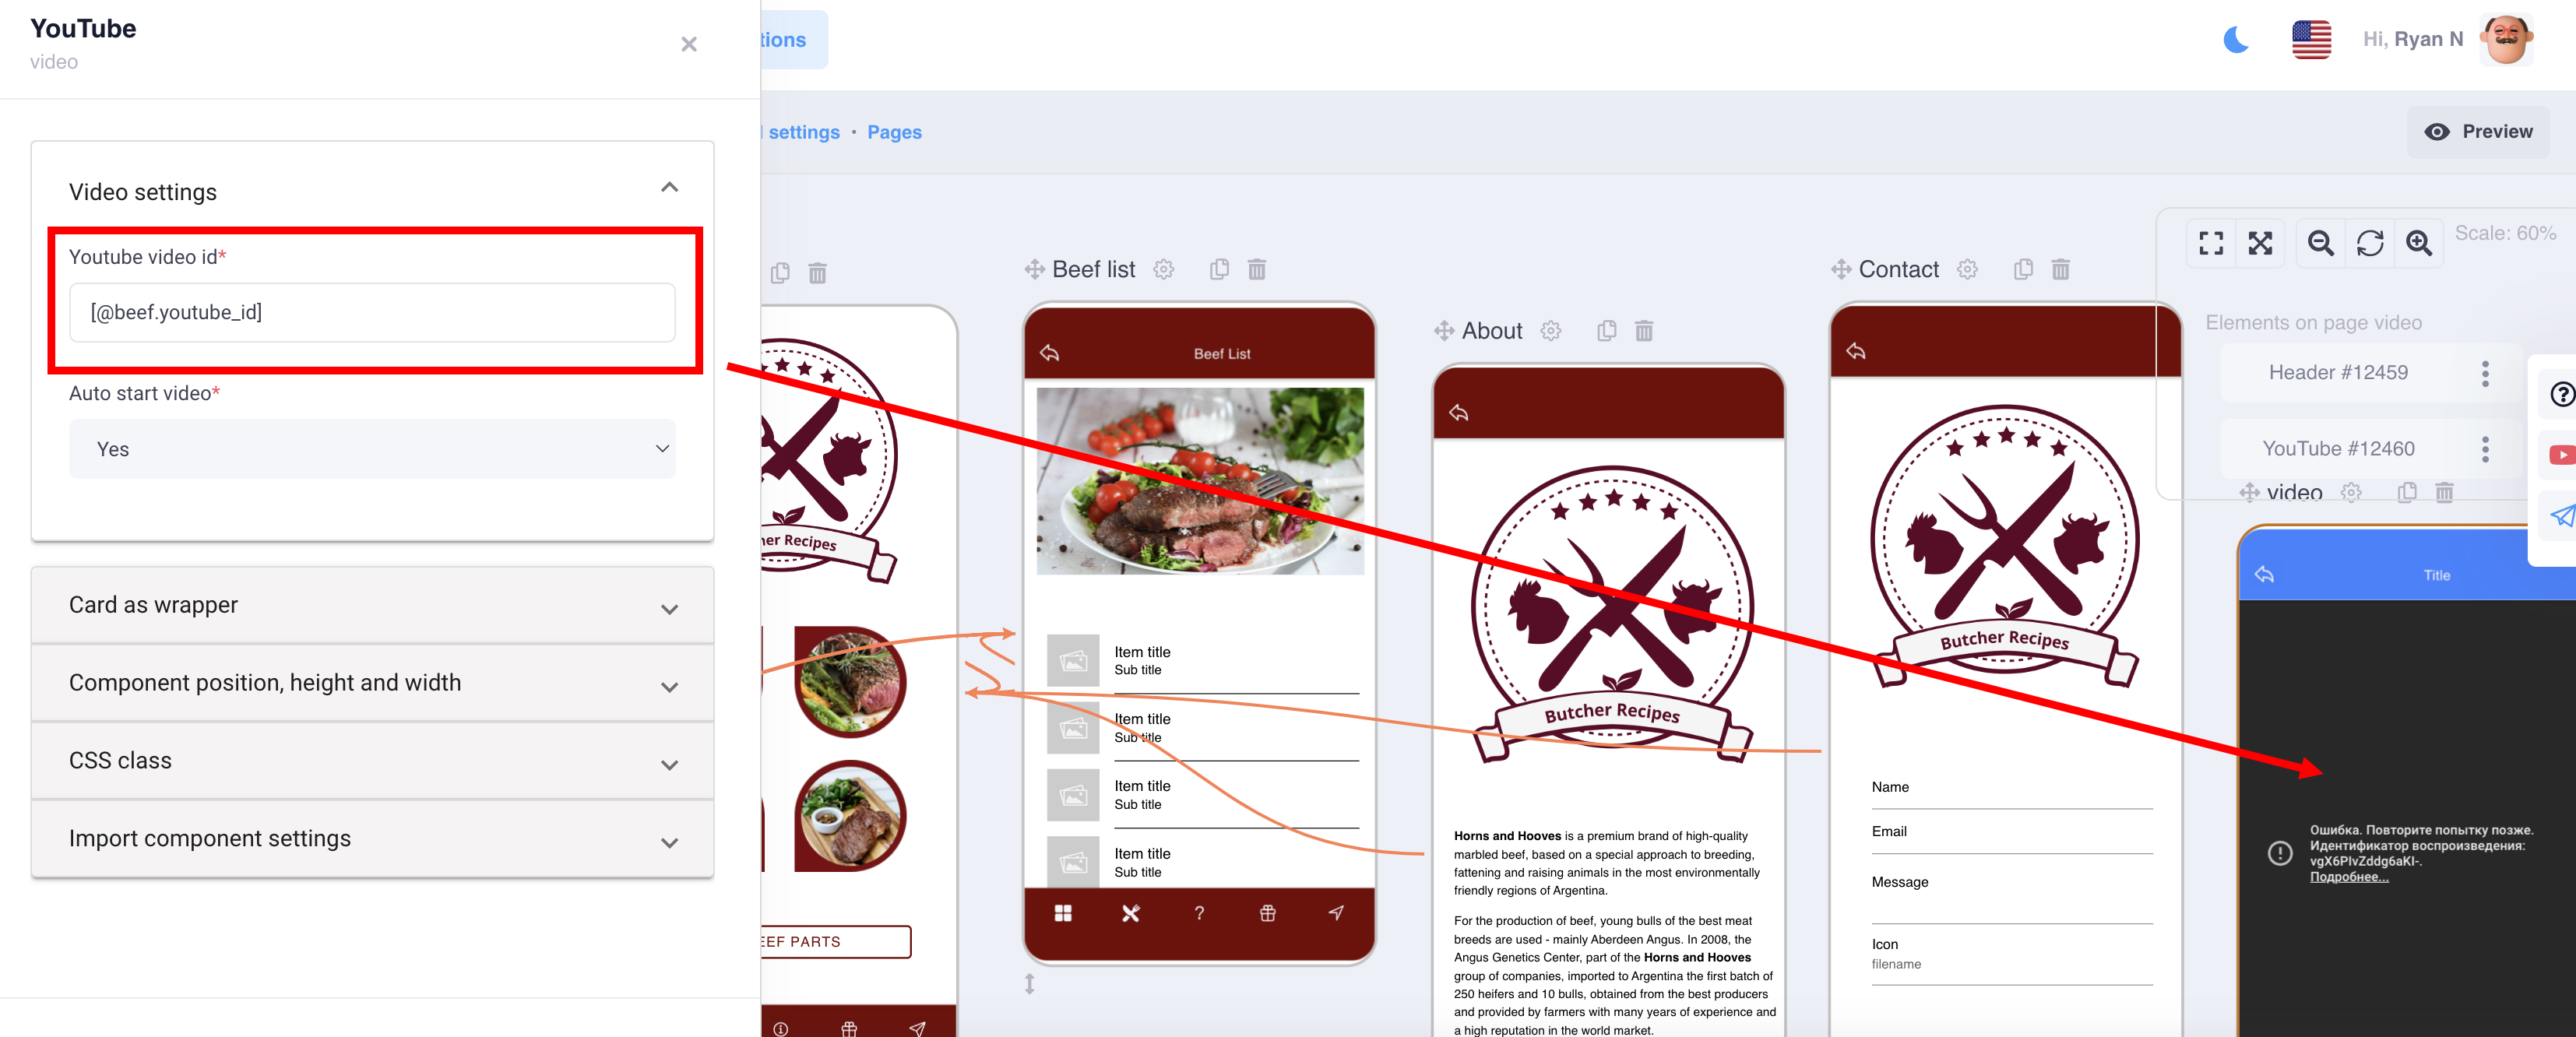
An example based on the Recipes template… Using the Youtube video component in the database