Managing Content
Getting Started
Getting Started
Build any mobile app with no code
To start creating your application, you need to create screens, configure logic and think about what these screens should do and what data they will need to display and save.
Terms and designations
- Screens – pages of your application
- Components – The building blocks of the Nwicode interface.
- Actions – Used to specify what your app should do when you click a particular component.
- Database – the database allows you to enter data to display to app users or to collect the data that they input into the app.
Navigating
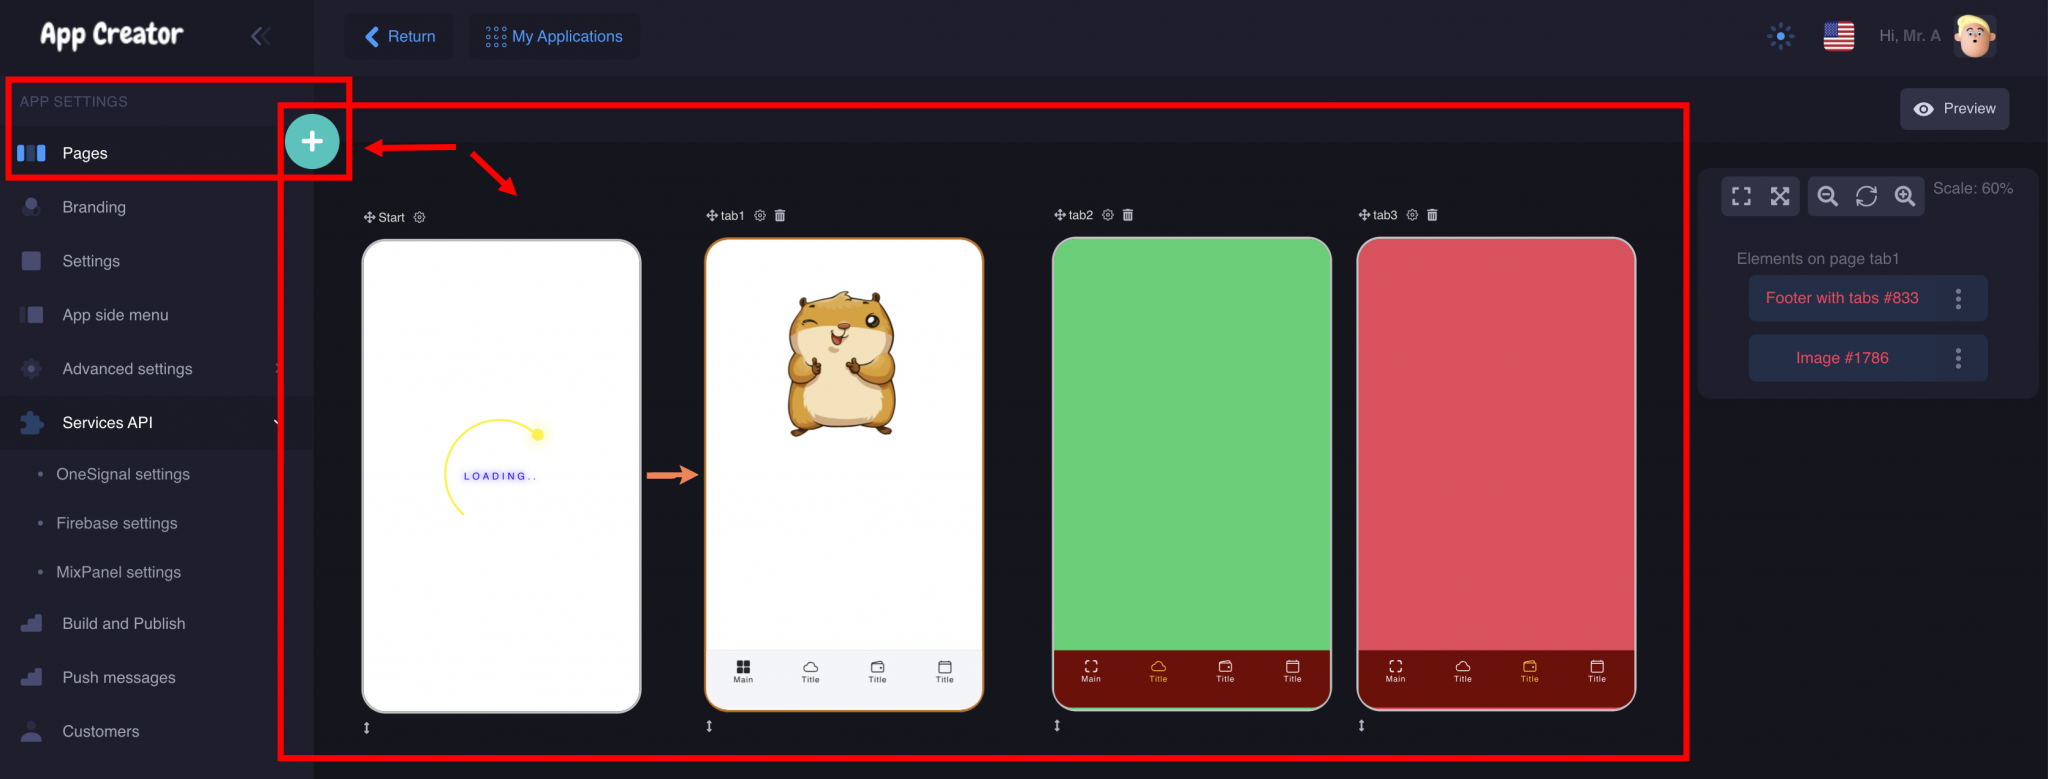
Canvas
- 1. The Canvas is the workspace where you design the screens of your app
- 2. Navigate in the Canvas using the scroll bar or your trackpad— scroll left and right and zoom in and out
Low-Code
Nwicode has the ability to integrate code, you can work in a visual editor, and you can add programming if necessary
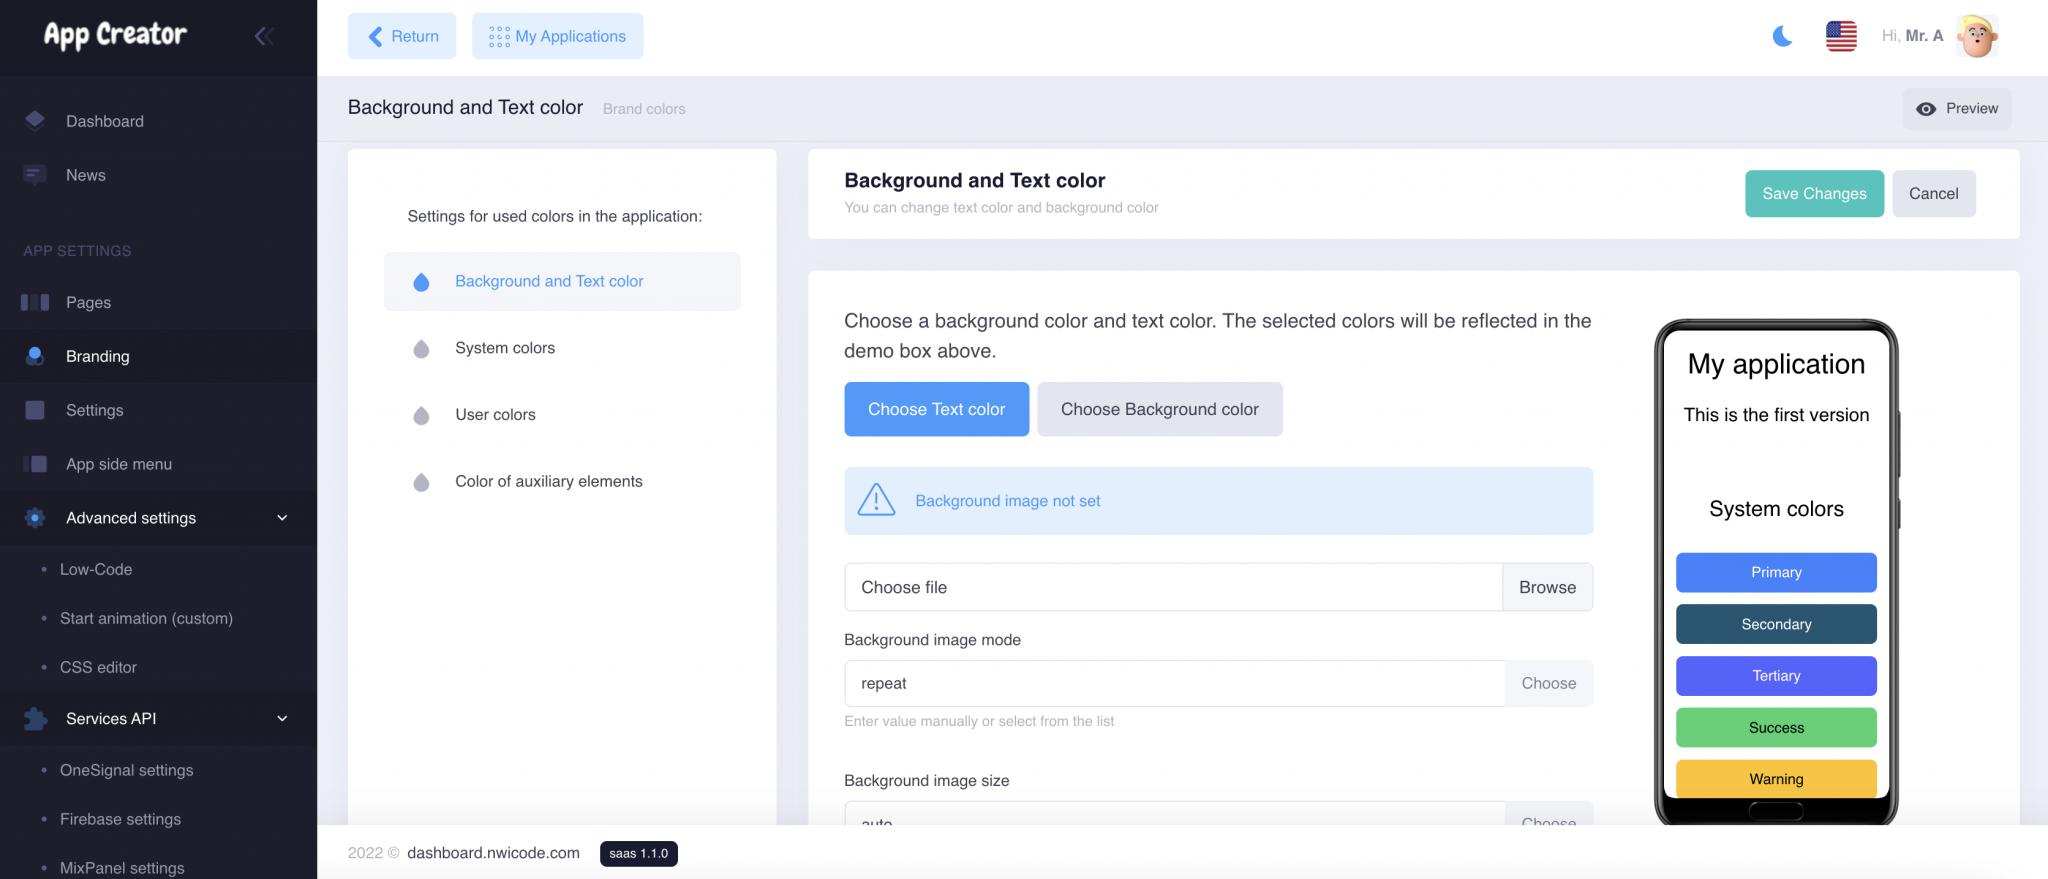
Branding
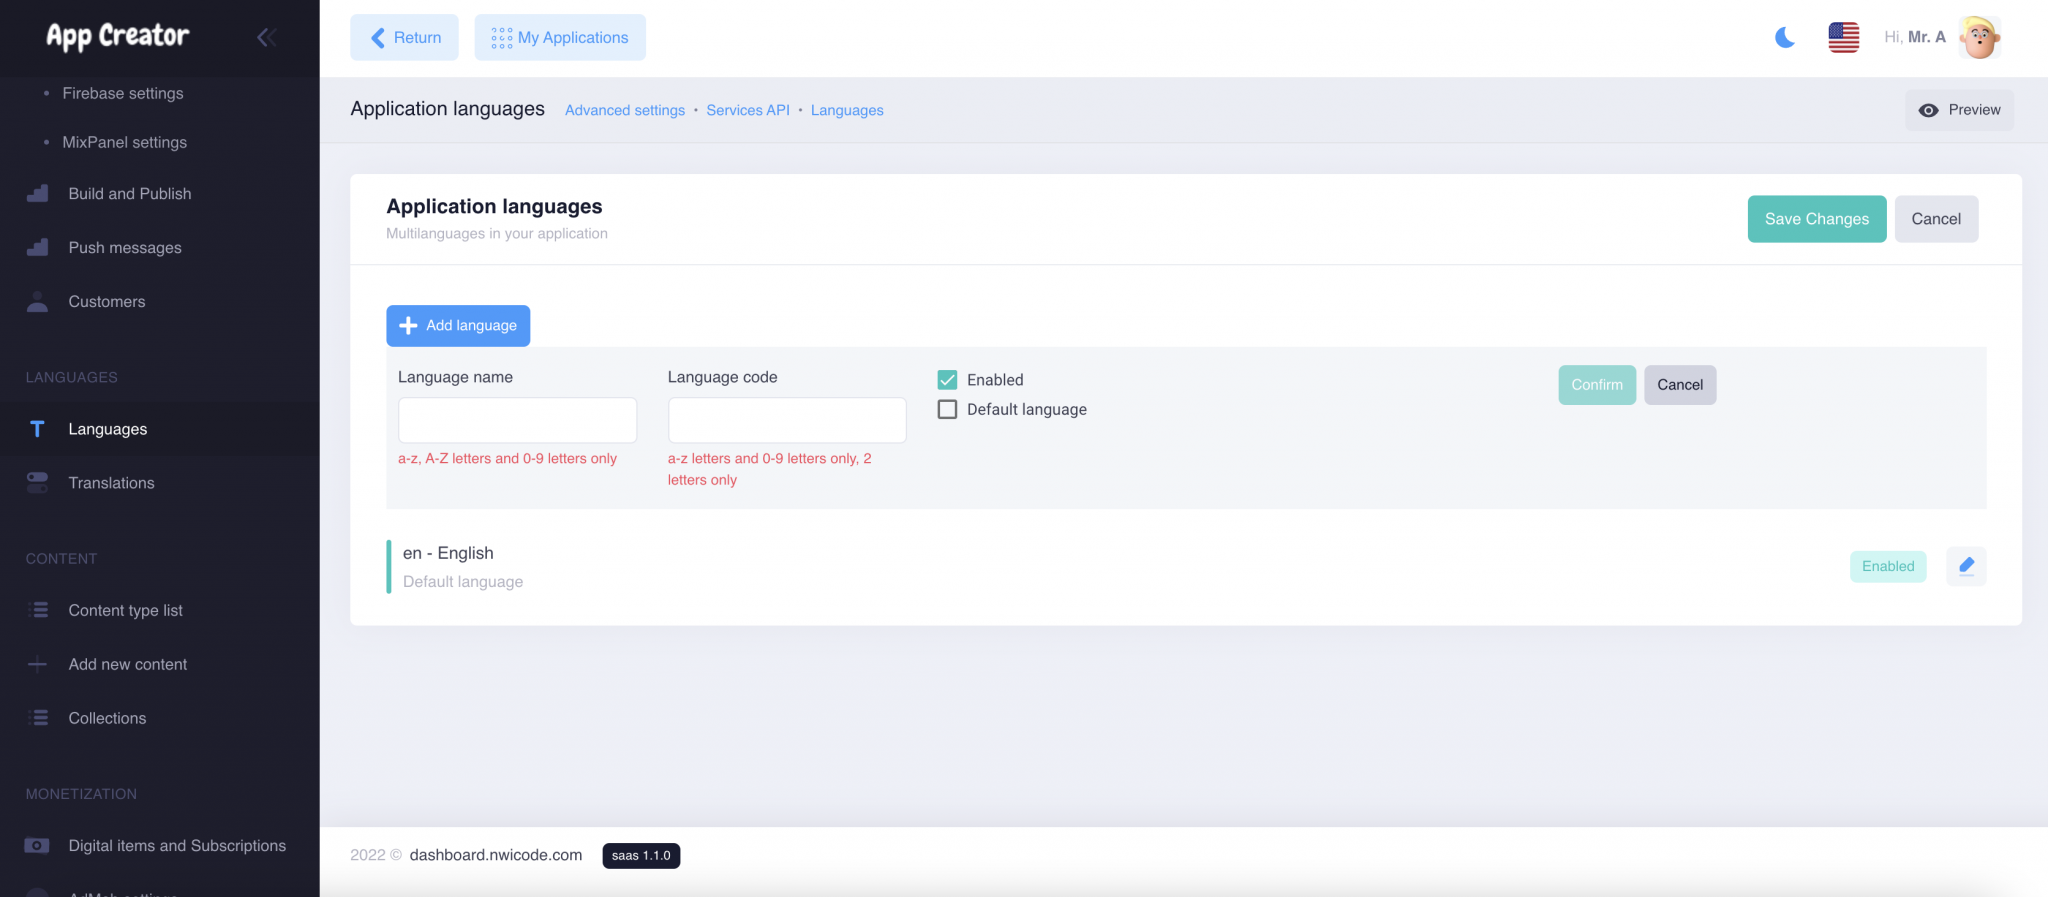
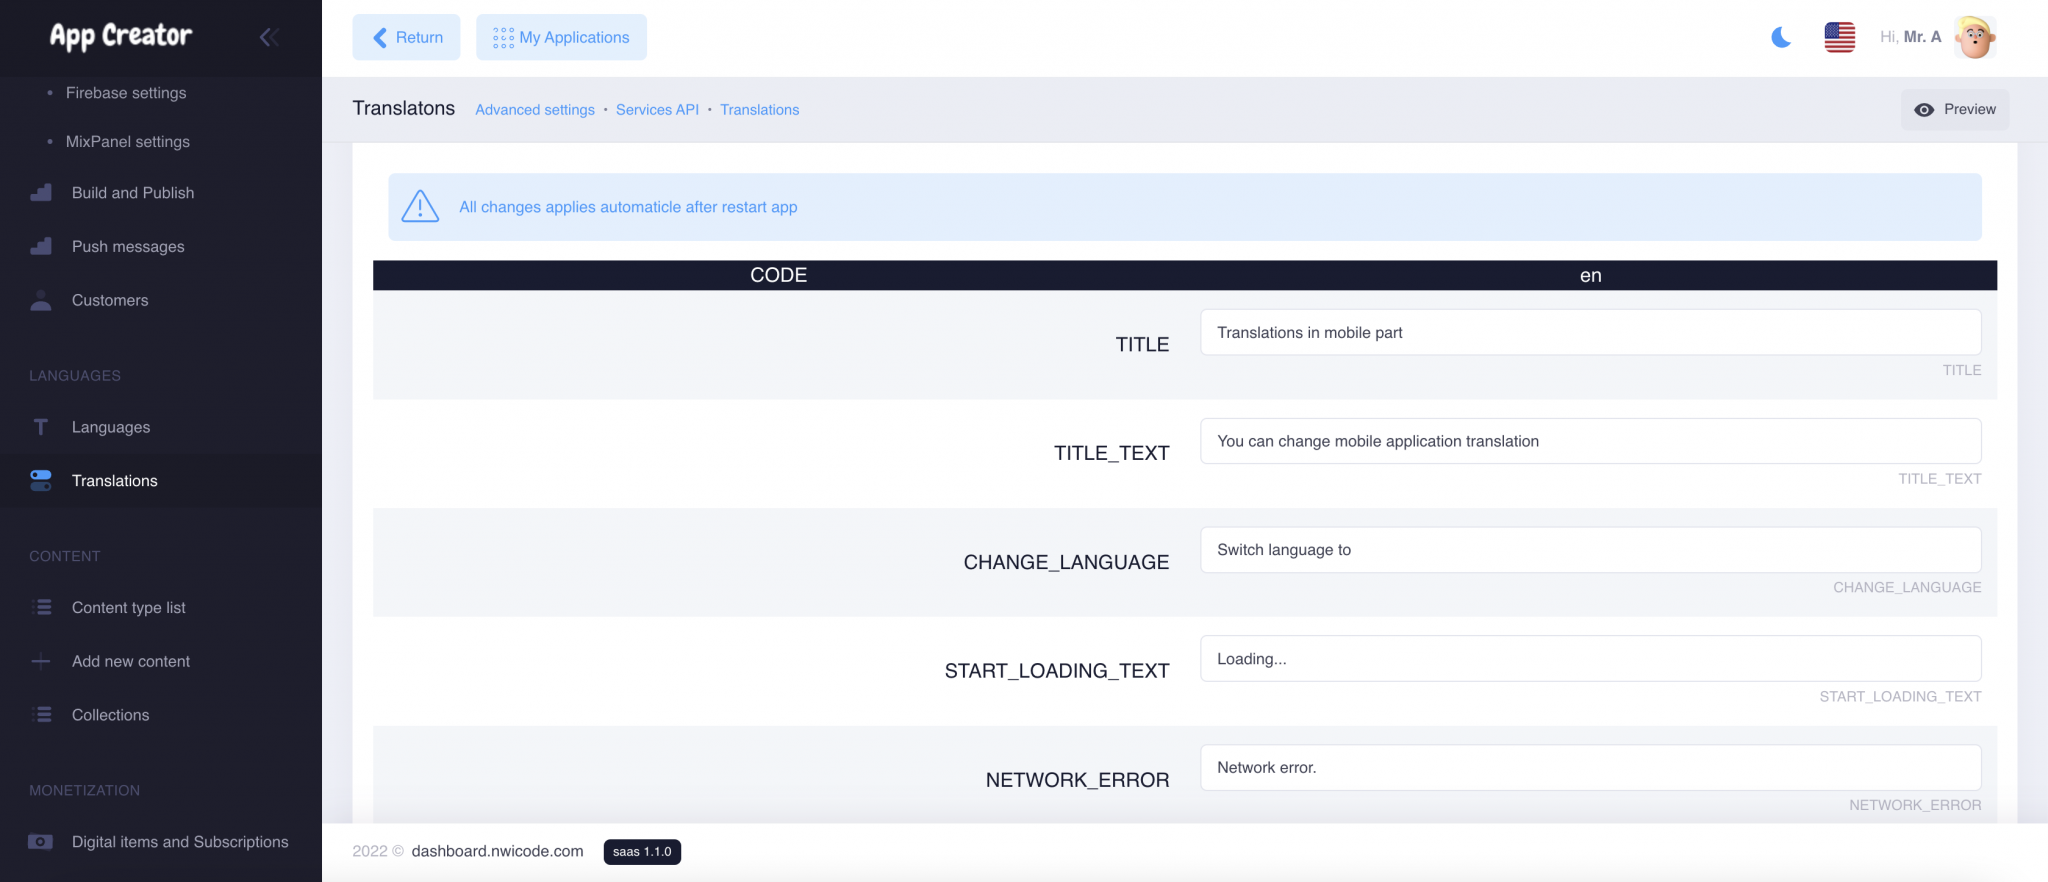
Managing application languages
Publication
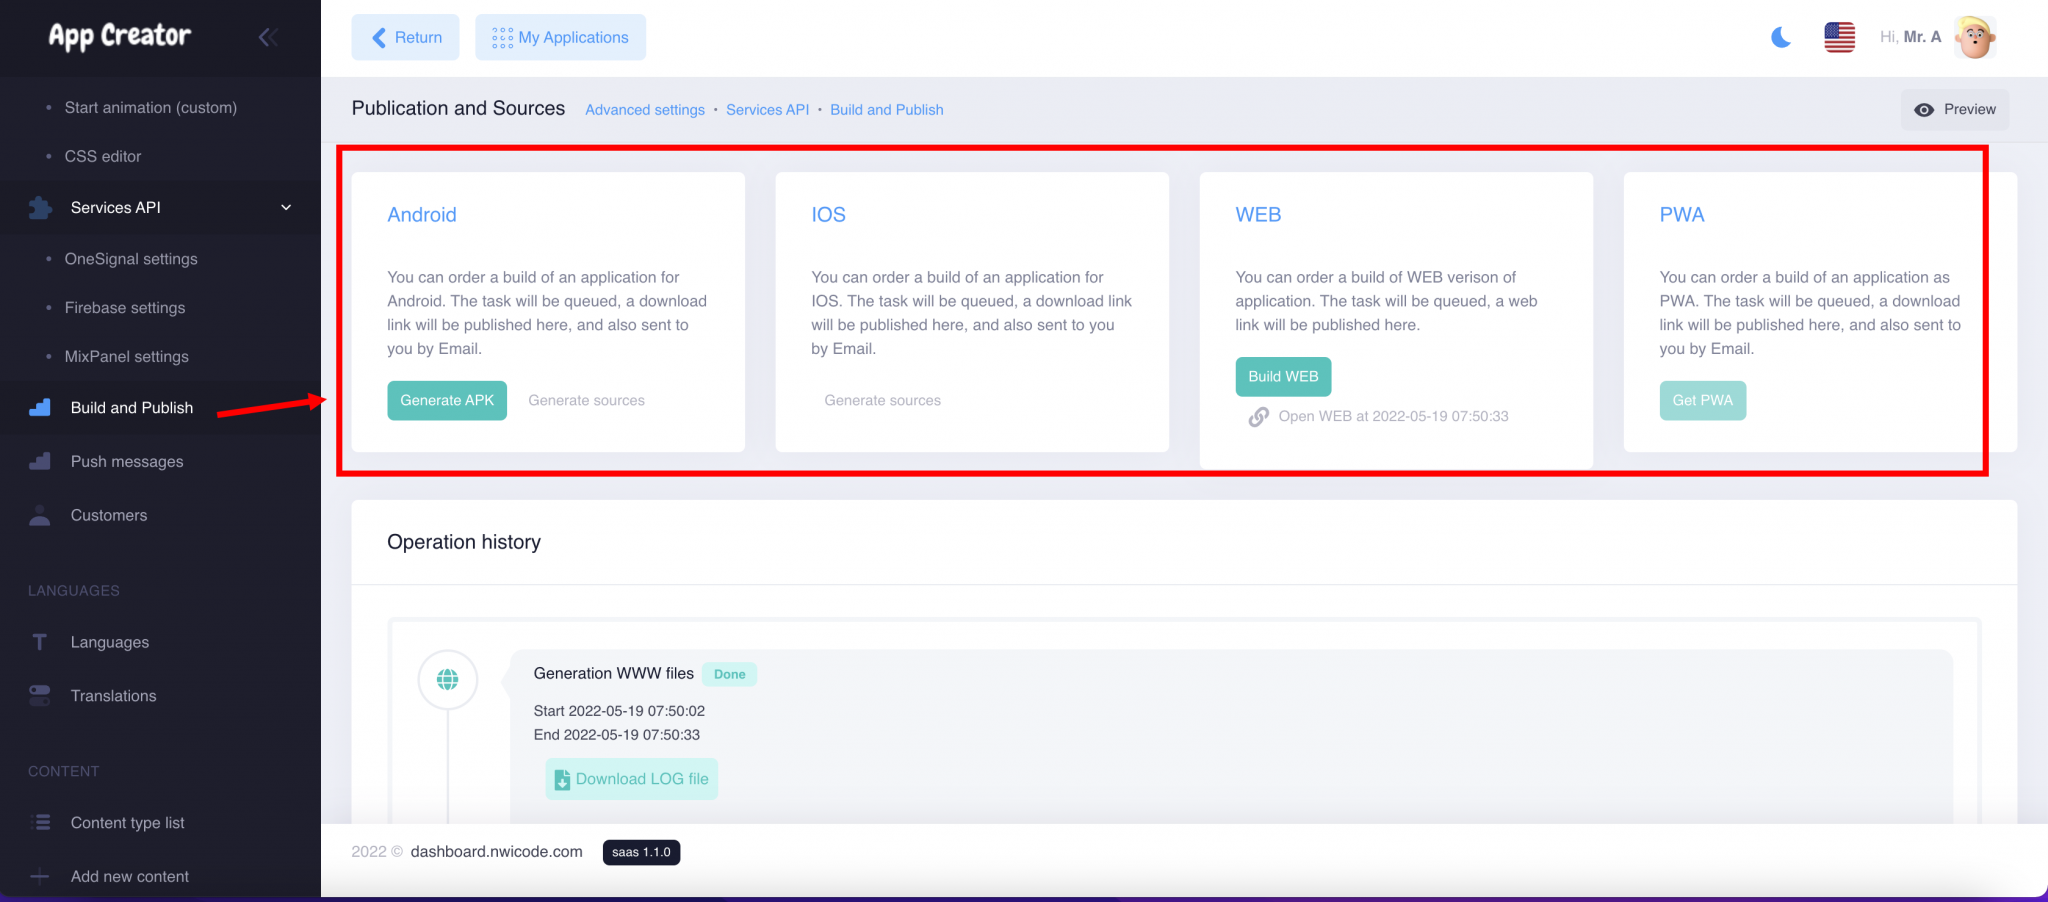
Making an Android App Bundle .aab file from a Moxly project
Publishing an App to the App Store
To publish an iOS app you need a Mac computer because you must use Xcode software.
Certificates
An iOS publication under one developer account needs 4 files, one file that will sign the certificates and 3 certificates. The file that will sign the certificates and one of the 3 certificates are used for all apps published under one developer account, and the two other certificates must be created each time you will publish a new app.
The ones that are used for all apps published under one developer account:
These 2 files will be created once (the first time you are going to publish under this developer account). It is the CertSigningRequest (CSR) and the iOS distribution certificate (iOS_Distribution). The CSR is created from your computer (must be a Mac) from the Keychain Access, and the iOS_Distribution is created from the Member Center at developer.apple.com.
These two items must be stored in the main certificates folder for this developer account on your computer (it will be better in term of organization if you are willing to publish other apps under this account). Thus if we consider this example, for the client named “John Doe” who has his own developer account, on your computer there will be these folders with this organization:
- IOS apps
- John Doe
- Certificates –> CSR and iOS_Distribution for John Doe account must be stored here after you have created them
- John Doe 1st app
- Certificates
- Screenshots
- John Doe
You will use this CSR and iOS_Distribution certificate for all the apps that you will publish for John Doe, if there are several apps to publish under this account. You create once and you use them each time you publish an app for John Doe under his account. For your information, the Keychain Access to create the CSR is in your Mac in Applications > Utilities.
The two other certificates are the Apple Push Services certificate and the Mobile Provisionning Profile. You will have to create them for each app, as you can see in the video. You will stored them in the certificates folder which is in the app folder. Thus if we consider the previous example, for the client named “John Doe” who has his own developer account:
- IOS apps
- John Doe
- Certificates
- John Doe 1st app
- Certificates –> Apple Push Services certificate and Mobile Provisionning Profile for John Doe 1st app must be stored here after you have created them
- Screenshots
- John Doe
Step to compile an iOS app
Create the items related to the developer account with which you are going to publish
You have to create a CSR file and an iOS Distribution certificate. And you will be able to use these items for all of the next apps you will have to publish under this developer account –> keep them preciously once created.
1. CSR File
It must be created from the keychain access tool of your Mac. Open it from Applications > Utilities > Keychain Access:
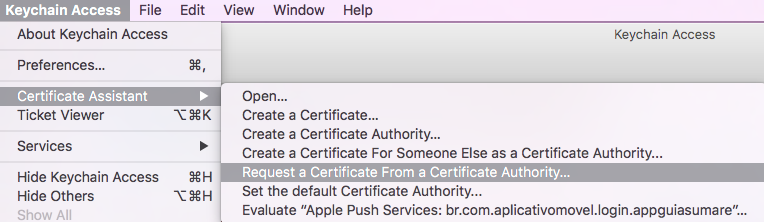
From the menu select “Keychain access” > “Certificate Assistant” > “Request a Certificate From a Certificate Authority”:
In the window that opens, enter the email of the developer account (or any other email address, it doesn’t have any impact), and enter the name of your developer account, and select “Saved to disk”:
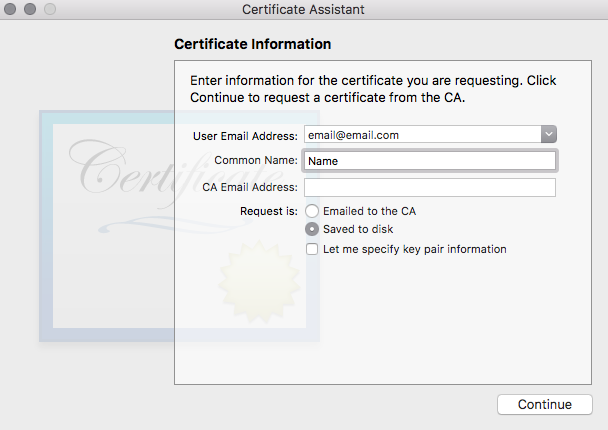
Save this CSR to your disk, in a folder related to the certificates of your developer account.
Close the window.
IOS DISTRIBITION certificate
– Connect at https://developer.apple.com/membercenter/index.action with the developer account
– Click on “Certificates, Identifiers & Profiles”
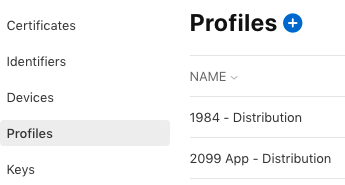
– Click on “Certificates” in the menu on the left, then click on +:
– Choose “iOS Distribution (App Store and Ad Hoc)” and click on “Continue”:

– Sign your iOS Distribution certificate with the CSR file you have created before.
– Download the iOS Distribution certificate that has been created.
– Double click on the iOS Distribution certificate (ios_distribution.cer) to add it to the Keychain Access.
Create the items related to the app you are going to publish
Apple Push Services certificates
Thanks to this certificate you will be able to add push notifications, in-app purchase, and other services to your app. In our case, only the push notification service is interesting.
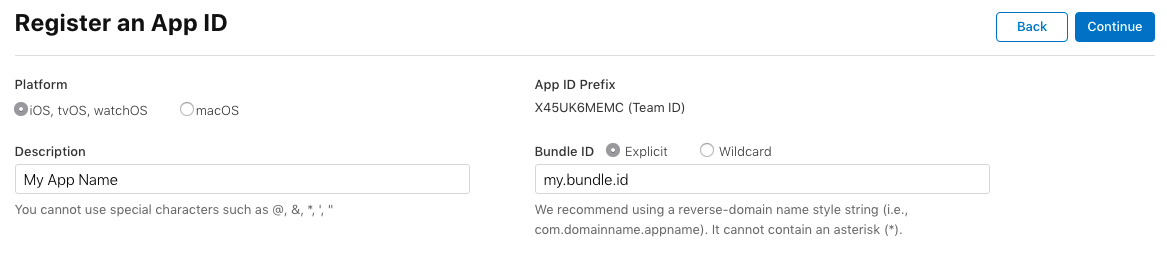
– Click on “Identifiers” in the menu on the left, then click on +:
– Choose “App IDs” and click on “Continue”:

– Enter your app name, the Bundle ID of the app:
– Go below and select “Push Notifications” in the list of “Capabilities“:

– Click on “Continue“.
– Then click on “Register“.
– In the list, find the App ID you have just created and click on it.
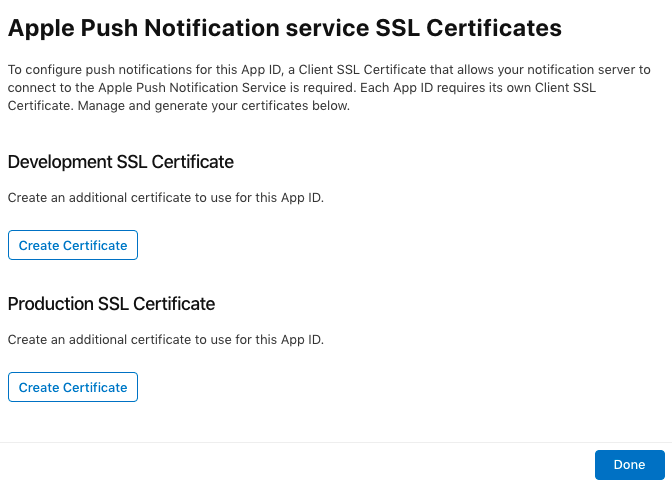
– Go at the bottom and for Push Notifications, click on “Configure”:

– In “Production SSL Certificate” section click on “Create Certificate”:
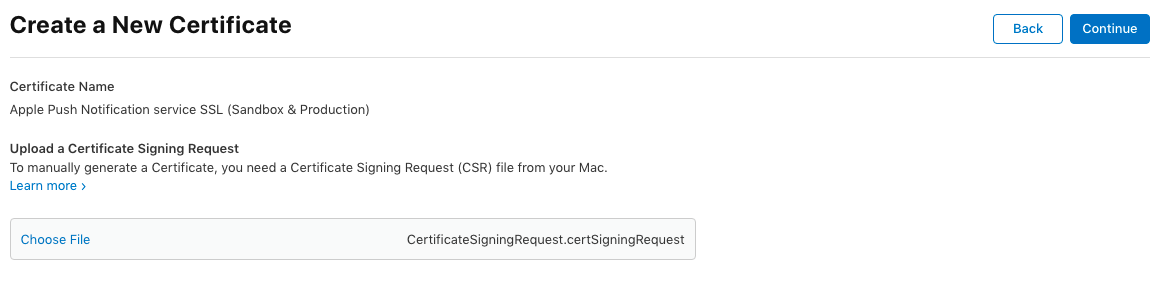
– Click on “Choose File” and upload the CSR file you have created before for this developer account (the same CSR you have used to create the iOS Distribution certificate for this developer account):
– Download the Apple Push Services certificate (aps.cer) that has just been created. Store this certificate in a folder related to this app on your Mac.

– Click on “< All Certificates“.
-Double click on the Apple Push Services certificate (aps.cer) to add it to the Keychain Access.
Provisionning Profile
– Click on “Profiles” in the menu on the left, then click on +:
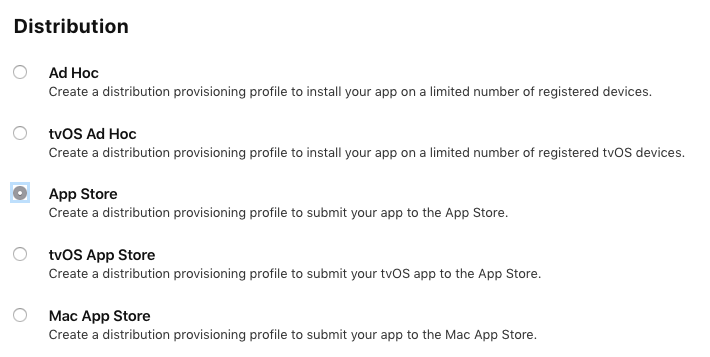
– Choose “App Store” under “Distribution“:
– Select the App ID of your app, and click on “Continue”:
– Select the iOS Distribution certificate associated to the CSR you have used to sign the Apple Push Services Certificate you have created just before (it is very important to use the iOS Distribution which has been created with the CSR used to sign the aps.cer of this app. Don’t forget it, and don’t forget that in case you create a new aps.cer for this app with another CSR you will have to create a new provisionning profile too with the iOS Distribution certificate made with this CSR, and then to publish an update of your app on the App Store)
– Click on “Continue“.
– Name the Provisionning Profile and click on “Continue”
– Download the Provisionning Profile that has just been created. Store this certificate in the folder related to this app on your Mac, and which contains the Apple Push Services certificate created just before.
Compiling the app
– Download your iOS source code.
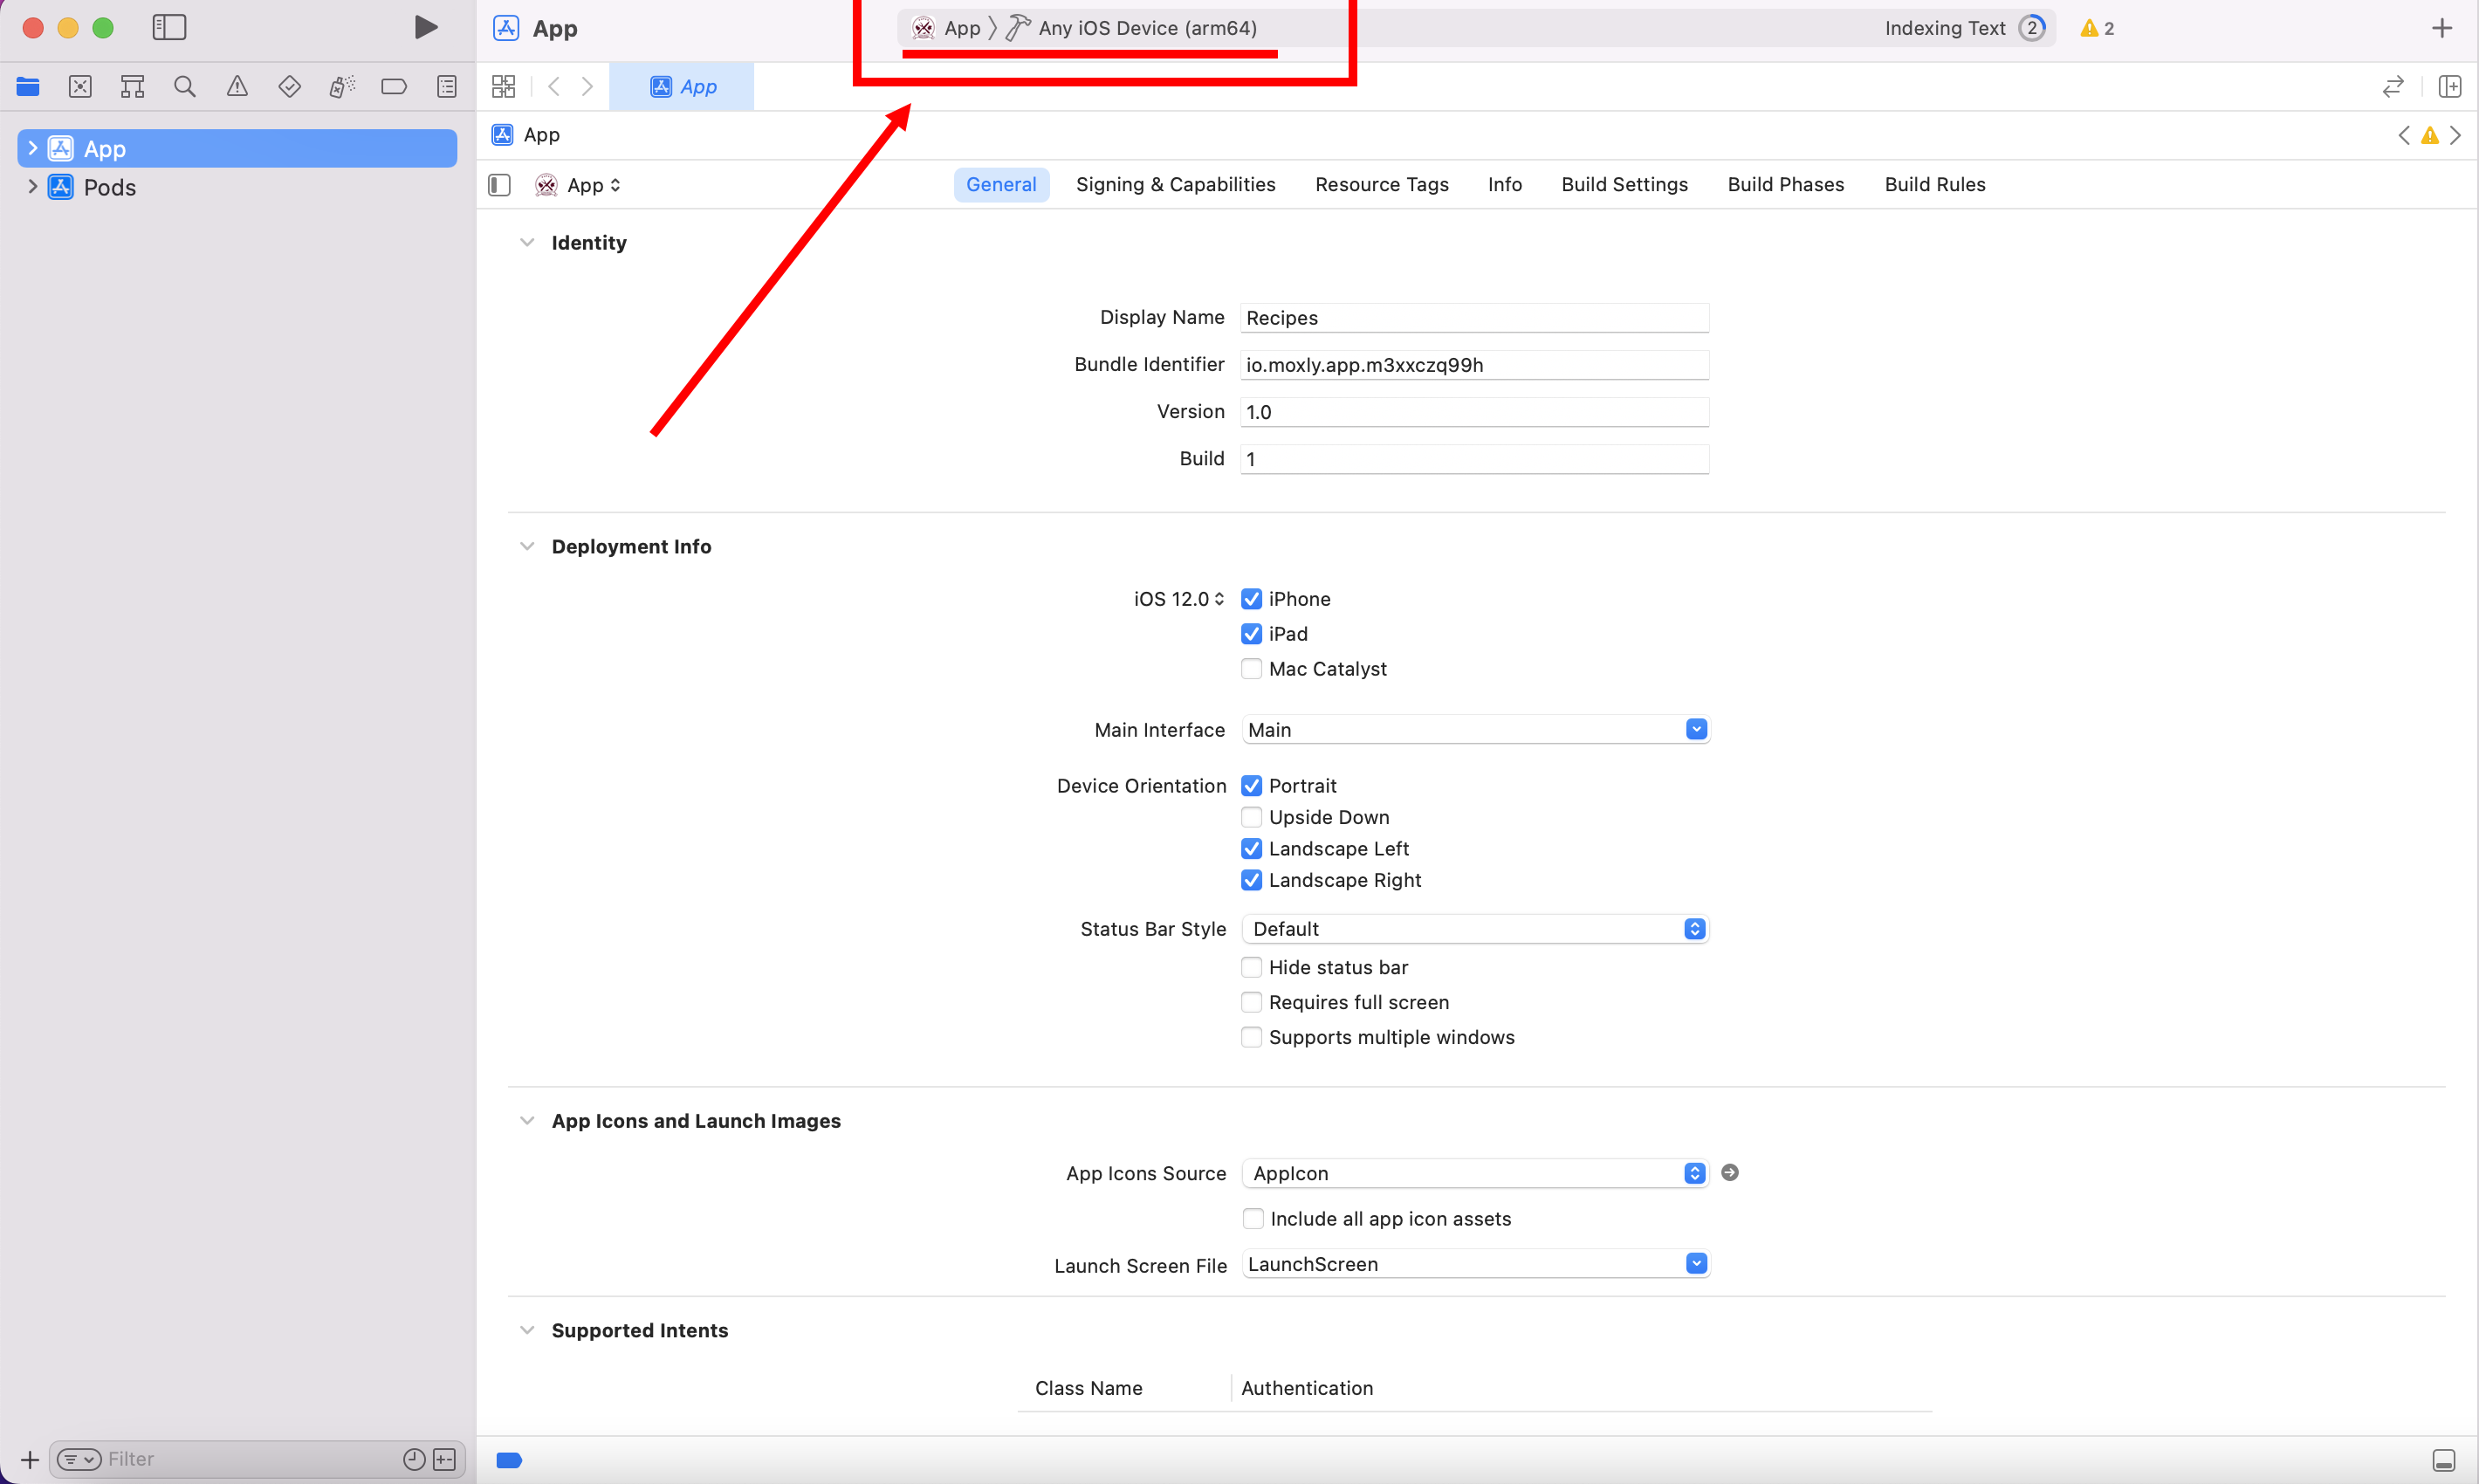
– Unzip the folder and open the .xcworkspace file by double-clicking it.
– If you haven’t already, you need to add the Apple developer account to Xcode.
Note: you must first create your app on App Store Connect before sending the build with Xcode
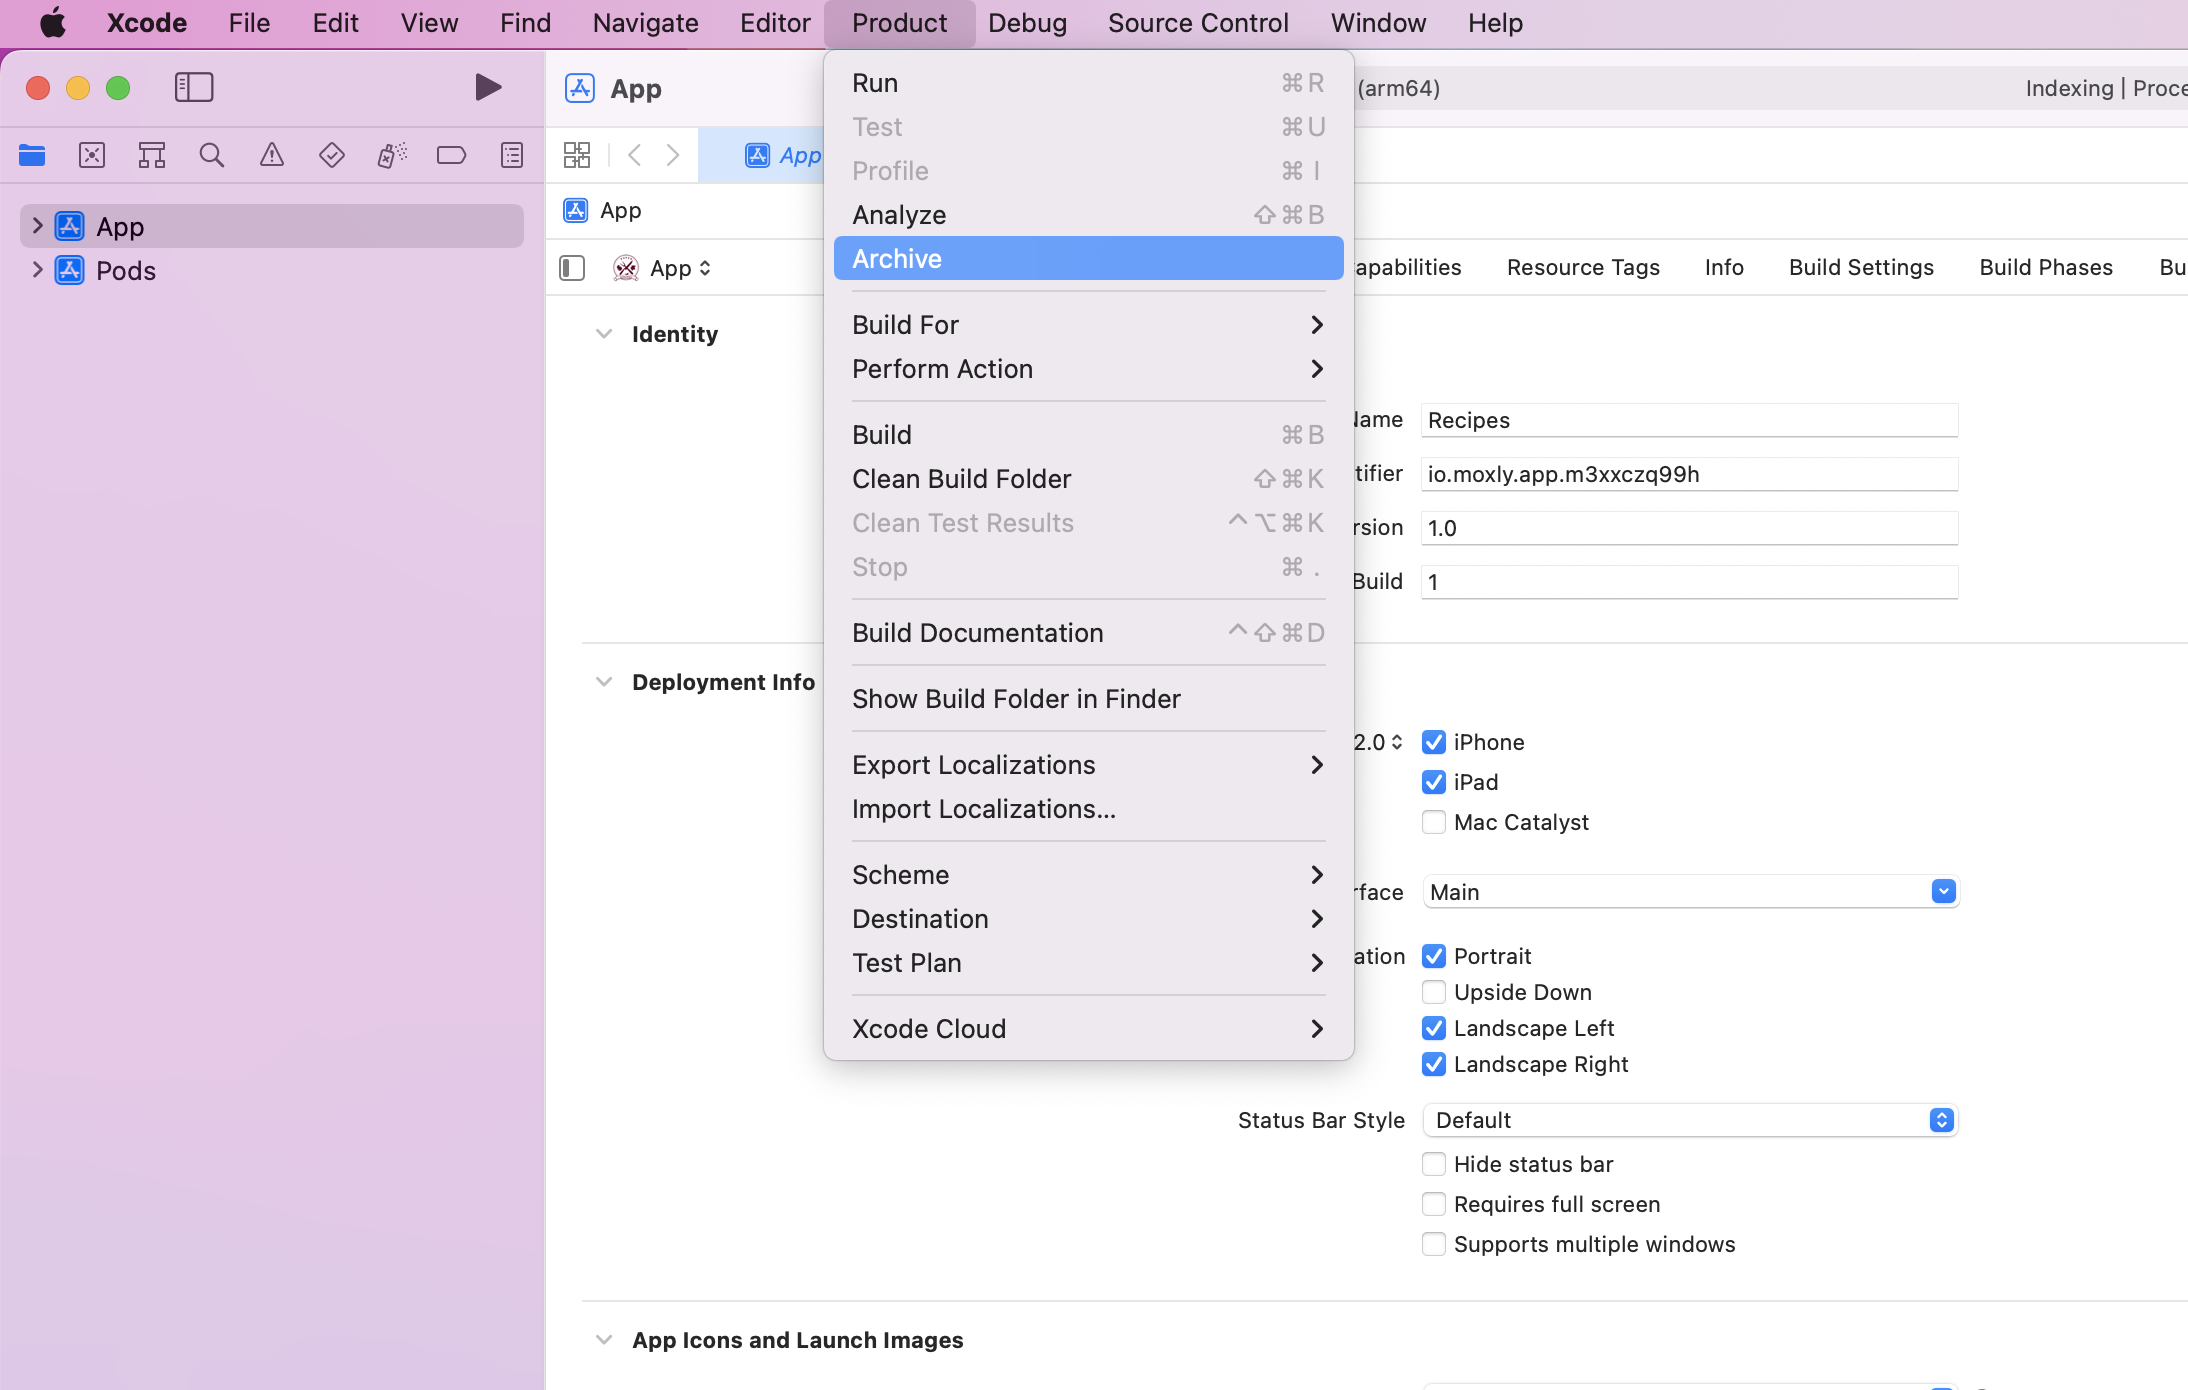
In Xcode, select your application and proceed to archiving it and sending it to the Appstore

Custom Domain
Connect your own domain or subdomain for PWA applications (Only available to users with a PRO subscription plan)
Note: Using the root domain as the default (e.g. yoursite.com) requires CNAME flattening. This process is different from connecting your custom domain or using the subdomain as the default (e.g. www.yoursite.com, blog.yoursite.com). CNAME flattening does not use A records.
How to update your DNS records
To update your DNS records, you’ll need to access your domain’s DNS settings in your domain registrar or DNS host’s dashboard.
Every DNS provider has their own process for updating DNS records. We recommend that you read the help documentation of your DNS provider, and contact their support for help with their interface and settings if needed.
To configure your DNS records to use the root domain (subdomain) as the default:
- Open the DNS settings for your custom domain (in your domain registrar or DNS host’s dashboard)
- Create a CNAME or ANAME record with the hostname @ and the value customers.moxly.io
Important: If you’re setting up your DNS records with Cloudflare, be sure to set the proxy status of your DNS records to DNS Only. Moxly hosting is not compatible with the Cloudflare proxy, as the proxy may cause issues with SSL provisioning and renewal on your custom domain.
After you have changed the DNS settings and added your domain on the Moxly platform, wait for the email to verify your domain and receive the SSL certificate, you will need to add 2 TXT records in the DNS settings
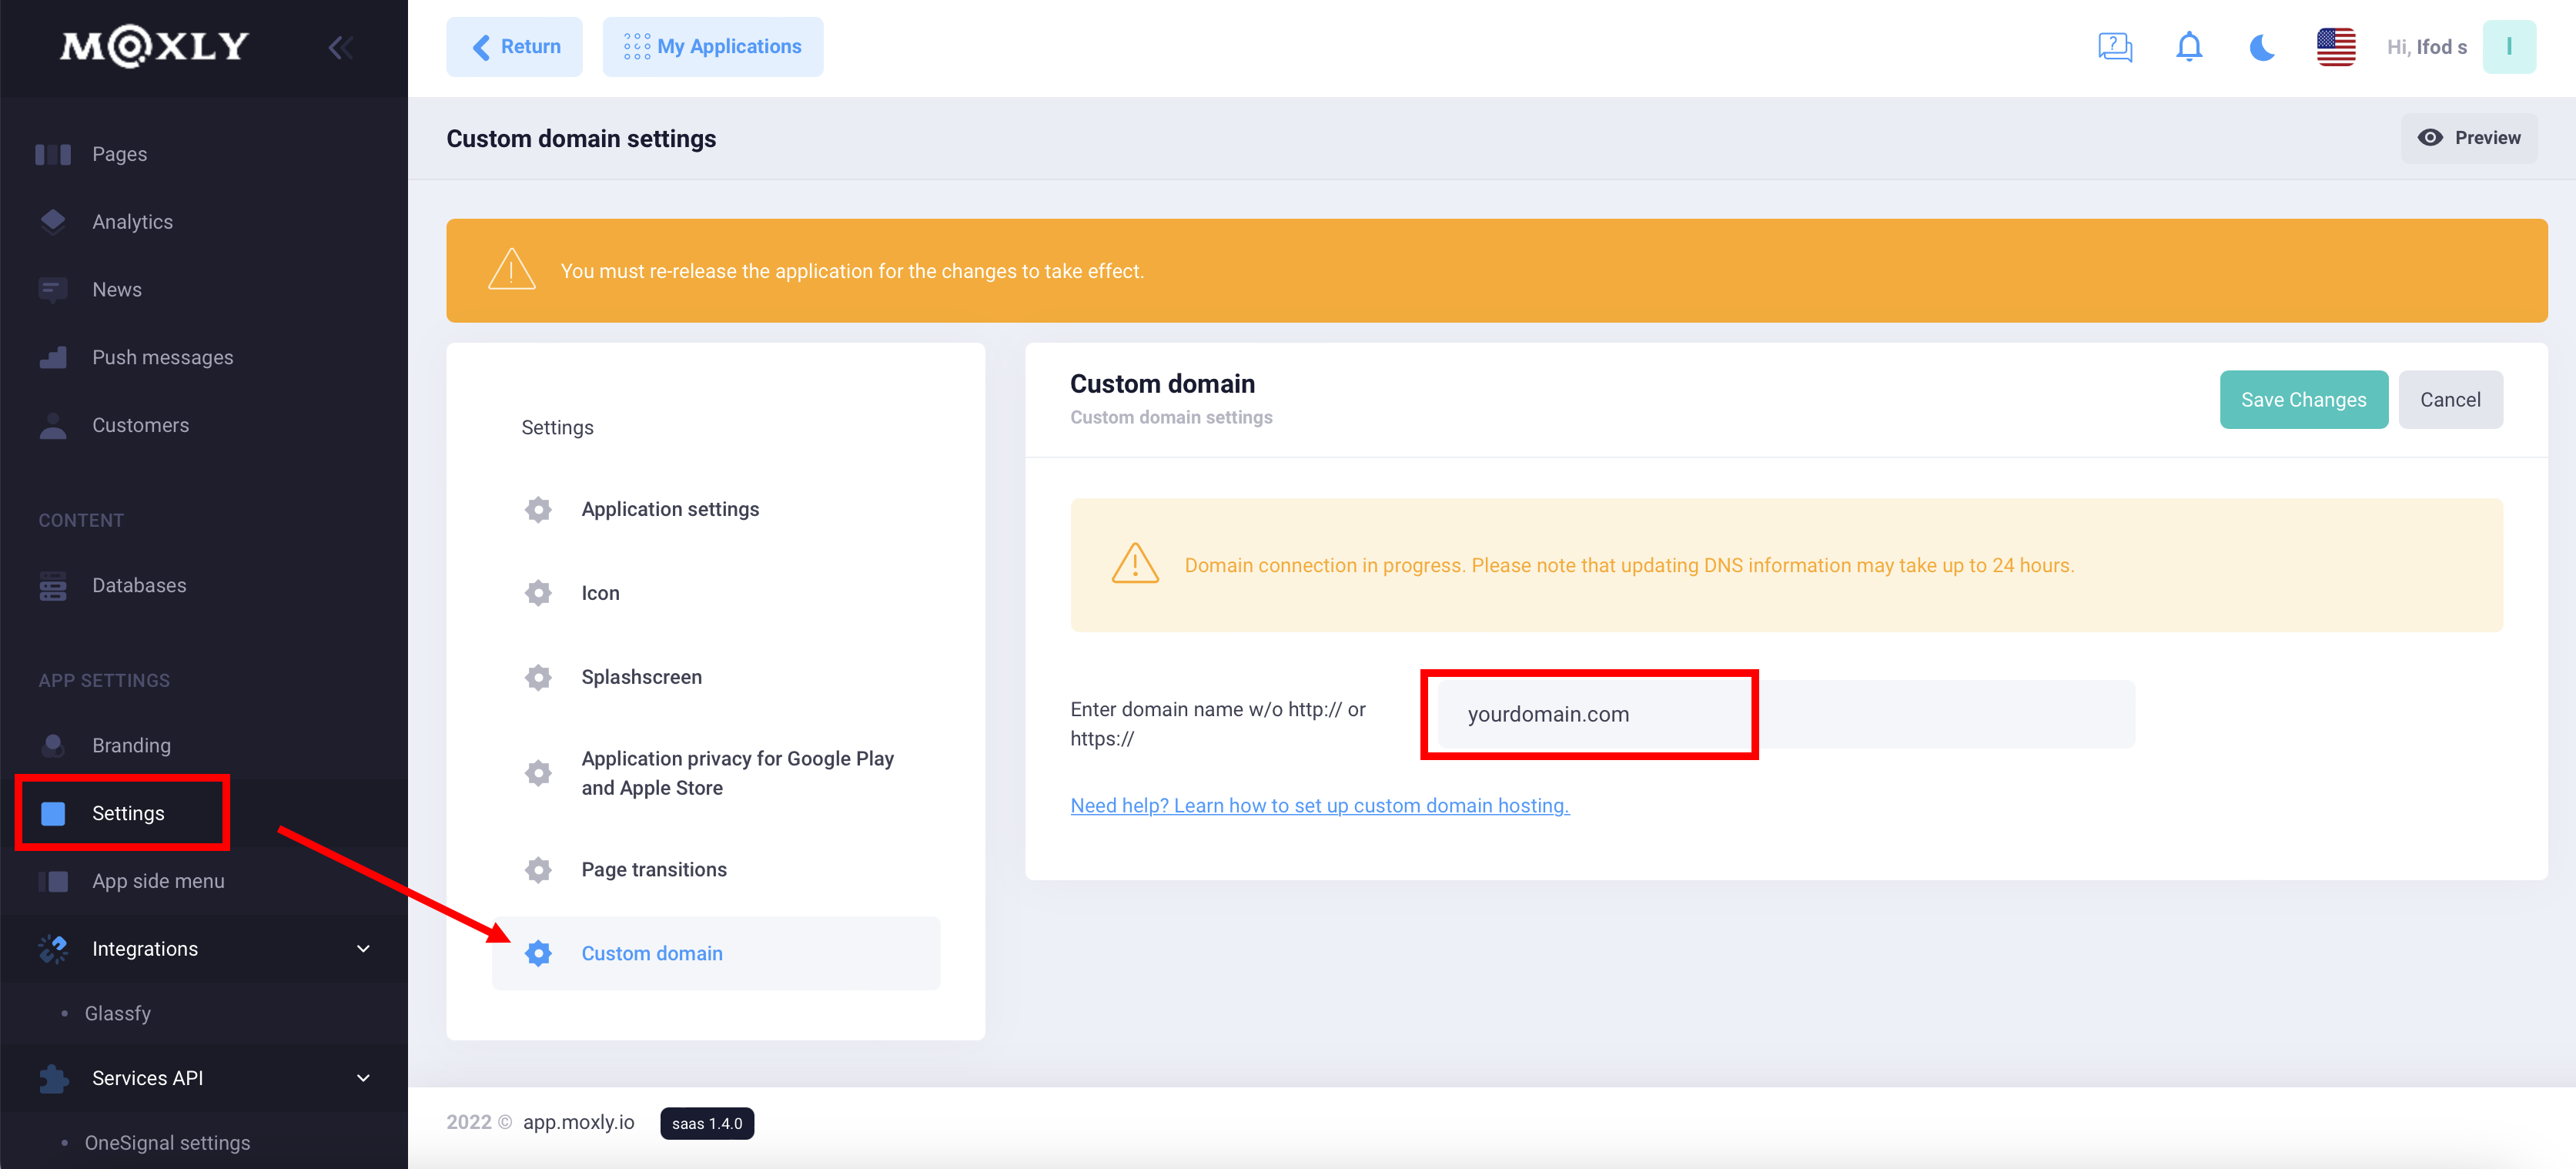
How to set a custom domain
To set the default domain to the root domain:
Open Site Settings > APP SETTINGS > Settings > Custom Domains
How to check that the domain points to Moxly
To make sure that your DNS settings are correct and that your domain correctly points to your Moxly site, click Check the status under your domain name in the section Settings > Custom Domains. You should see an activation confirmation
DNS changes can take up to 48 hours to fully propagate in all geolocations as the DNS cache expires, although this typically occurs within a few hours. If your site verification doesn’t work right away, you can come back later to check the status again.
If your DNS records are live and pointing to Moxly and you’re still experiencing issues with domain verification after 2 days, please contact Moxly’s customer support team.
.