Managing Content
Appointments
Appointments
Appointments is a feature with extensive customization options that allows customers to make appointments with you through a mobile app.
The application is designed to be flexible enough so that it can handle any enterprise work flow.
- Customers and appointments management.
- Services and providers organization.
- Working plan and booking rules.
- Google Calendar synchronization (planned)
- Email / Push notifications system.
Admin Panel
Appointments has a flexible permission system that allows the application to support several different user roles and with different privileges. Thus, each logged-in user can perform only those actions that are allowed to him, and can see only the information that is allowed to him.
Step 1
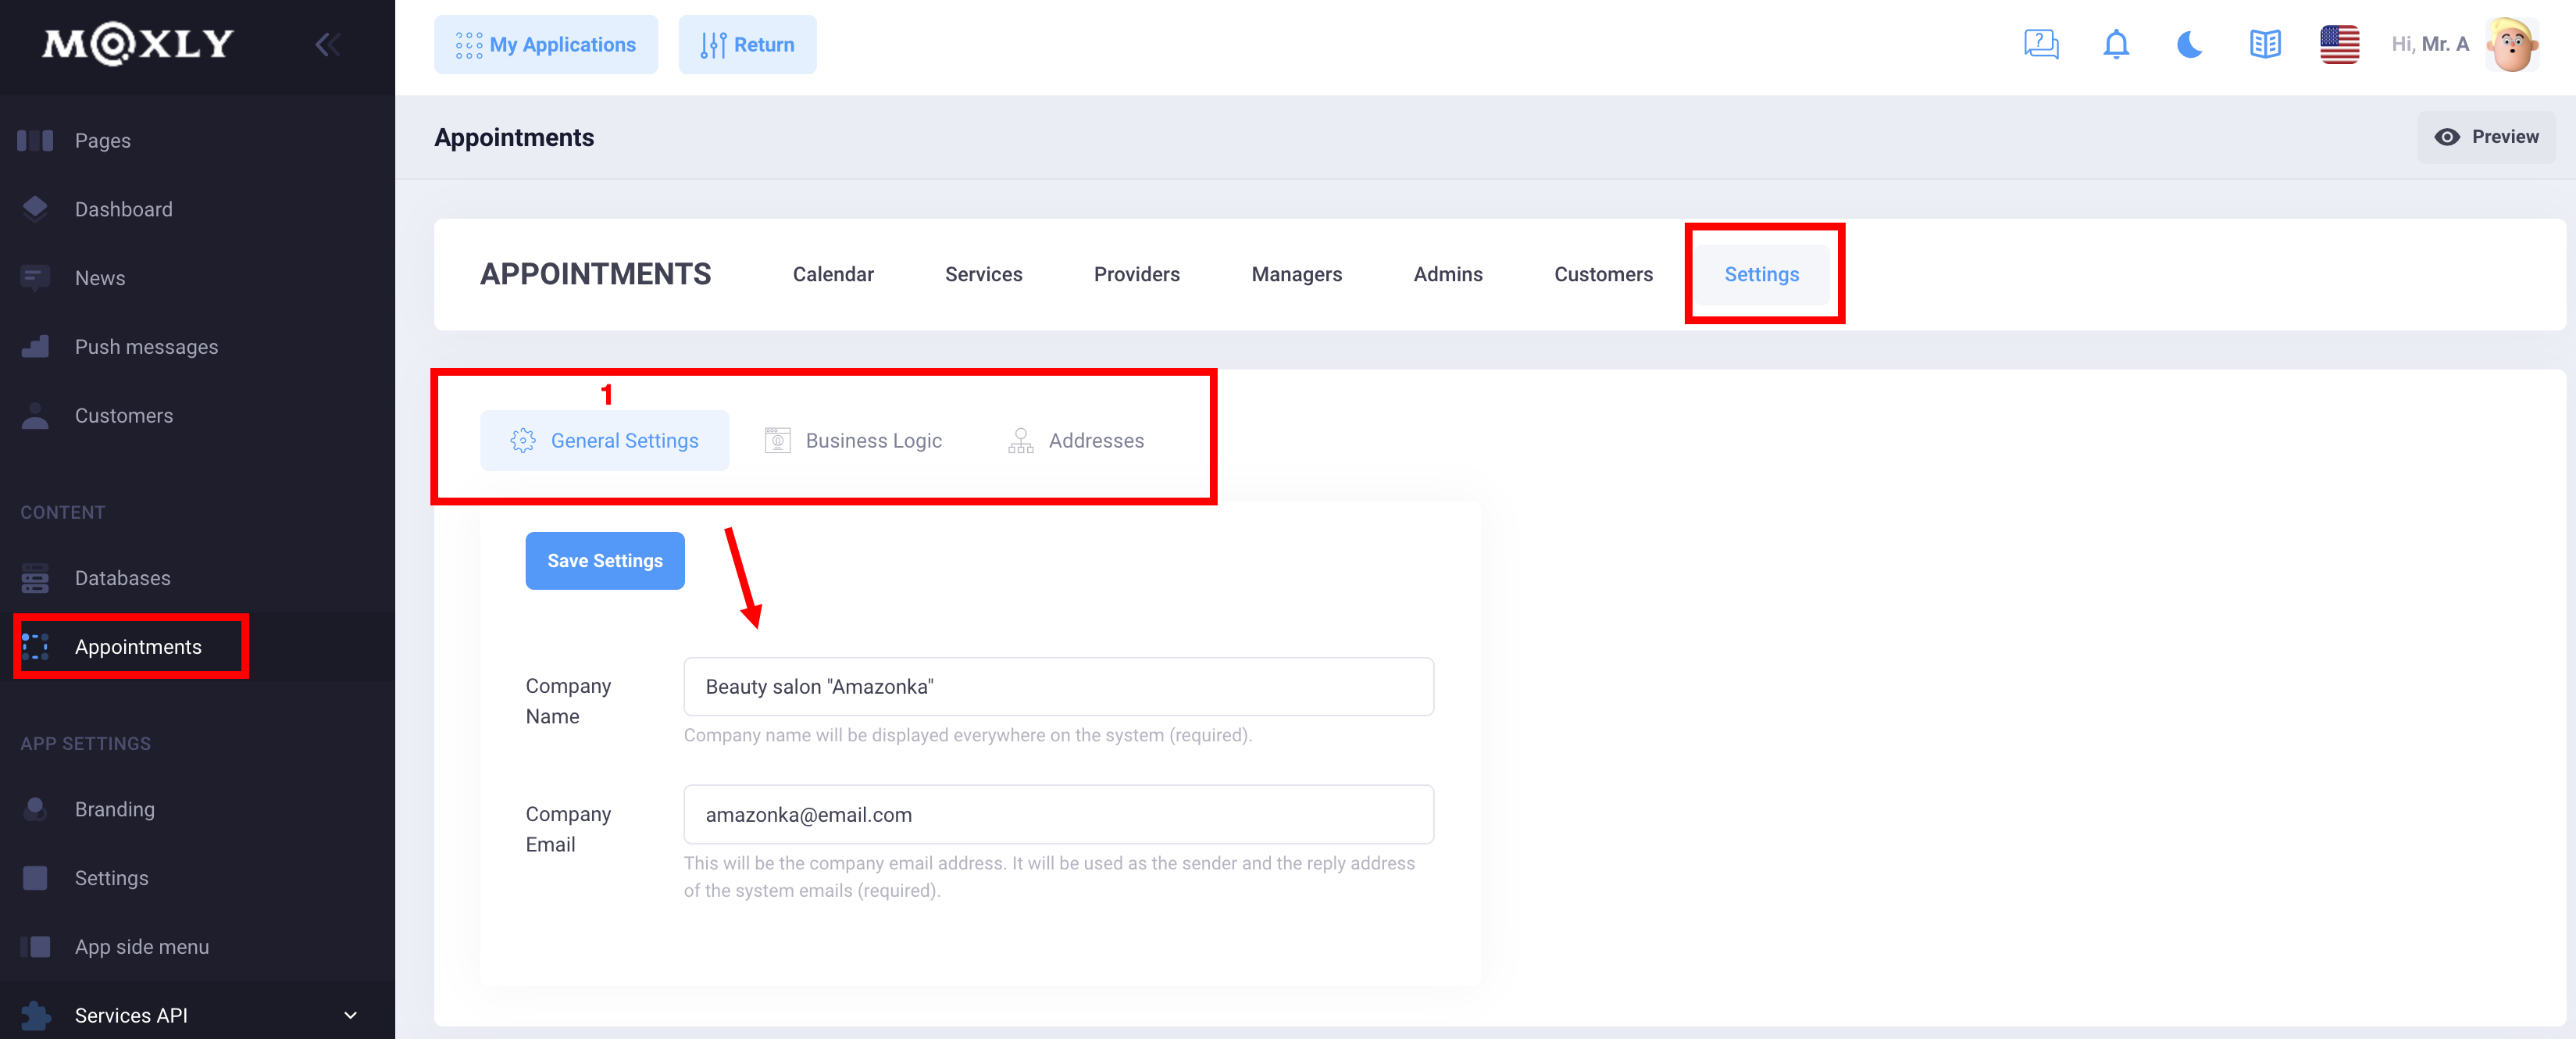
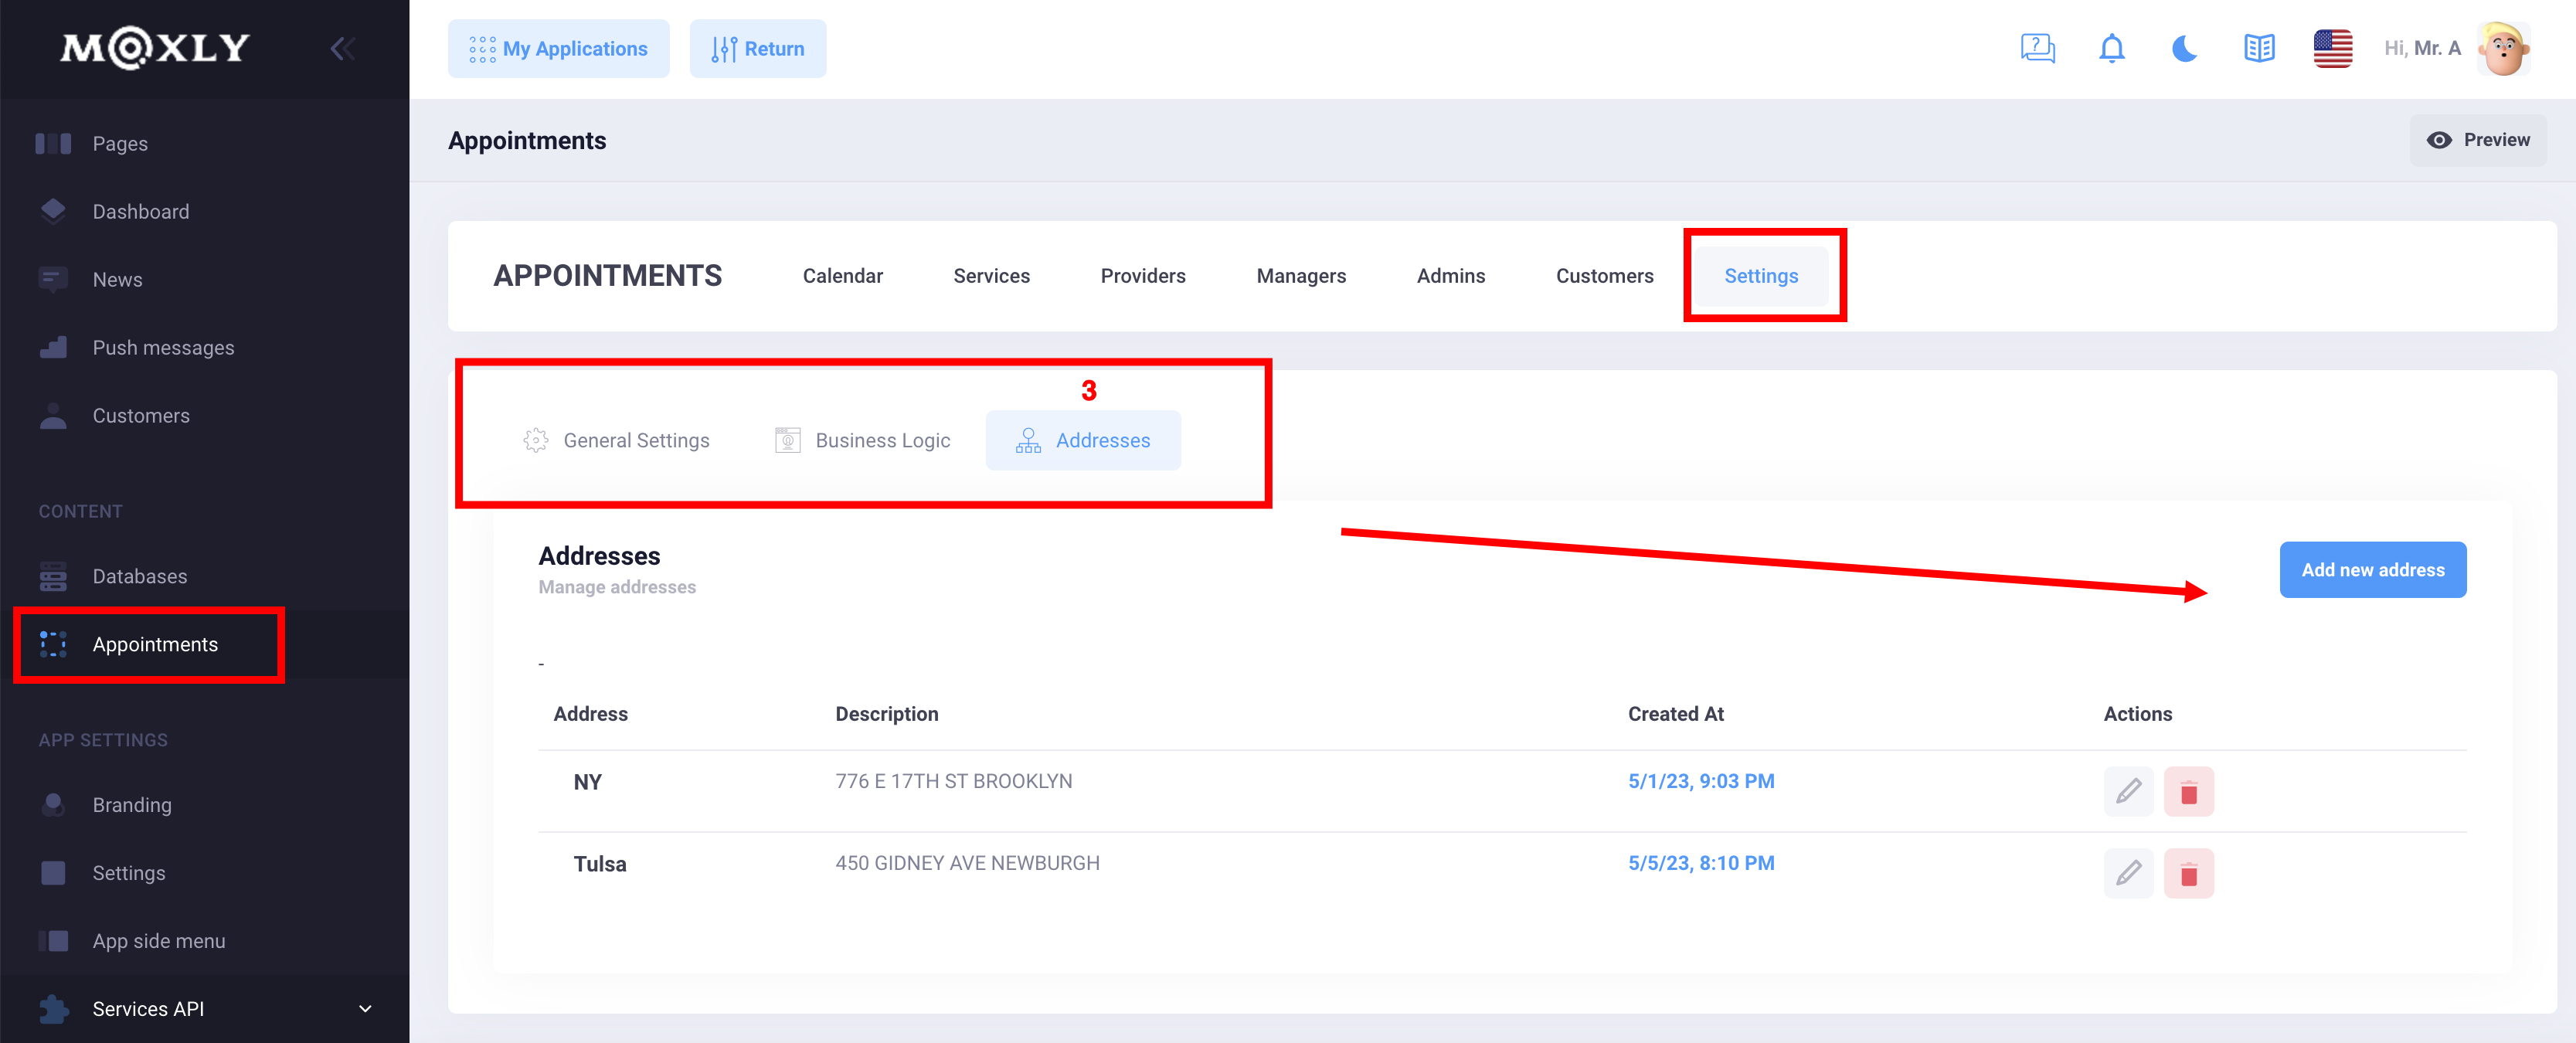
Set up basic information about your business. Add a schedule and a list of places.
Step 2
Set up your services and the employees/teams/sections which will serve the customers. Each service is completely configurable and every provider has his own schedule.
User Roles
By default, Appointments includes the Customer, Provider, Managers and Admin user roles. Each user role has different permissions and purposes so that the most common workflows are supported out of the box.
Customer
Customers is the simplest user role and are only able to use the booking page to make and manage their appointments. For this they only have access to the appointments resource and for their own appointments.
Provider
Providers that offers different services accept appointments and thus need to be able to see and manage them. Additionally they are able to manage customer information, as this is required for them to be able to handle all the required information for their schedule. Provider users are not able to manage services, users and system-wide settings as those are administrative tasks an actual administrator should take care of.
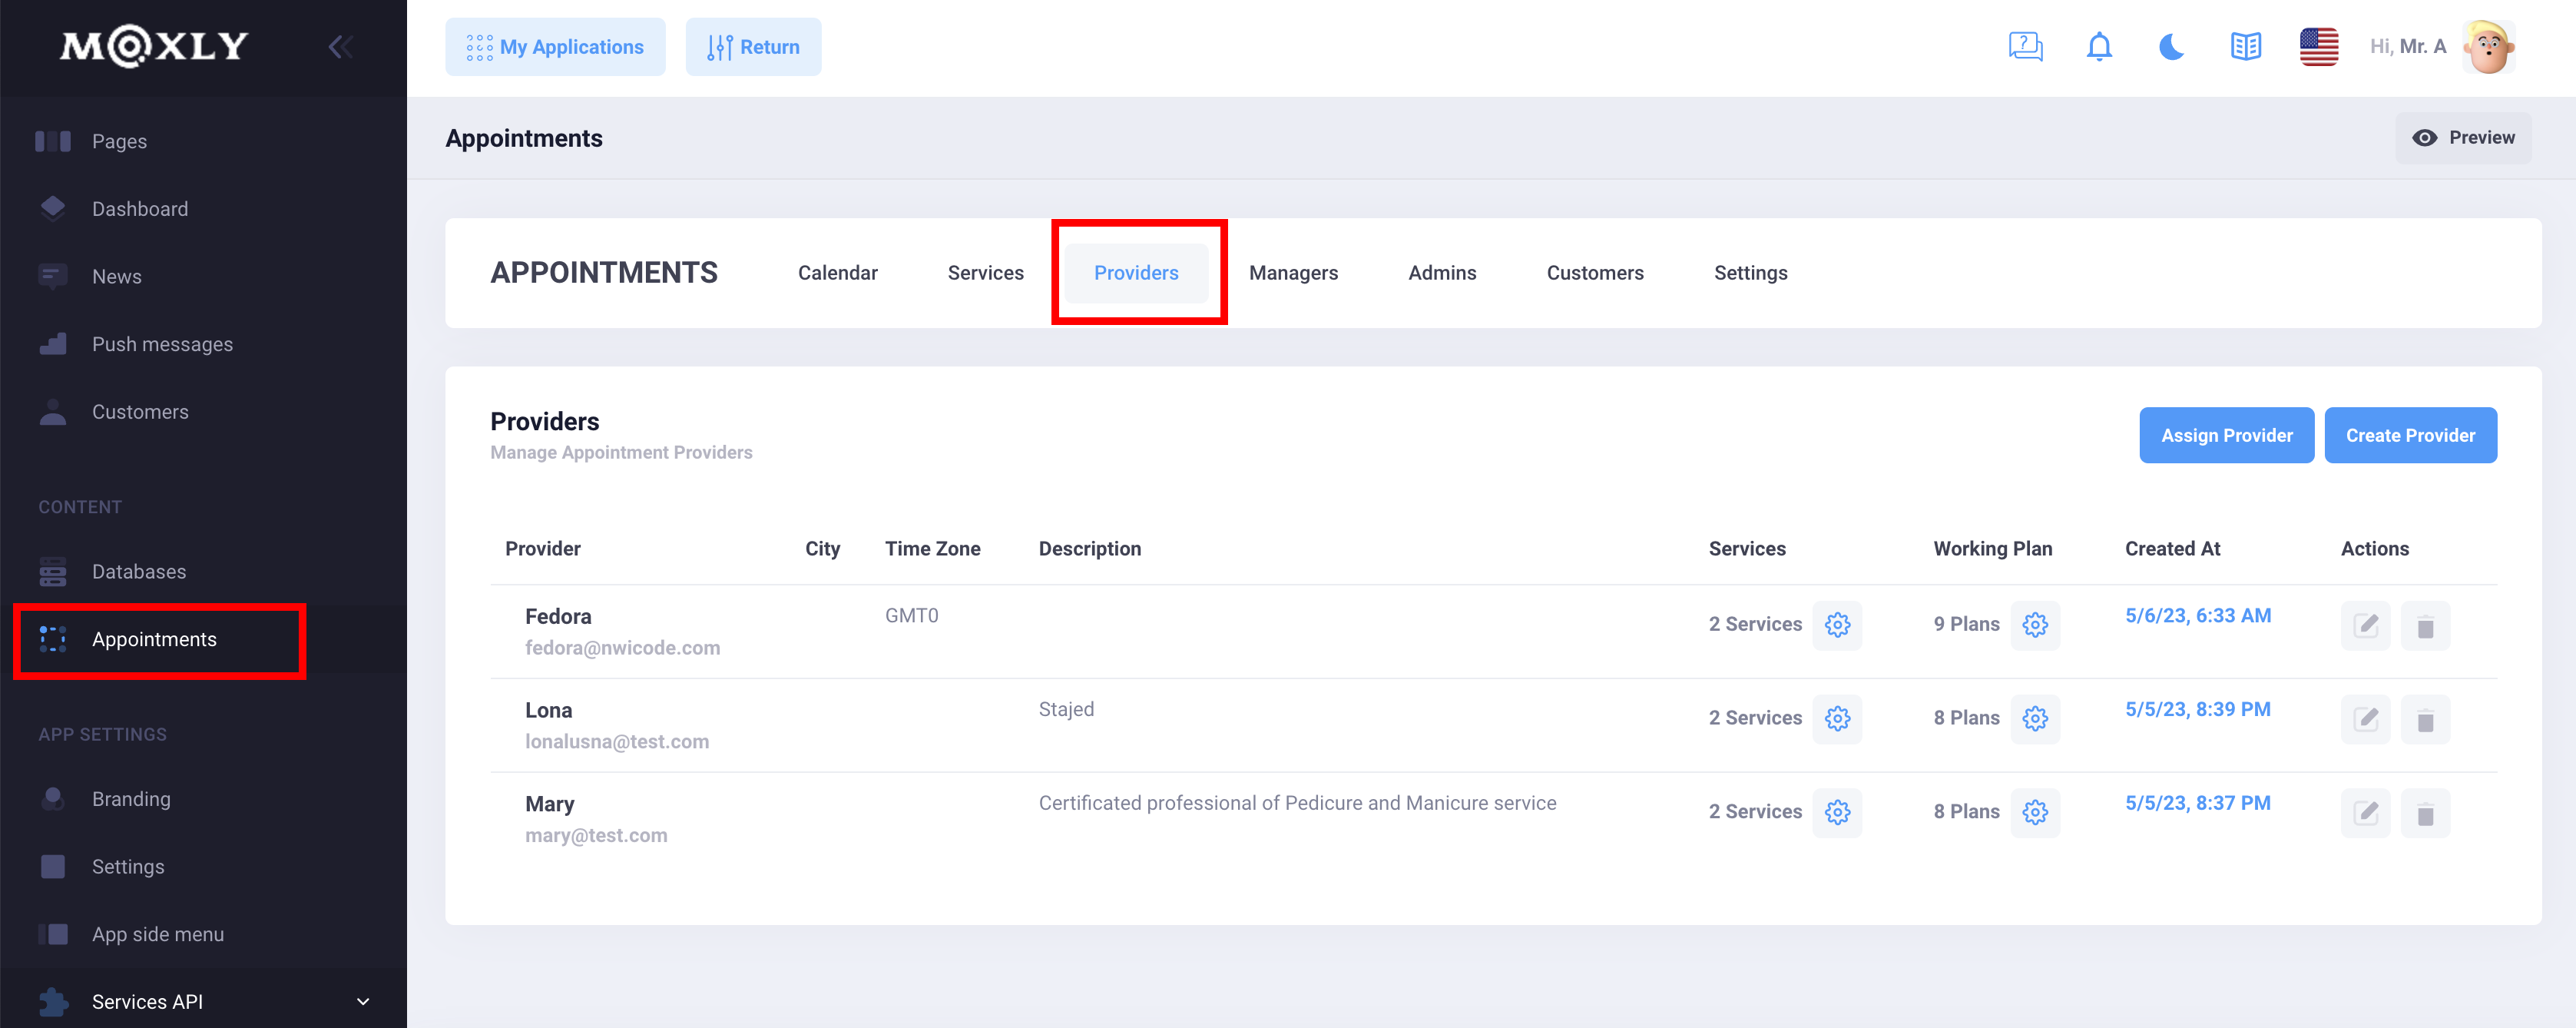
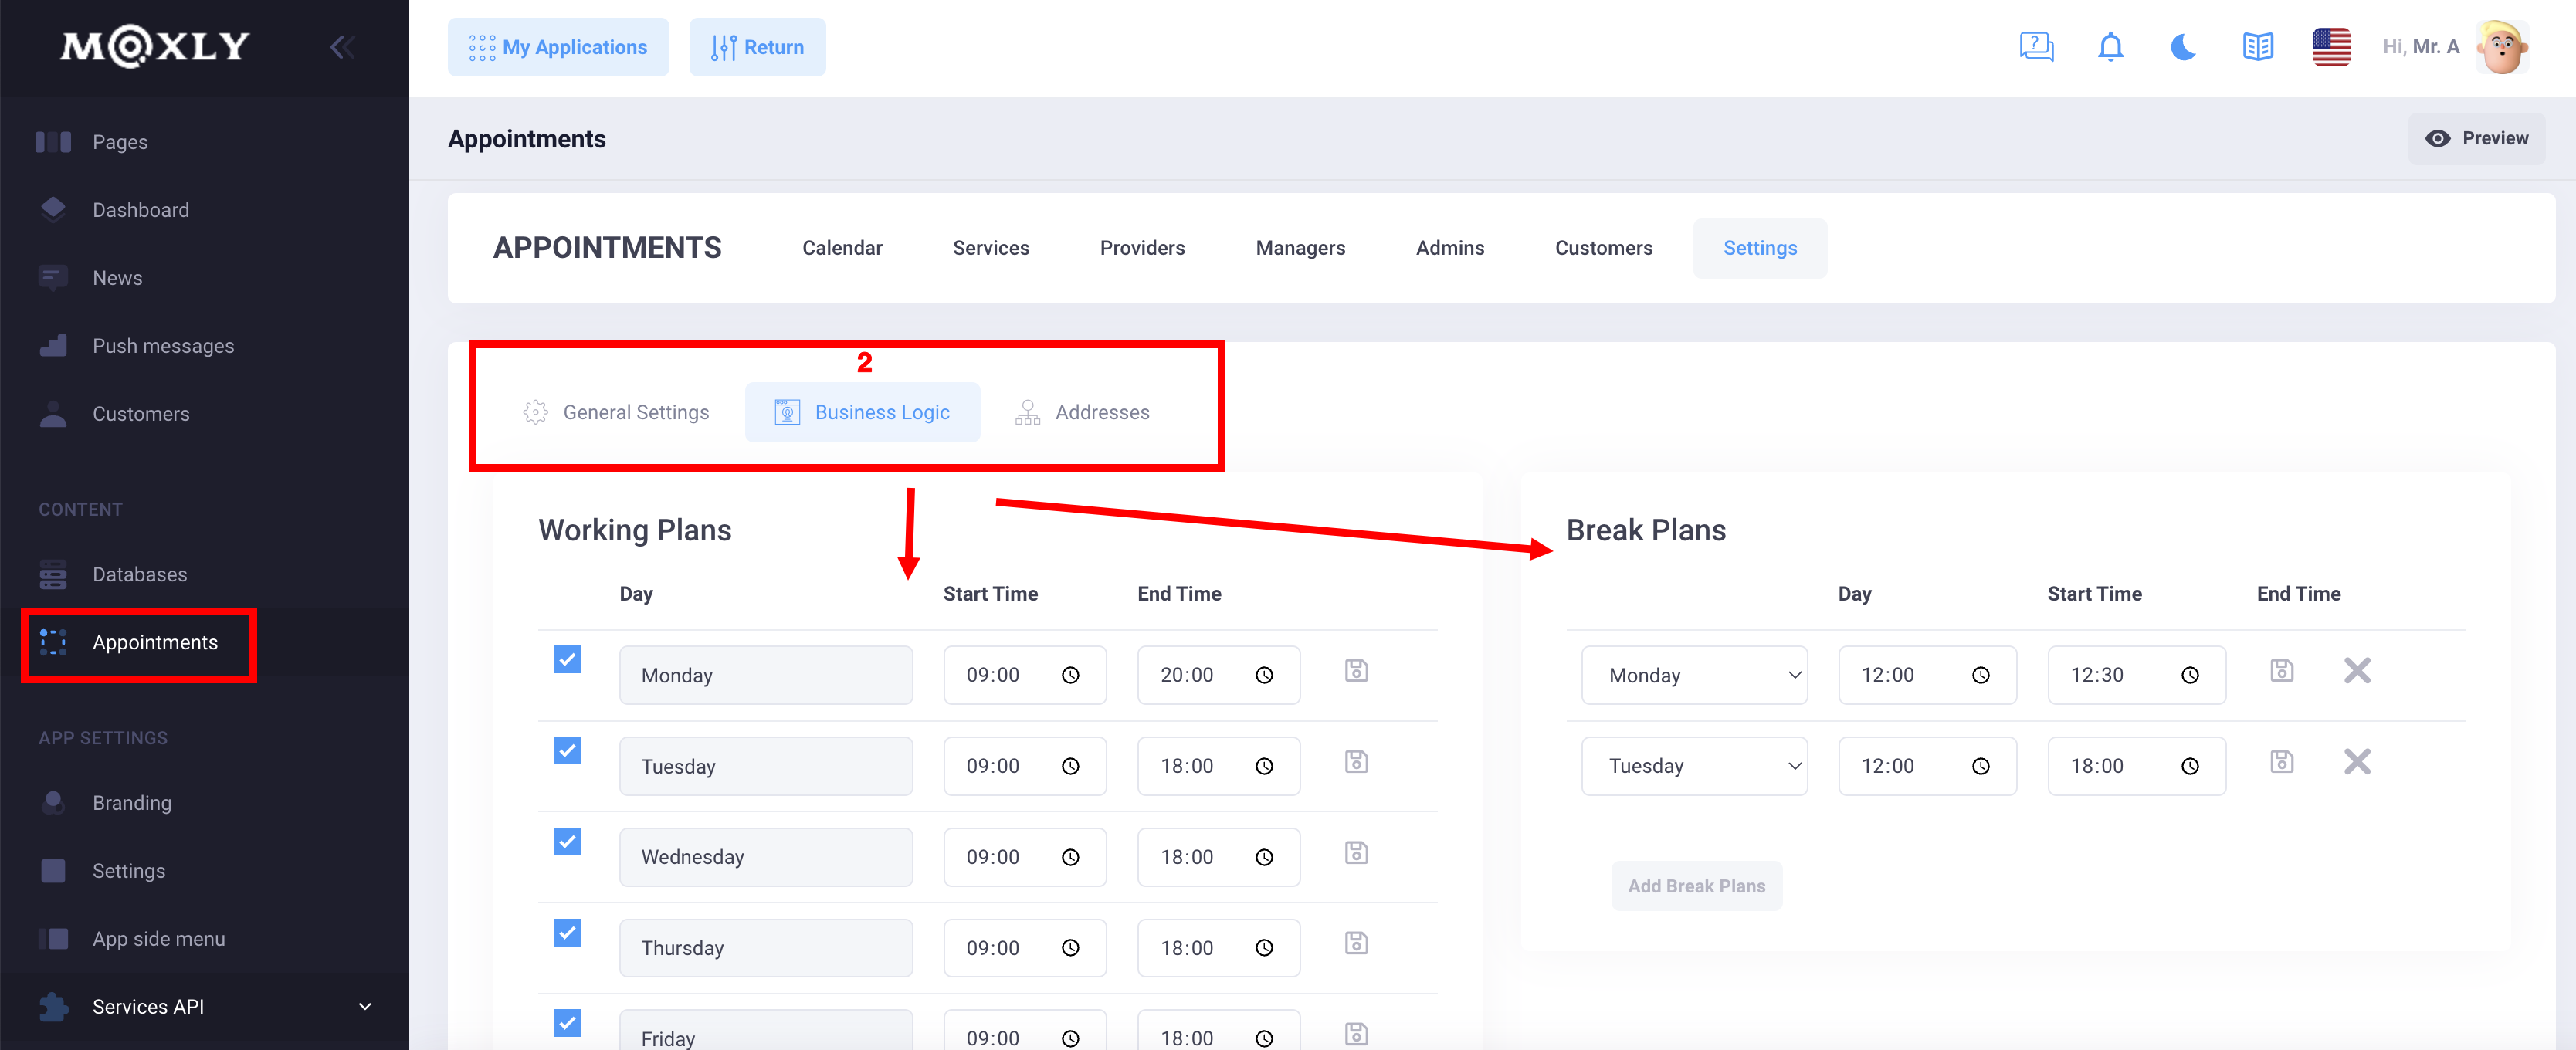
Configure the system at your own will, apply the business hours and breaks and let customers book, modify or cancel appointments within specific time periods.
Manager
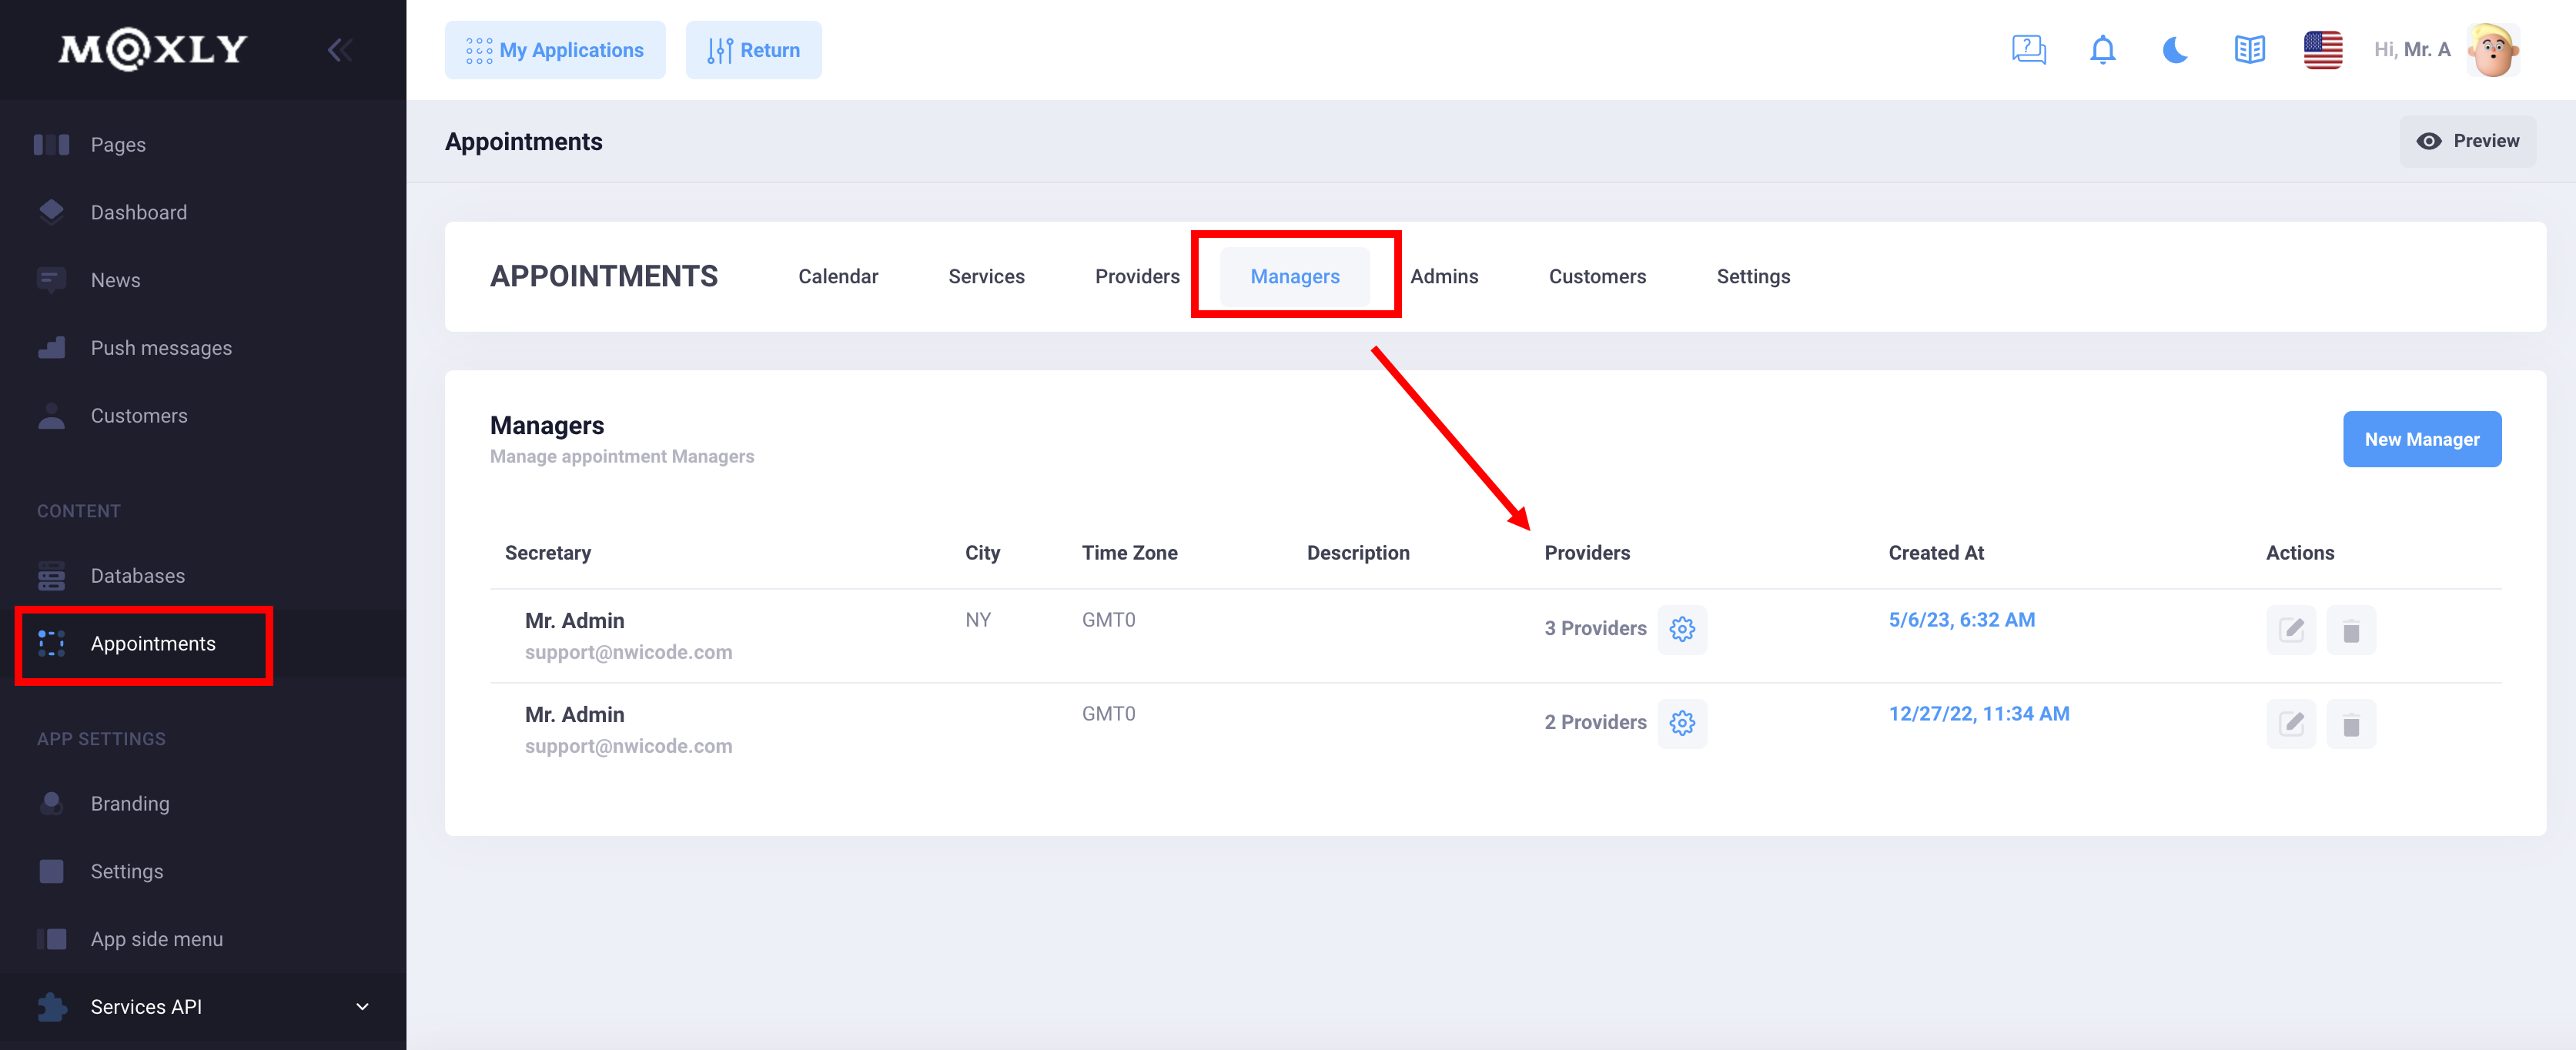
Managers share similar privileges to providers with two main differences: they do not serve appointments themselves and they can be assigned providers to handle. A manager is a user that is designated to perform organizational tasks such as the management of multiple schedules but only for the already assigned providers. They also cannot manage services, users and system-wide settings.
Admin
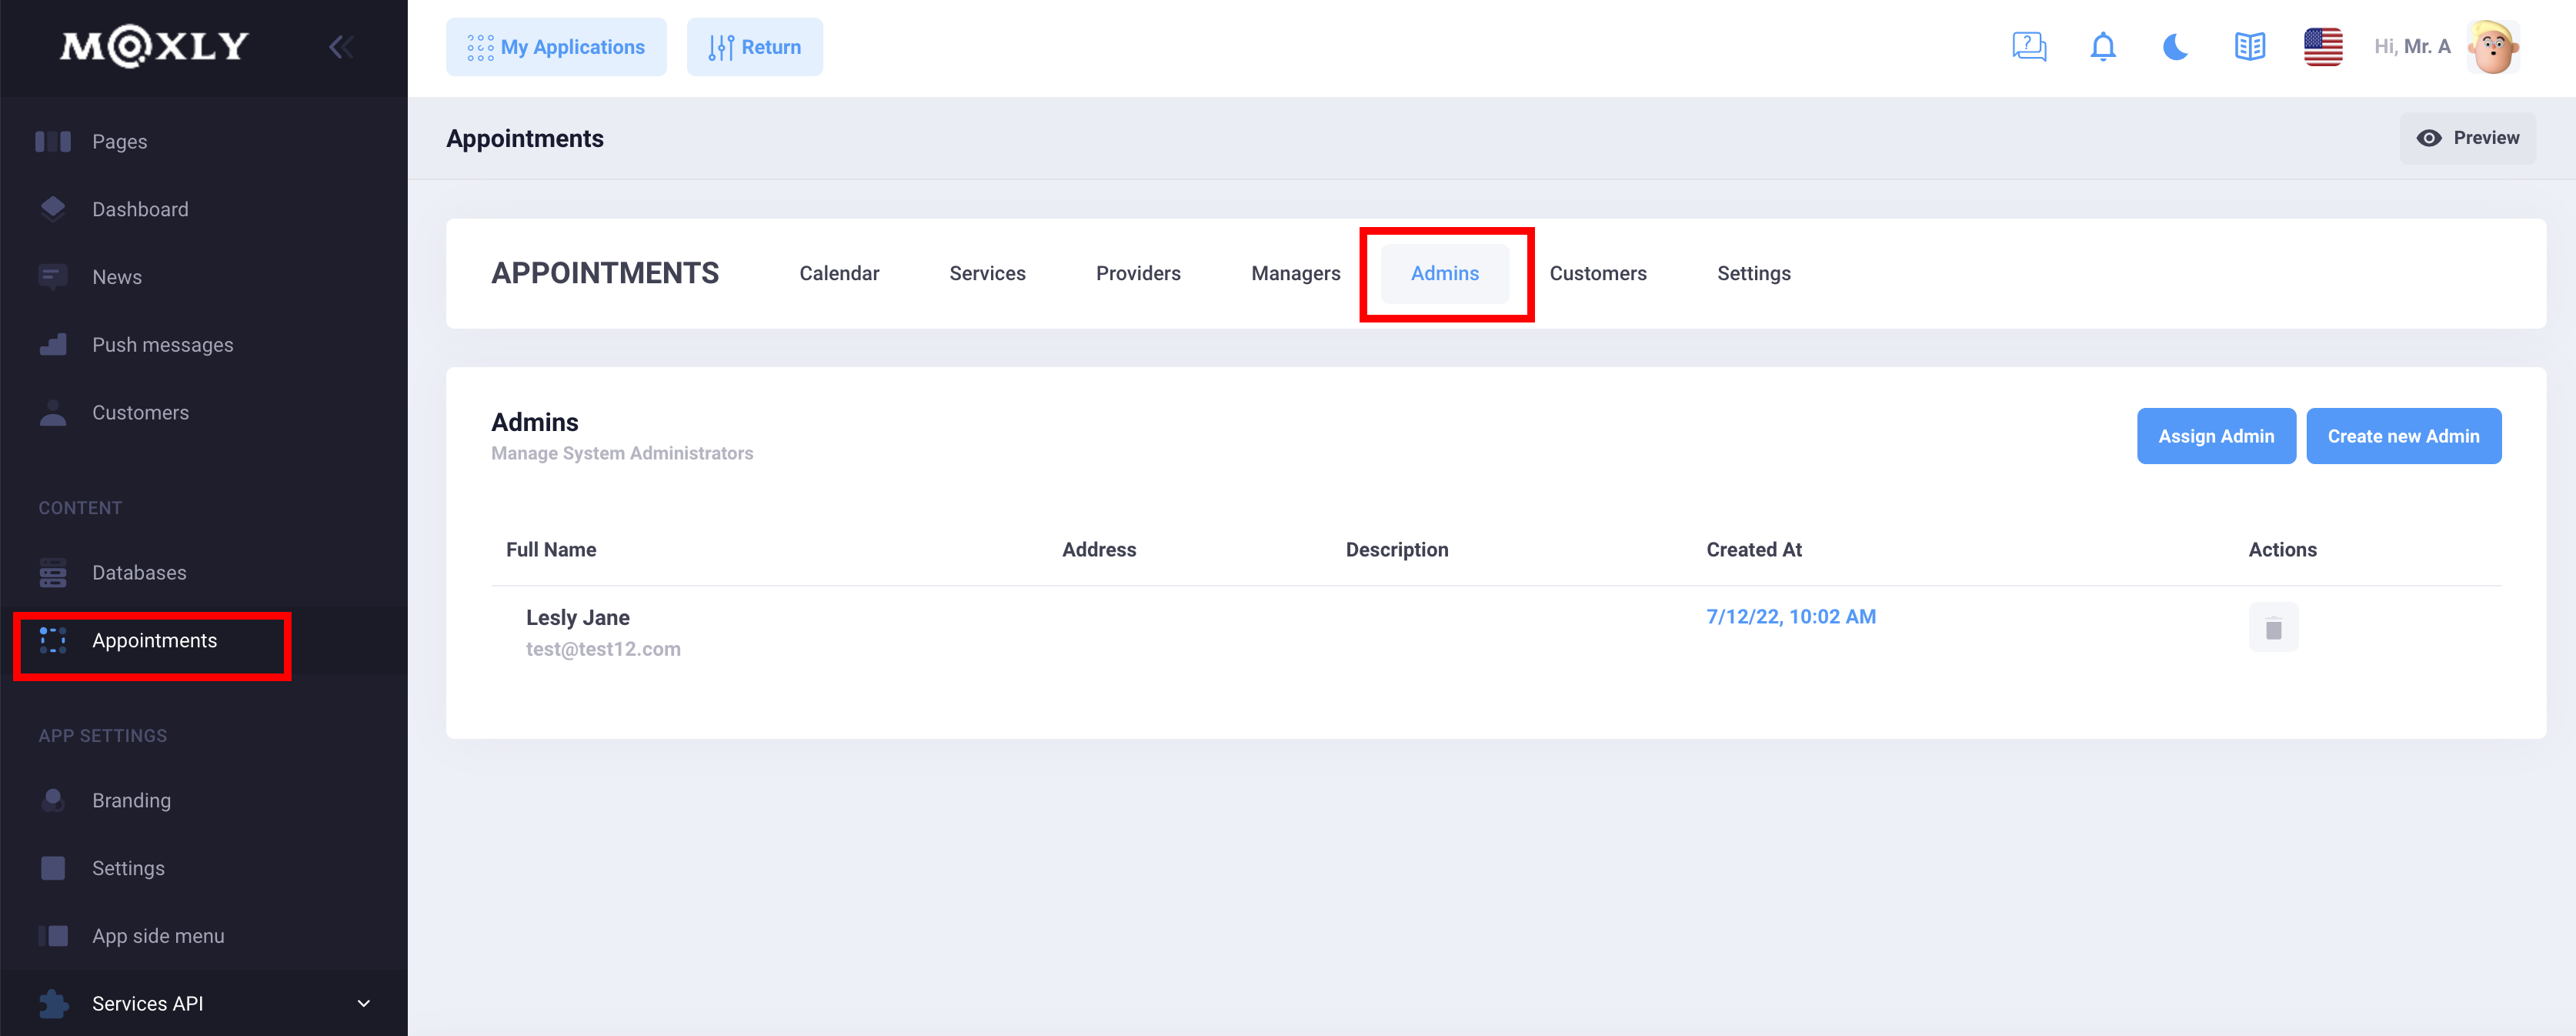
Admins have all the permissions unlocked as they do have control over all the resources and actions available in the system and can manipulate all the stored information. That also includes the service definition, the user management, system-wide settings.
Step 3
Appointment Calendar
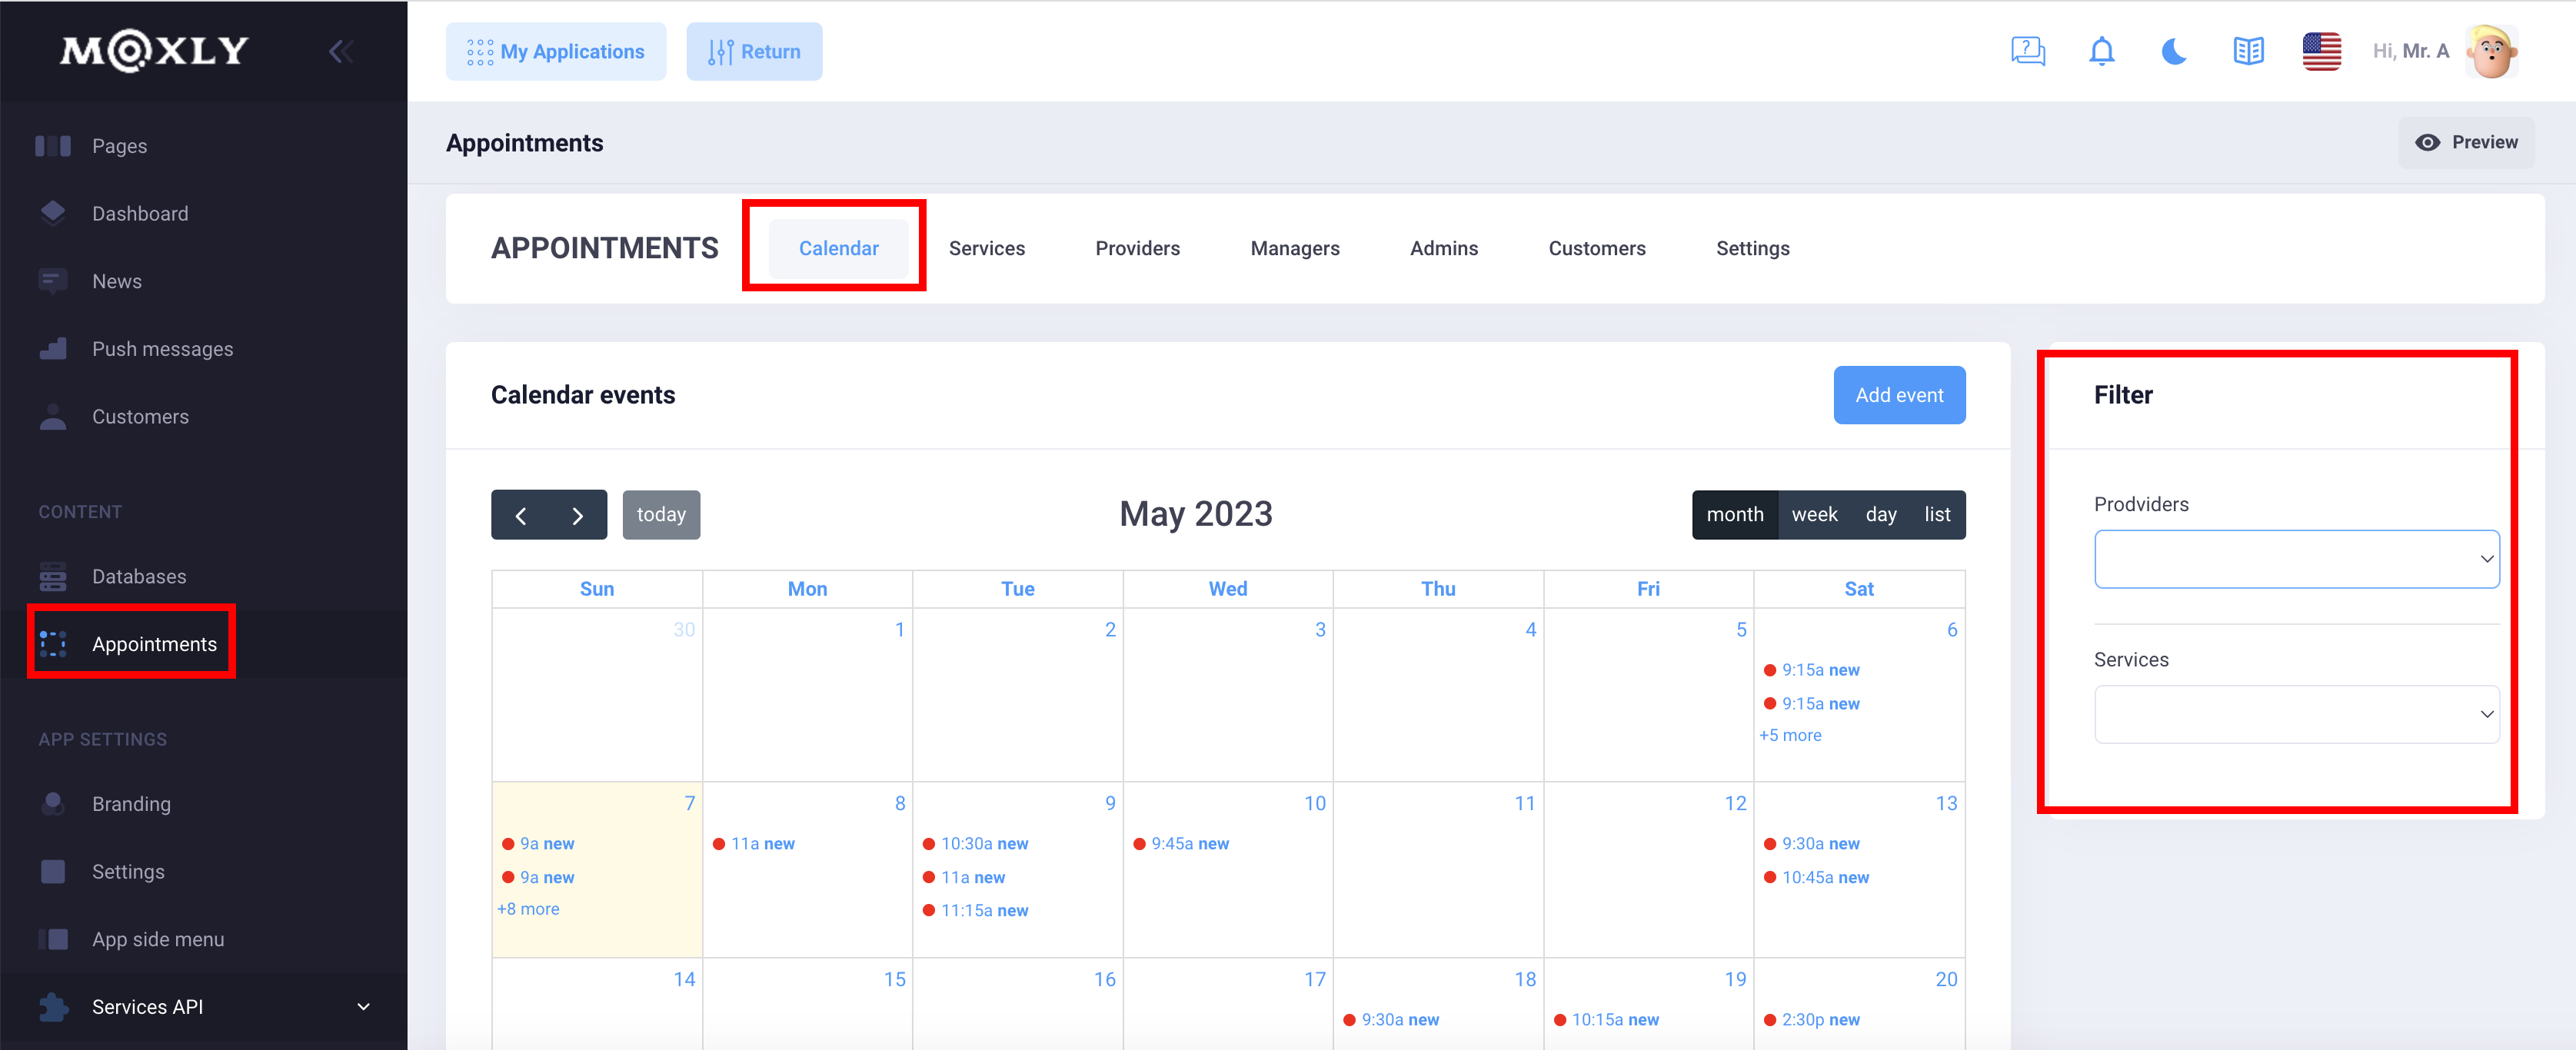
All your appointments are shown and synced with your calendar
- Directly open appointment from calendar
- Calendar colored events
- Ability to edit a meeting
- Ability to delete an appointment
- Ability to cancel an appointment
- Appointment Notes
- Reschedule an appointment (mark as current)
Creating Screens in an Application
Customize the user interface in the app according to your brand. Make the pages in the application convenient for your customers. Here are the main components you will need to set up the Apointment function:
- Default user login form
- User registration form
- Text
- Simple list
- Appointment Calendar
Additionally, you can use button components, images, etc. to improve the design of your pages in the application
By default, you will need to create 10 pages:
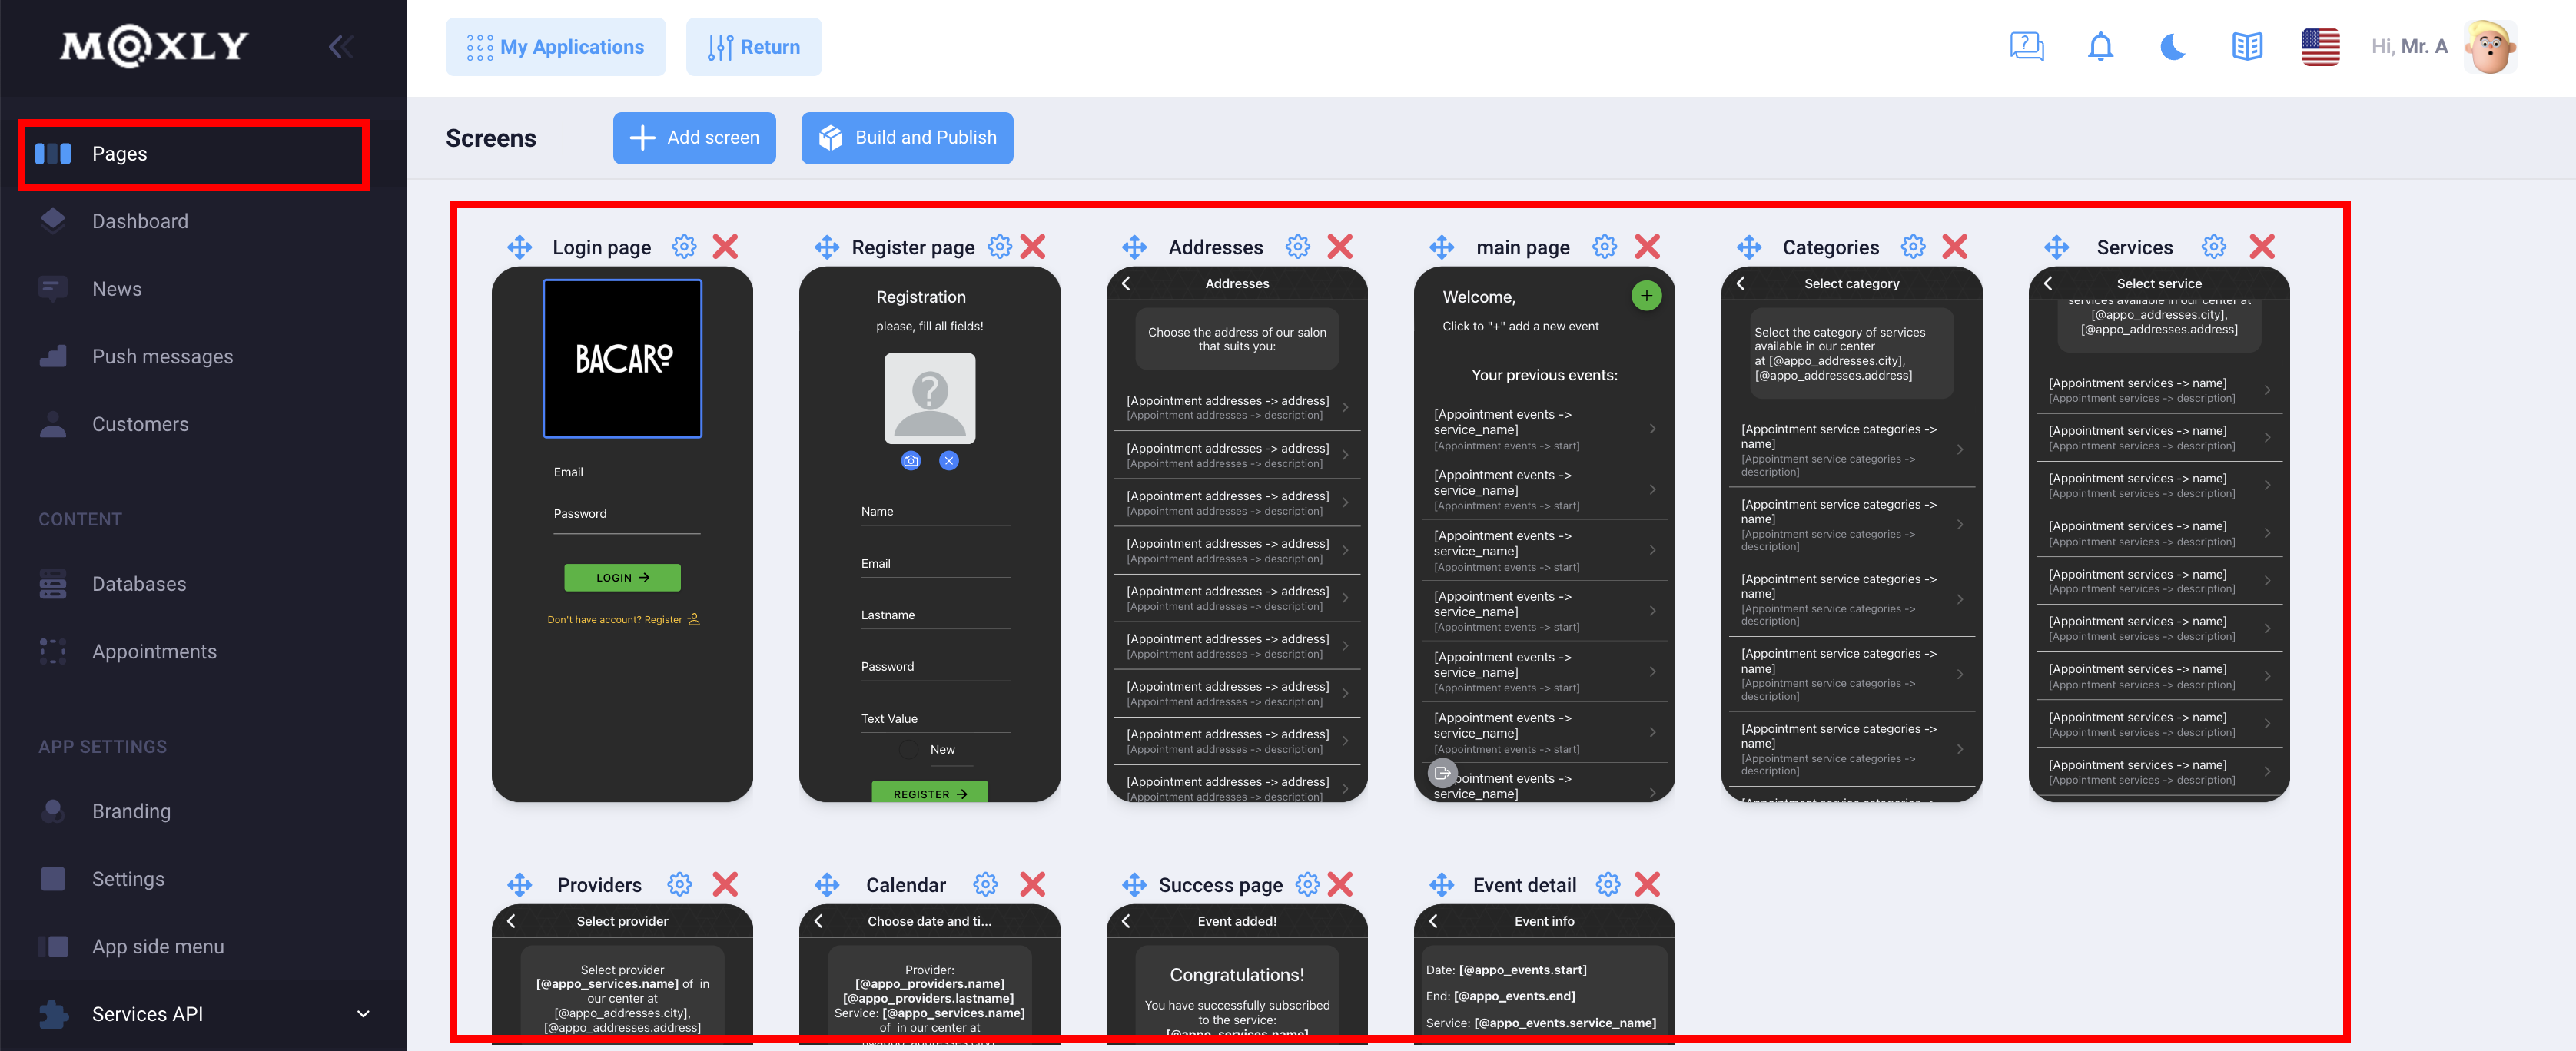
The process of online registration for the service is as follows:
Client registration/authorization - address selection (if you have only 1 address, then you can skip this step) -- selecting a category (if you have only 1 category, then you can skip this step) --- choosing a service (if you have only 1 service, then you can skip this step) ---- selecting an artist (if you have only 1 artist, then you can skip this step) ----- date and time selection
- Login page
- Register page
- main page
- Addresses
- Categories
- Services
- Providers
- Calendar
- Success page
- Event detail
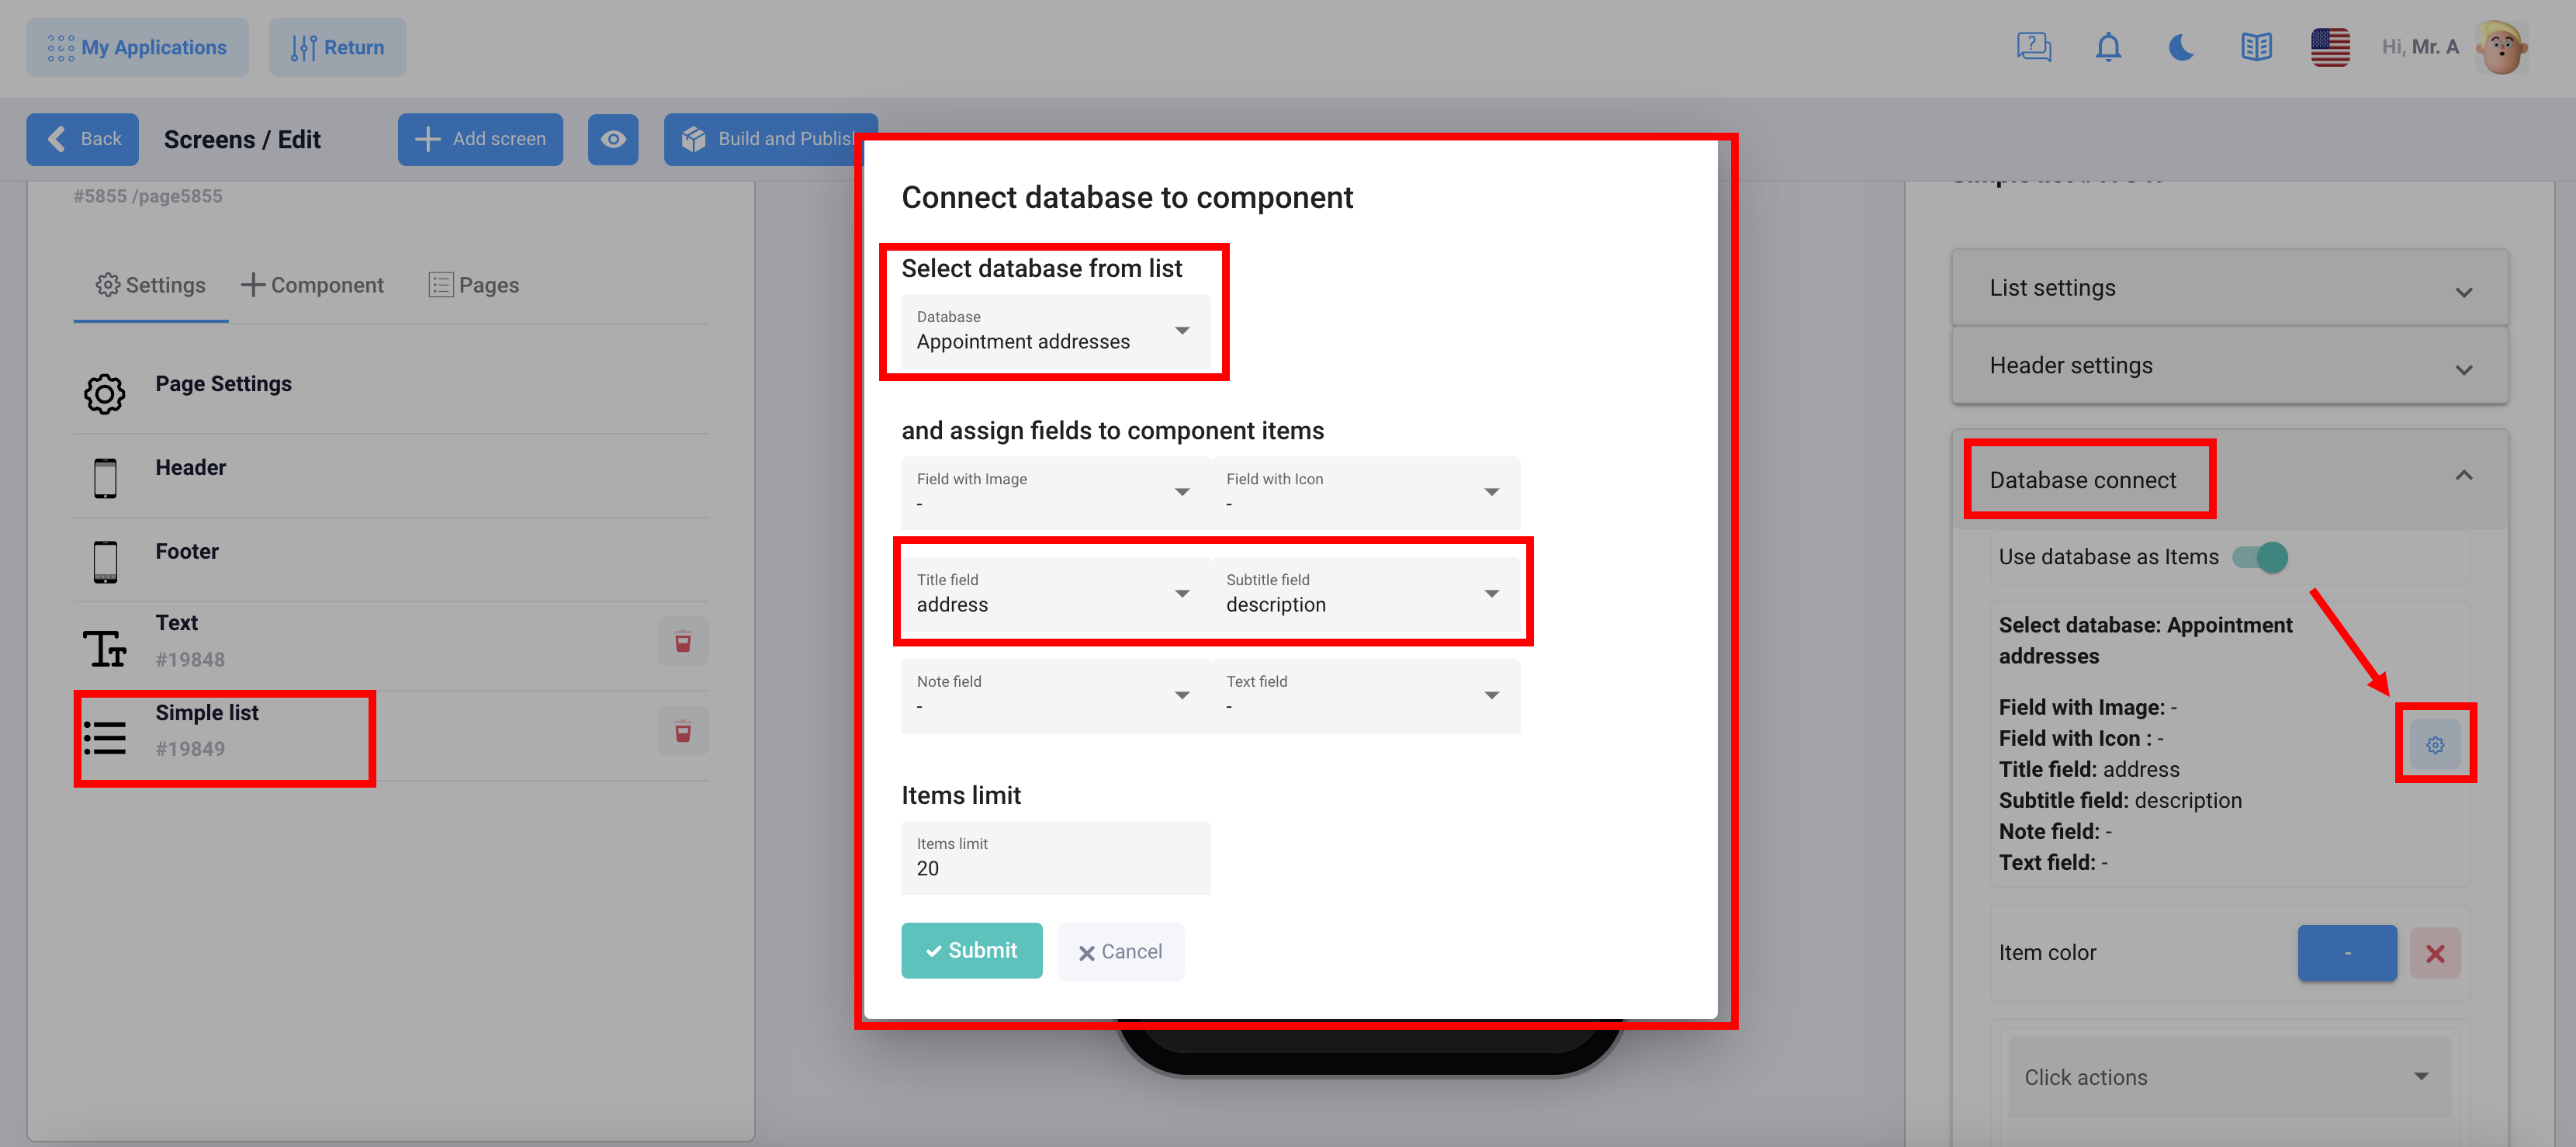
So, the information output settings are very simple, you will need to use a database connection (appointment)
Simple list component
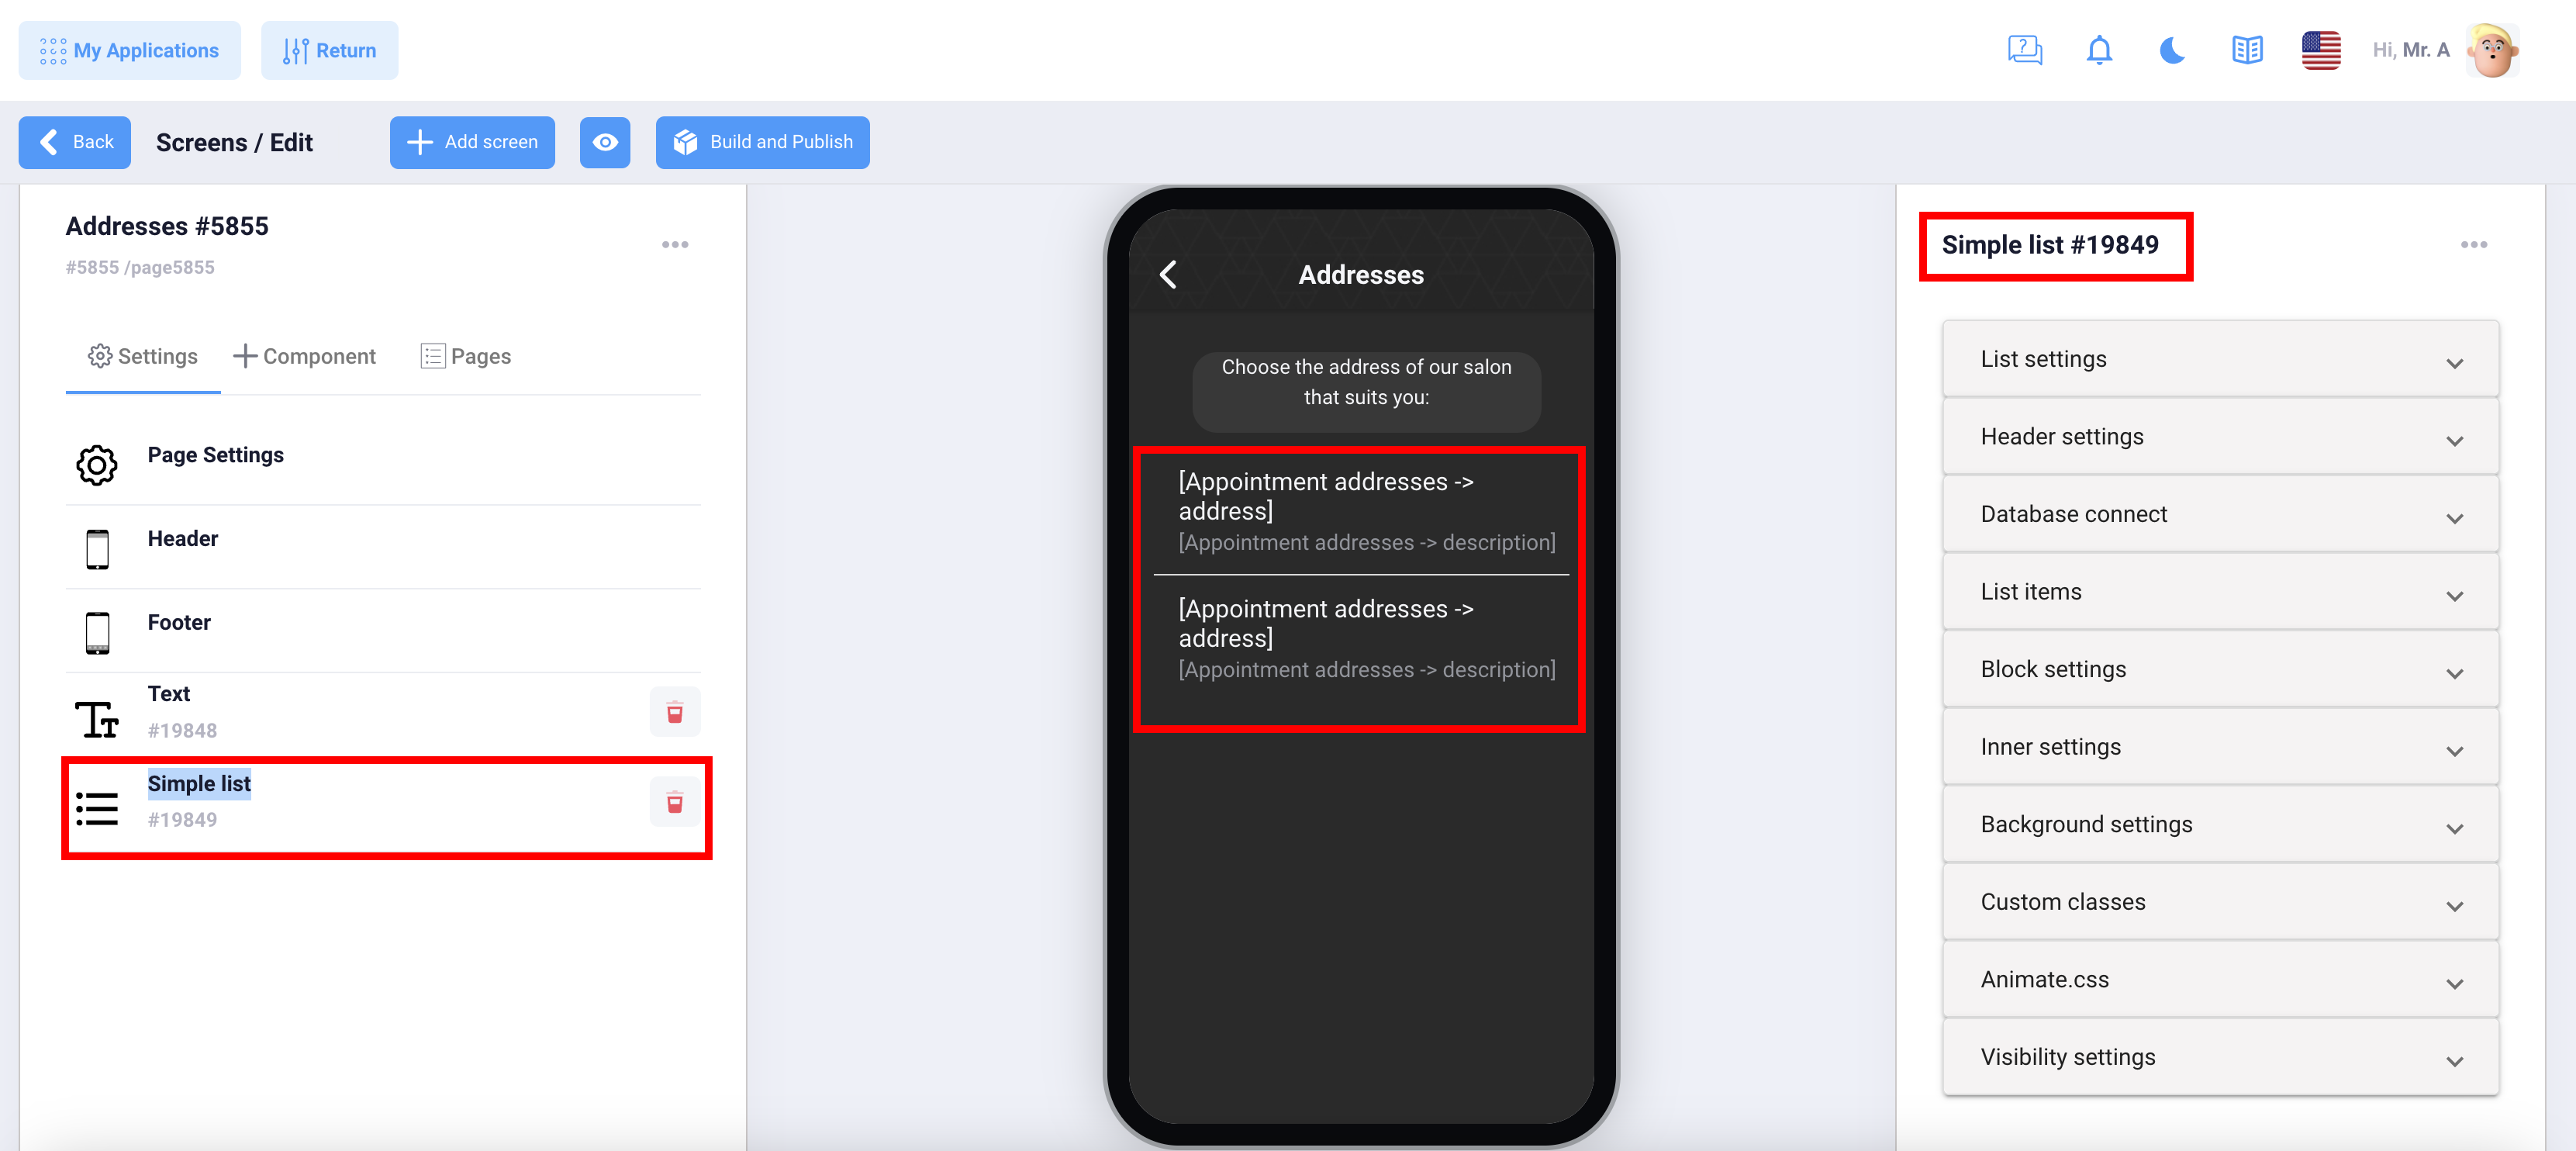
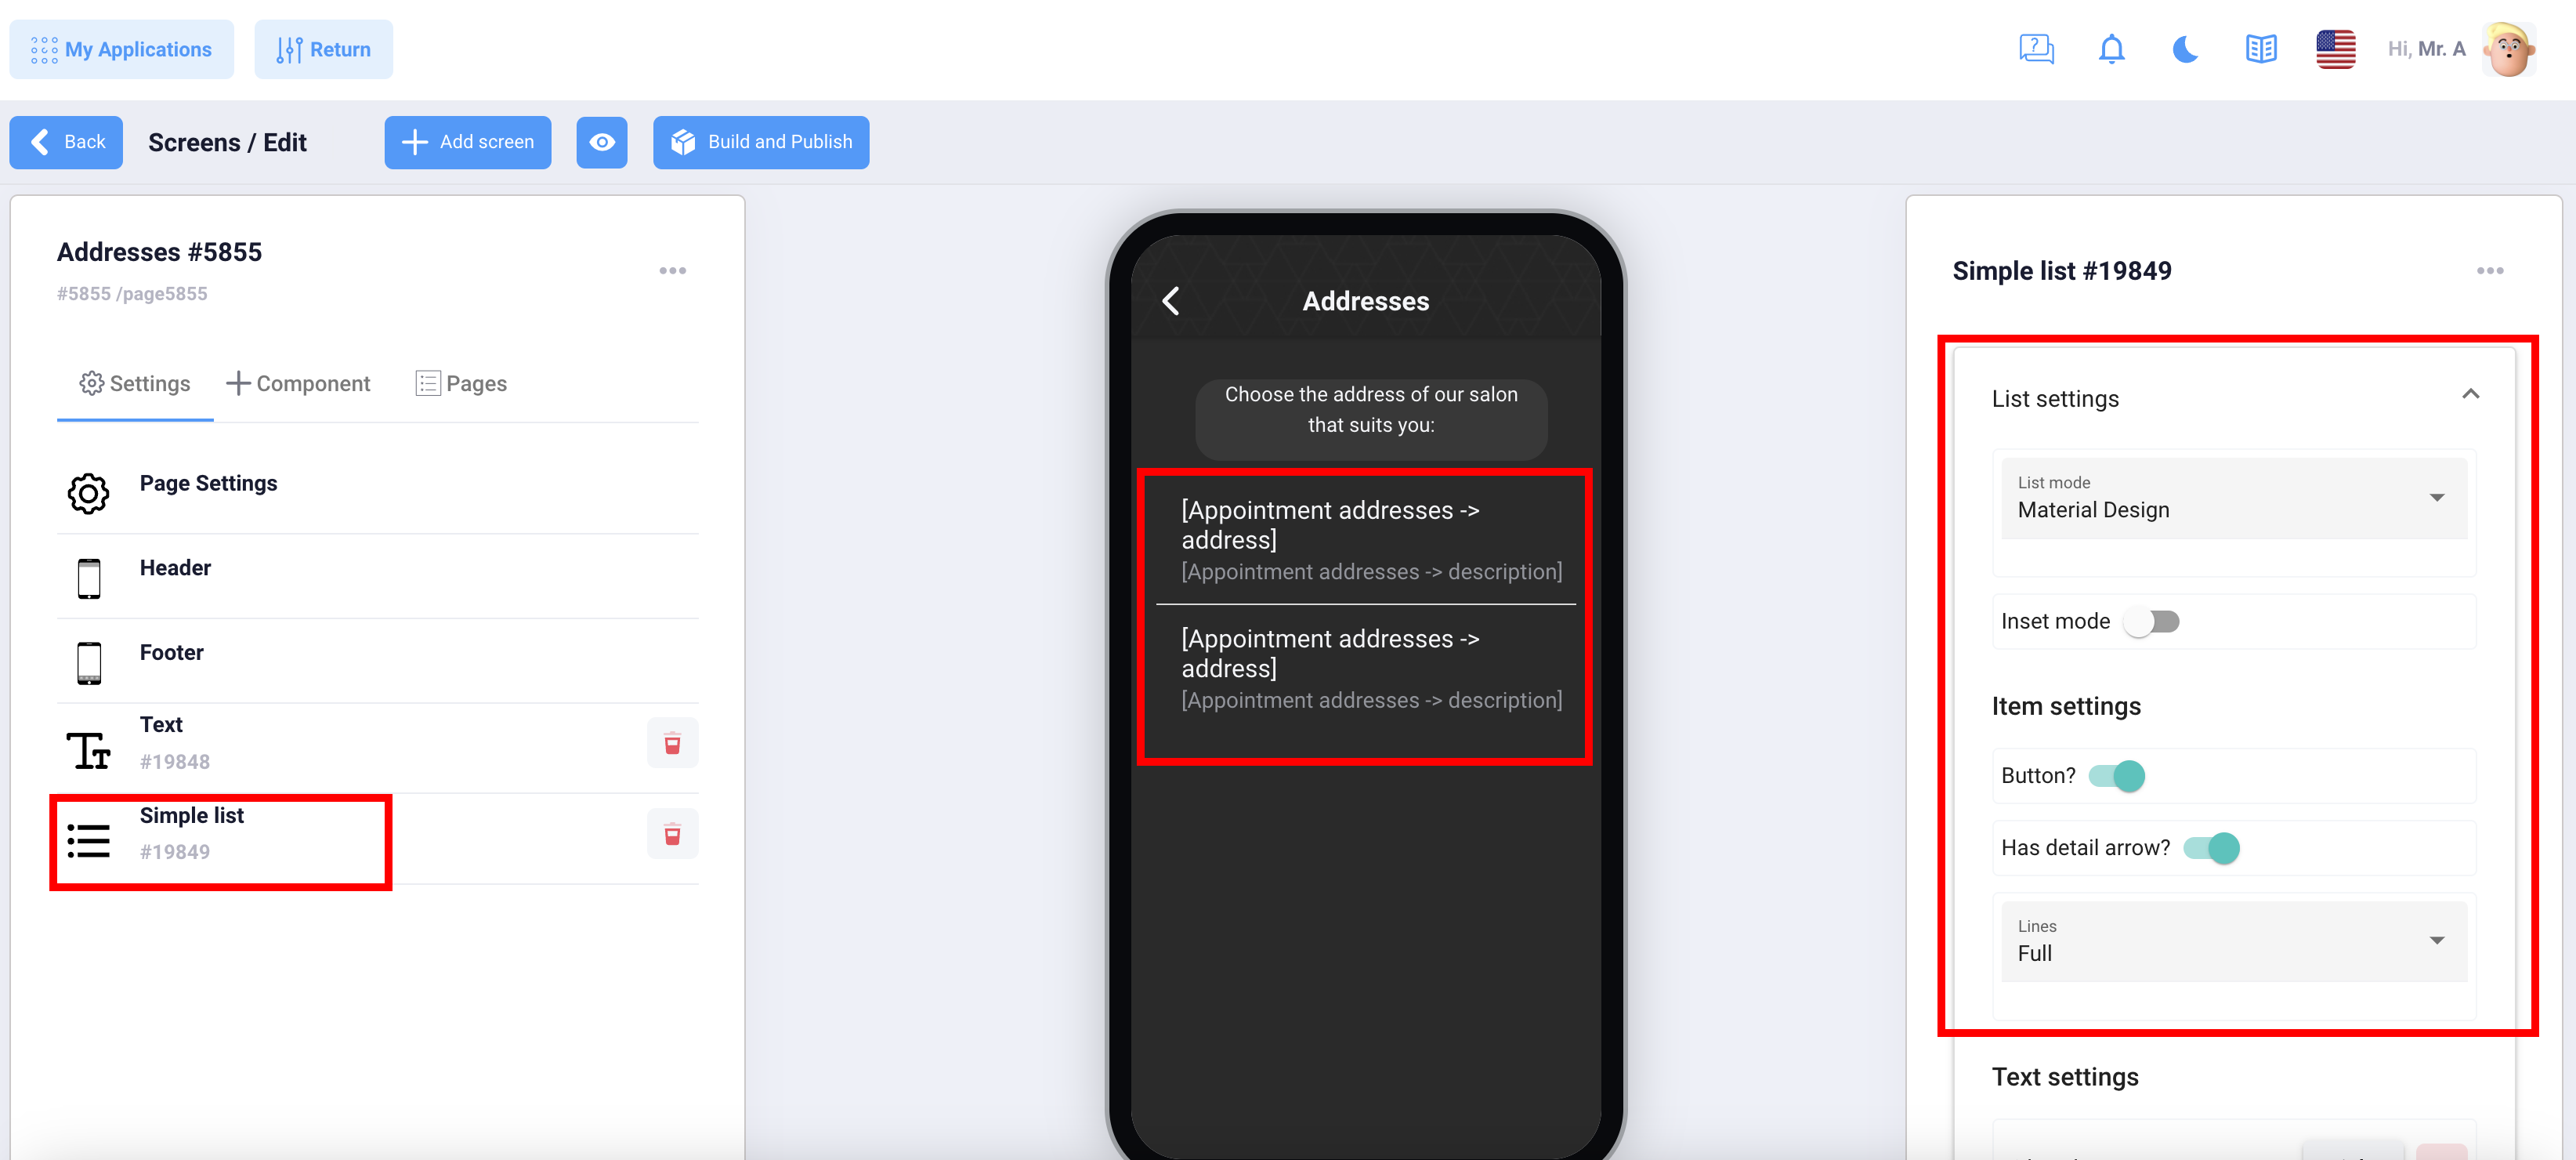
In this example, we are setting up a page with a list of places and adding our addresses. All other functions, categories, services, providers are configured in the same way.
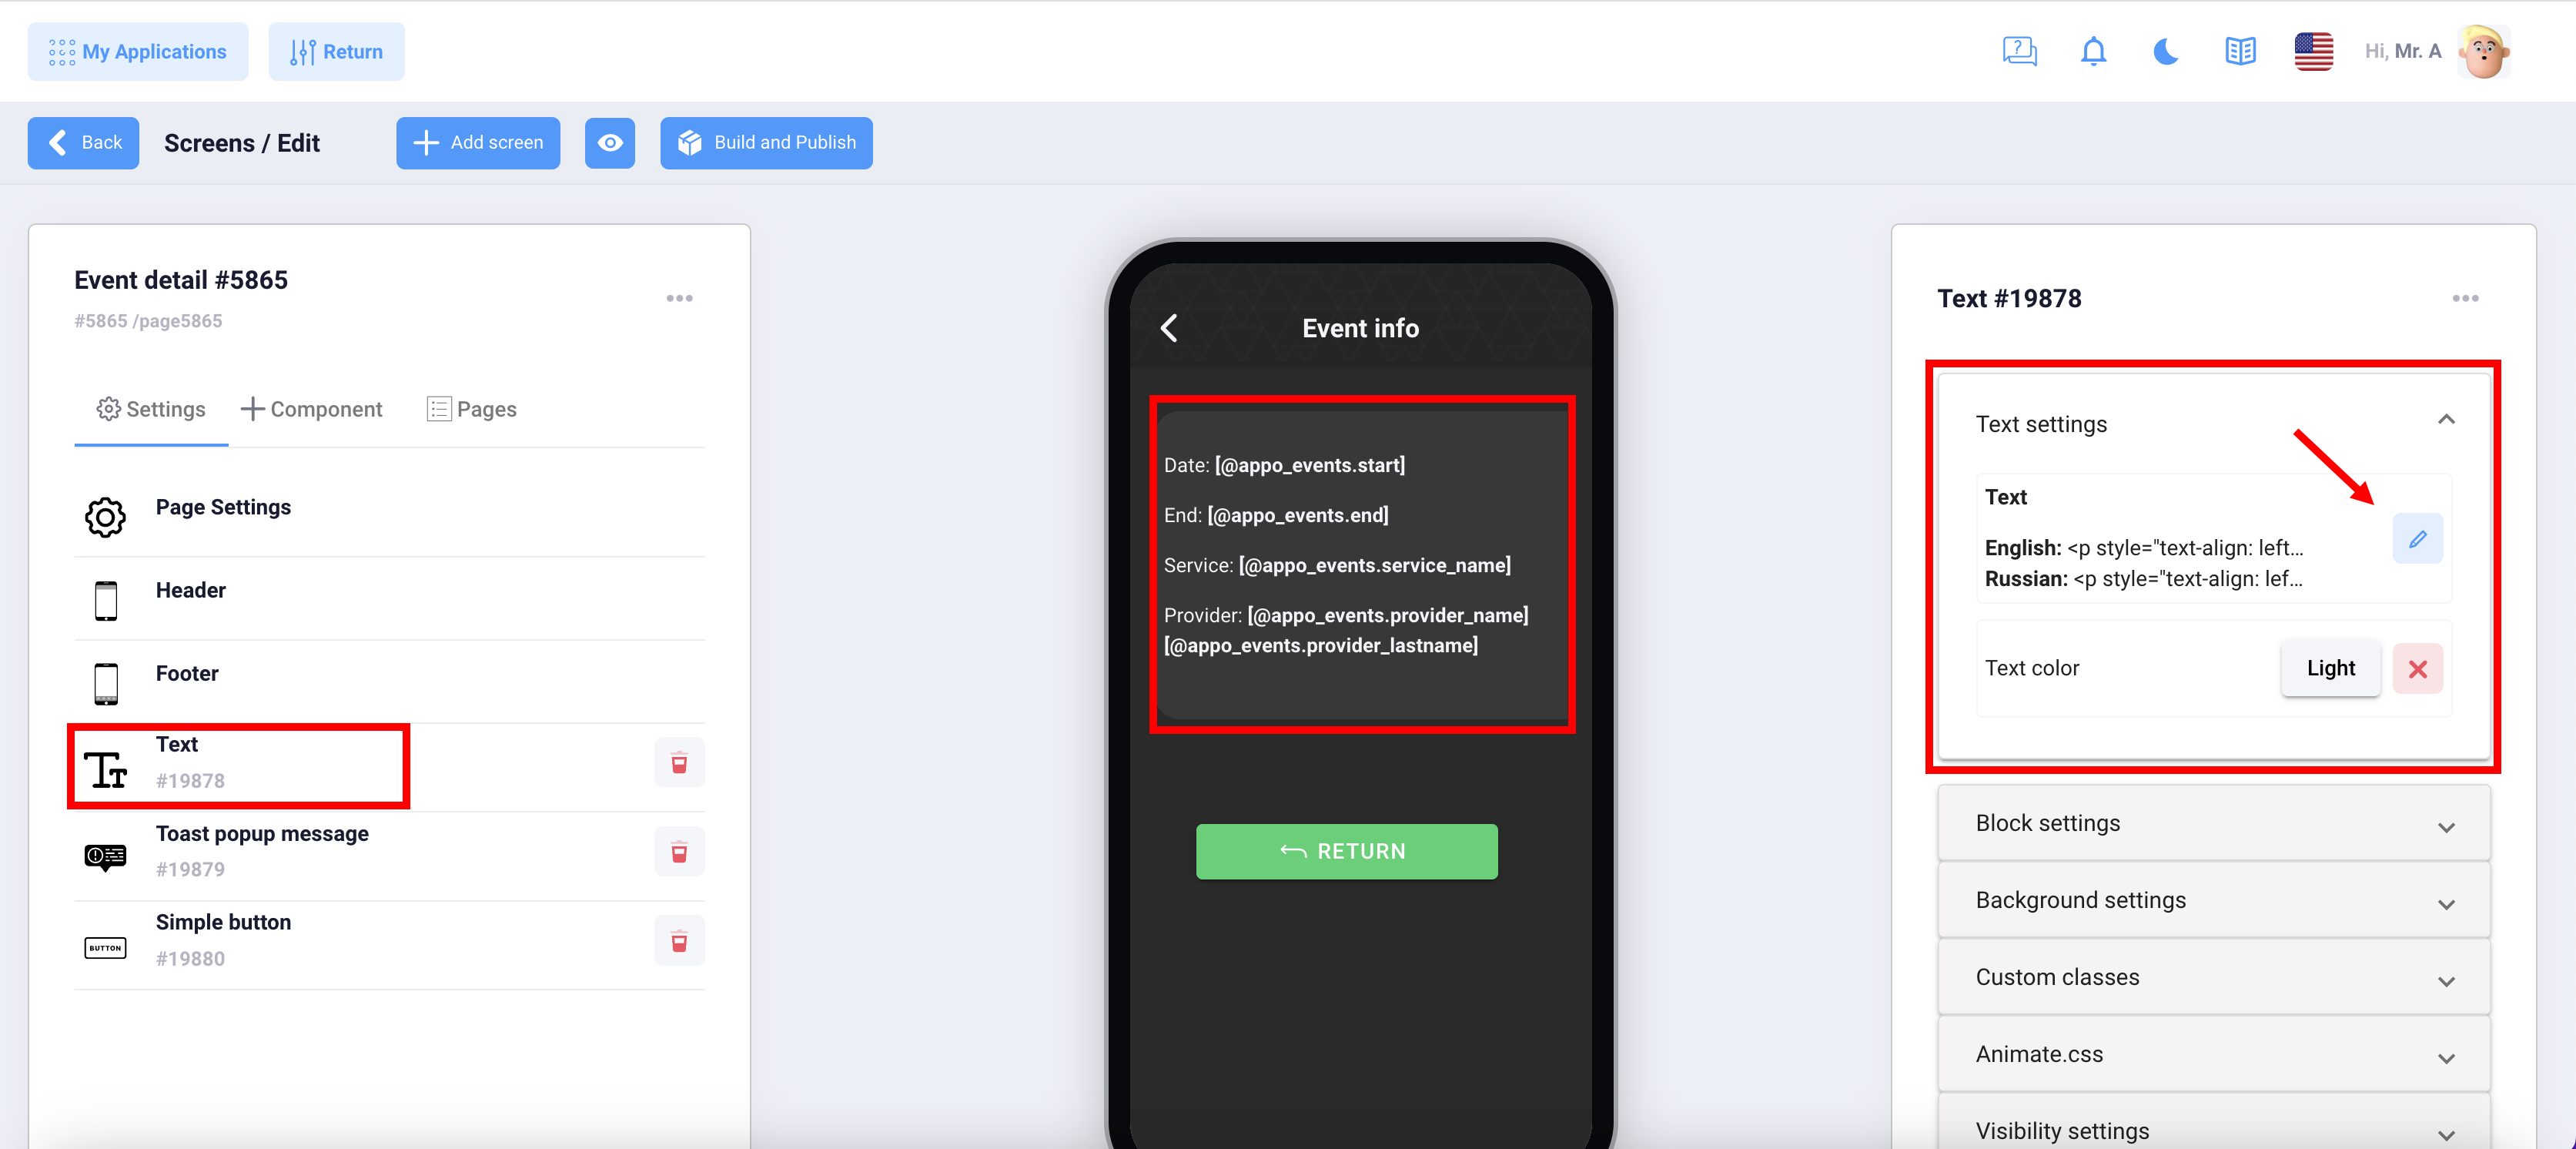
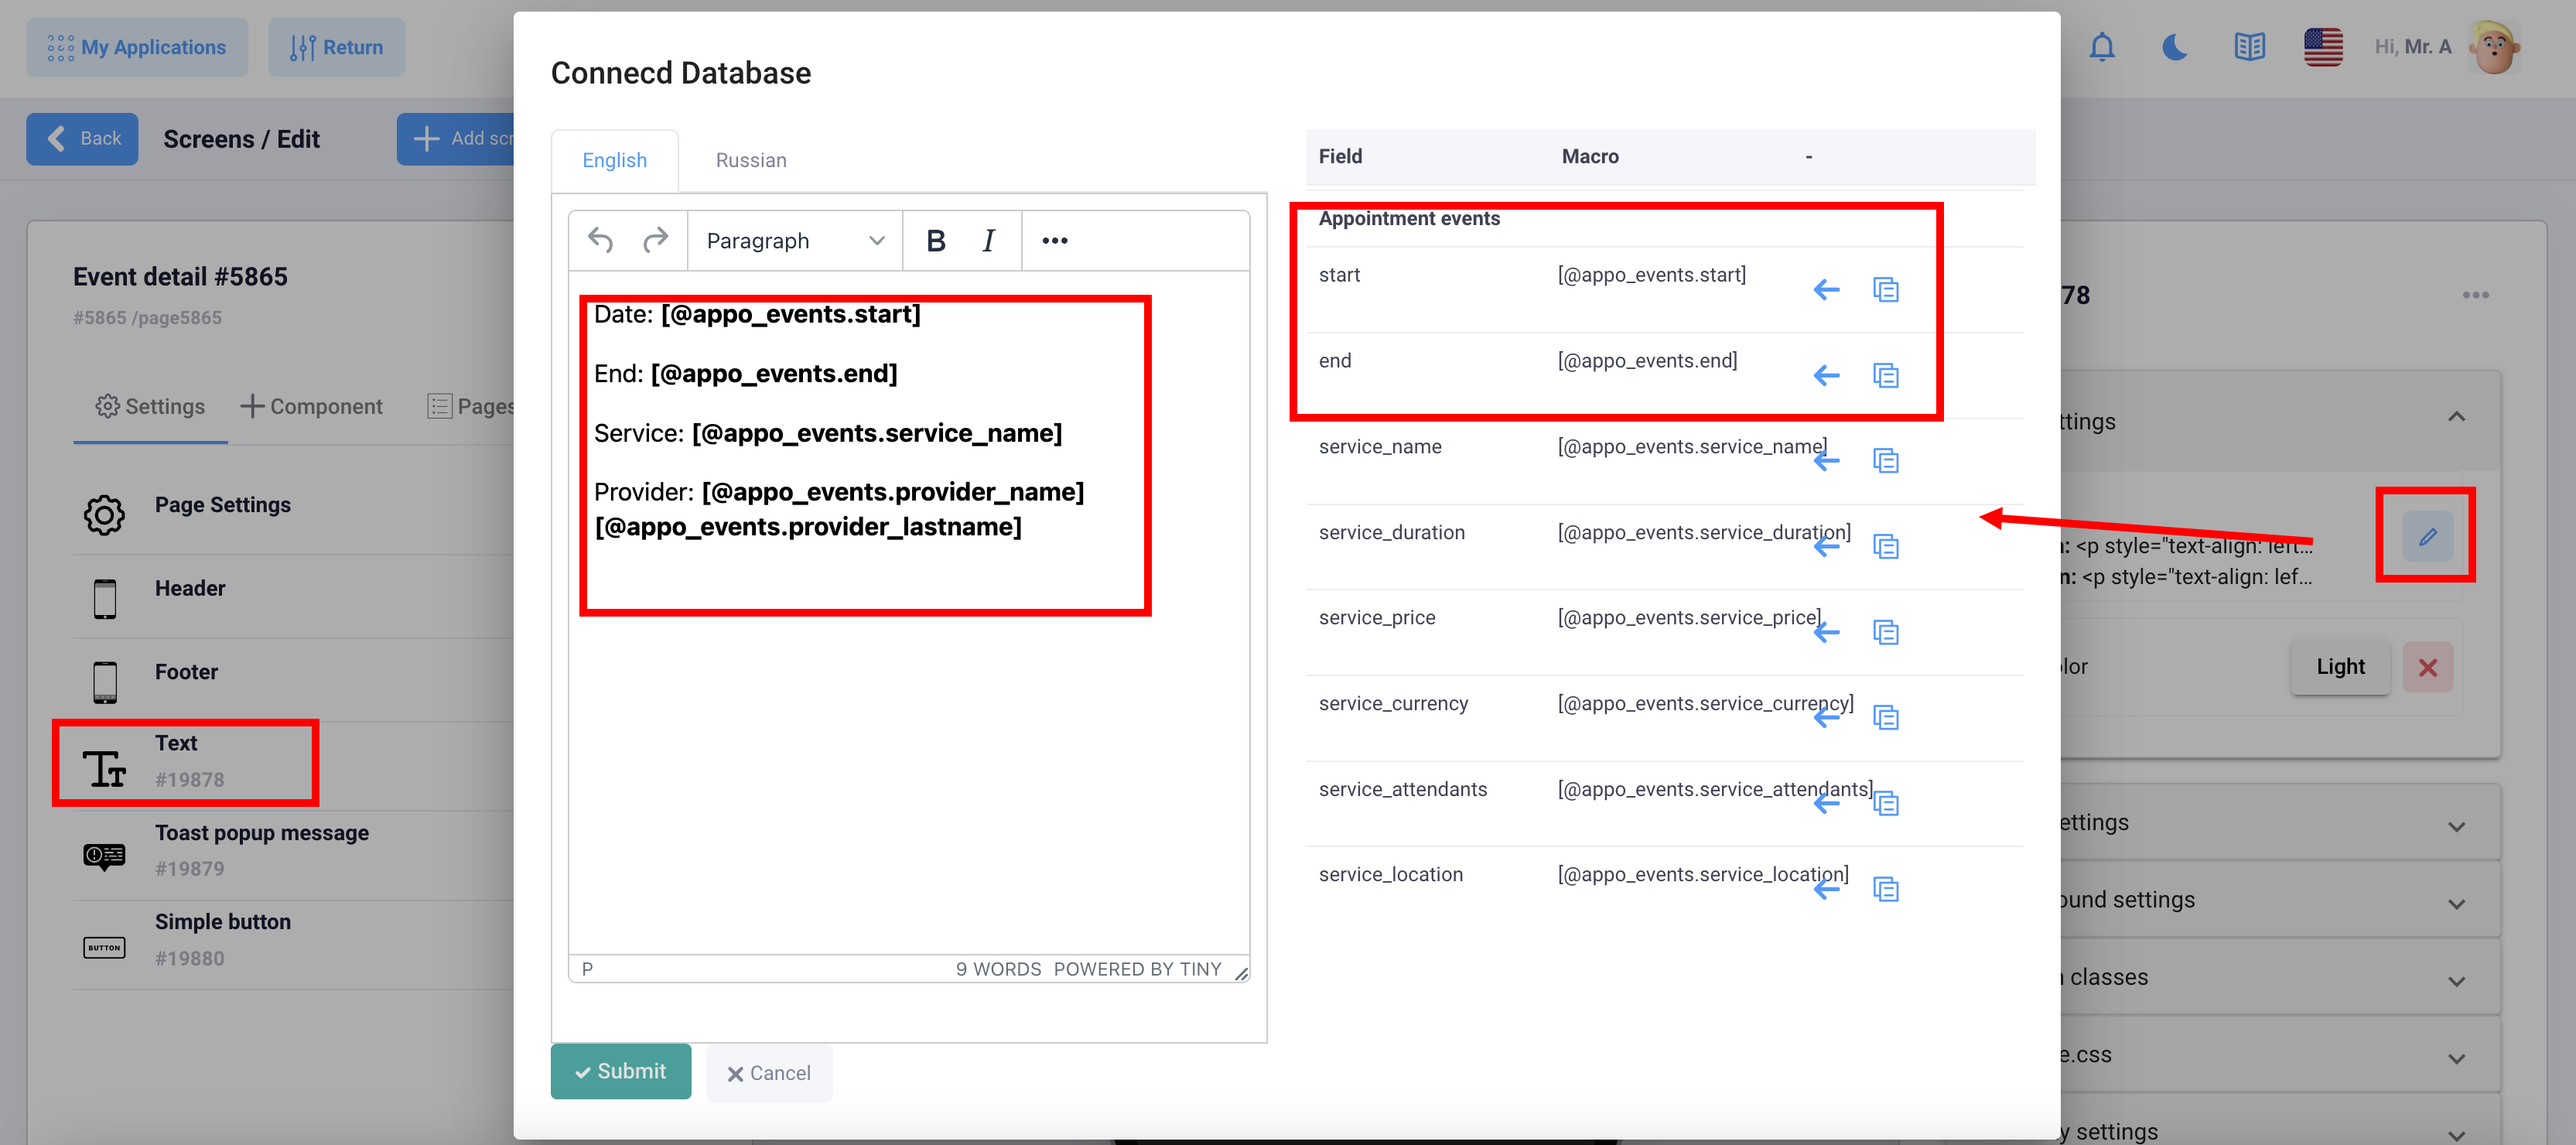
Text component
On each page you can customize the displayed text, it is recommended to use macros for this:
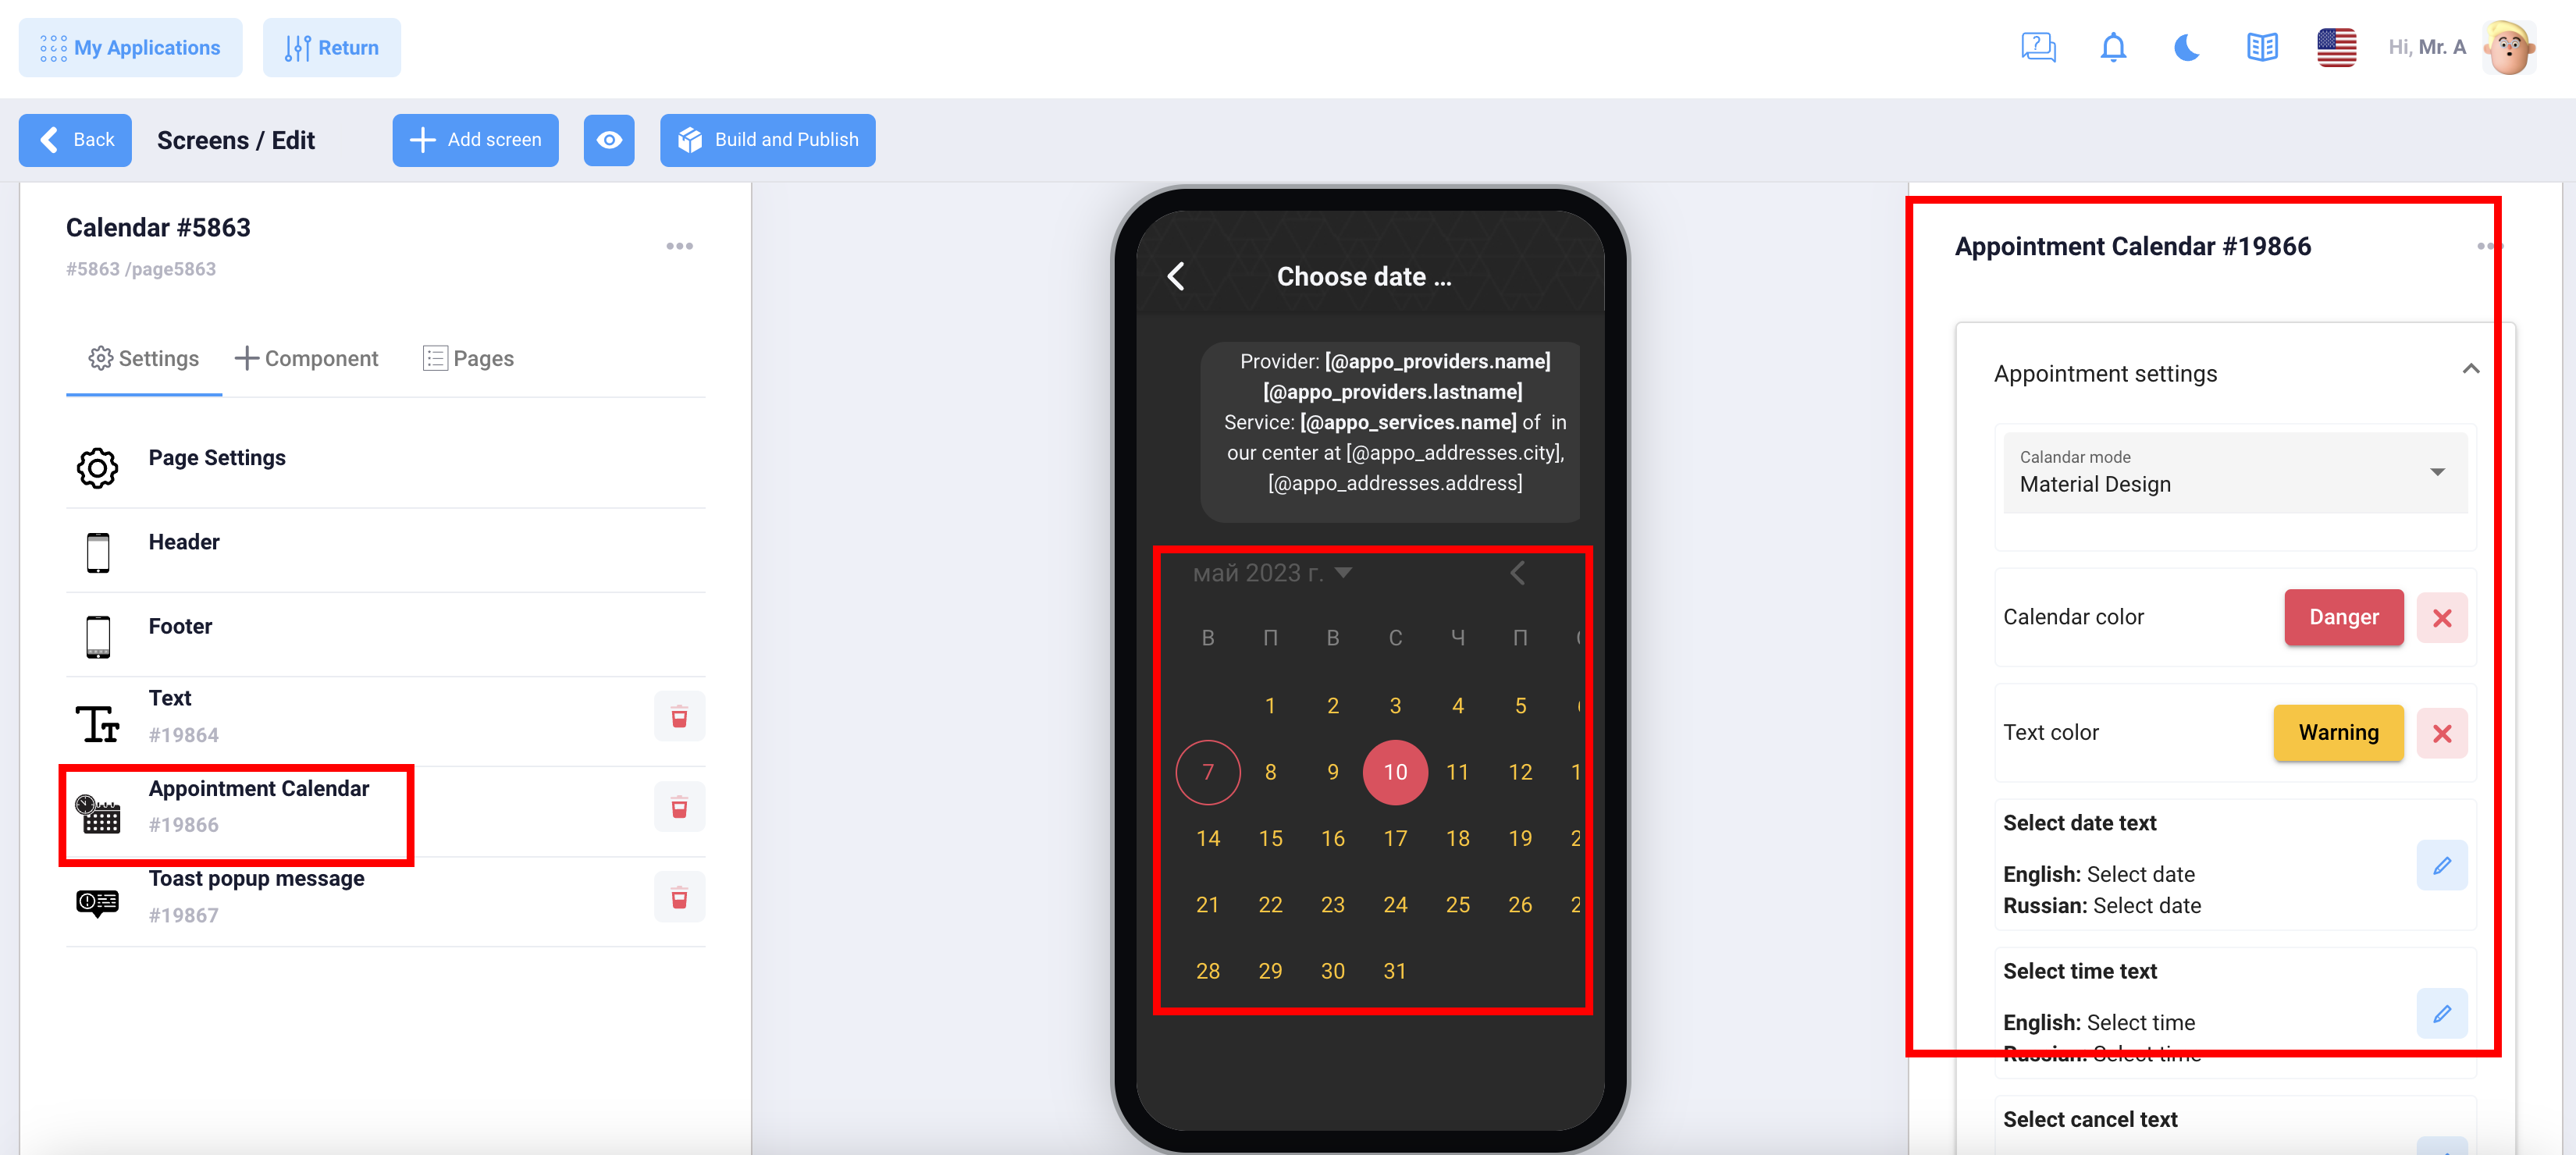
Calendar component
At the last step, after selecting the provider, the client selects the date and time in the calendar
