Installing Moxly CMS
Administrator settings
Administrator settings
Default account
Immediately after installation, the first thing (for security reasons) is to change the data of the default account of the platform administrator.
Default data after installation: login admin@admin.com password: admin.
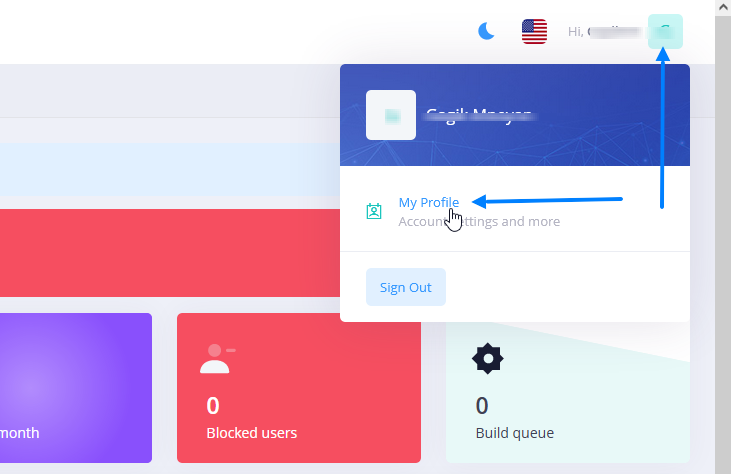
And so, to replace the data with your own, go to the My Profile page by clicking on the icon next to the Name on the left in the site header.
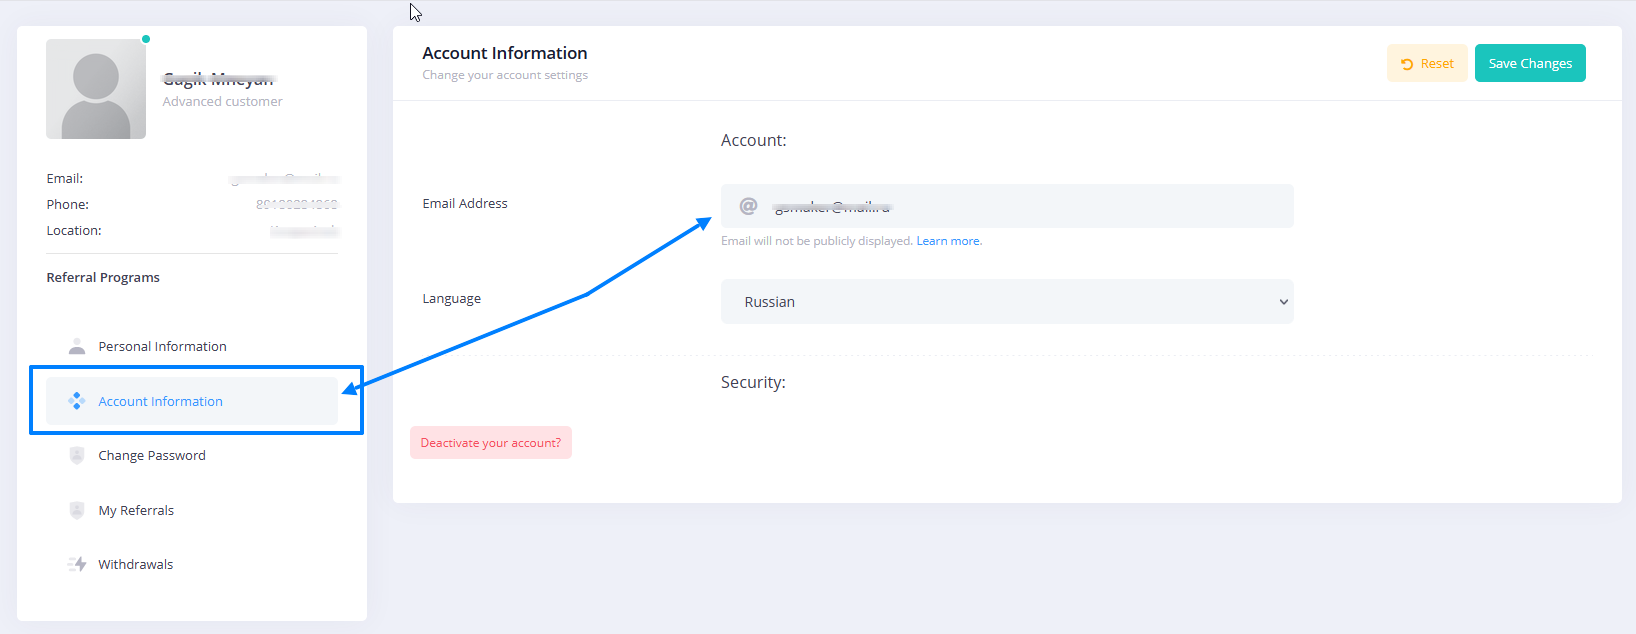
Next, on the profile settings page, go to the “Account Information” tab.
And in the “Email address” field, enter your email address. Once completed, click “Save Changes”.
Next, go to the “change password” page and specify the password: admin in the “current password” field, and a new password twice in the “new password” field and “Verify password”, respectively.
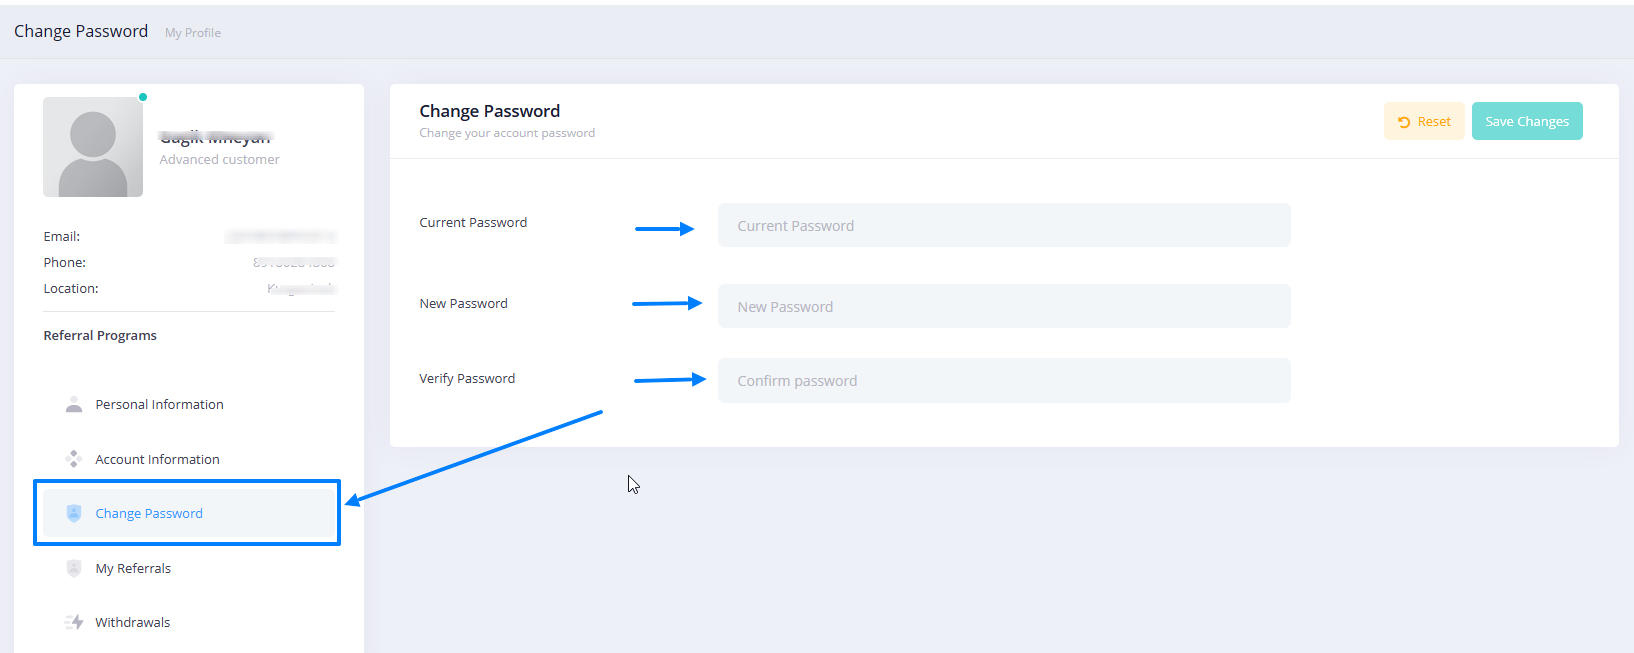
Once completed, click “Save Changes”.
Install updates
After setting up a default account, you need to check and install (if available) system updates.
- In the side menu, go to the “Updates and modules”.
- Select a subsection (tab) “Platform update”.
- Check for updates by clicking the “Check now” button.
- If there are updates, then click the “Update now” button below.
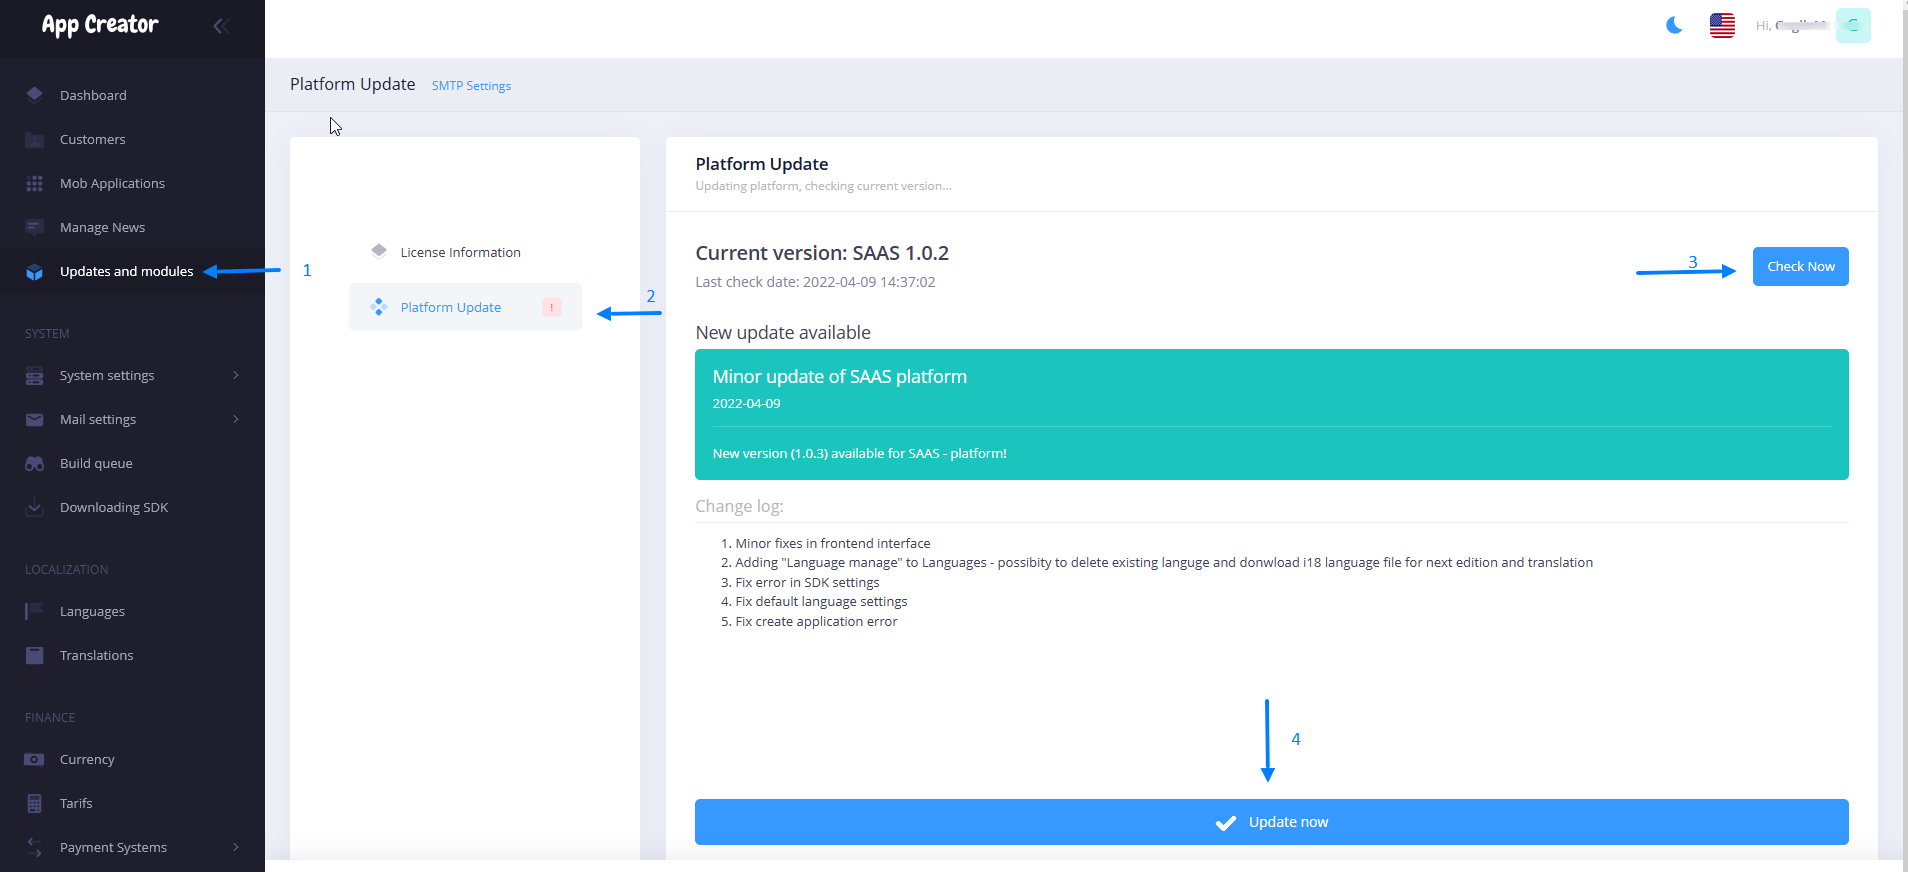
WARNING! Be sure to wait for the update installation to complete and don’t reload the page!
After the installation is complete, you will see a window informing you that the process was completed successfully. And the platform will automatically restart!
System settings
At this stage, you need to make a number of important platform settings for the full operation of the system.
Branding
So the brand settings include several tabs: Image on spinner | Image in menu | Background image on auth page | Logo image on auth page | Load favicon.ico
First Step – “Image on spinner”.
To set a custom image to be displayed on the loading screen above the spinner, you need to:
- 1. In the main menu on the left, select the drop-down section “System Settings”. Next, select “Branding”.
- 2. Select the “Image on spinner” tab.
- 3. Click on the “pencil” icon (see screenshot).
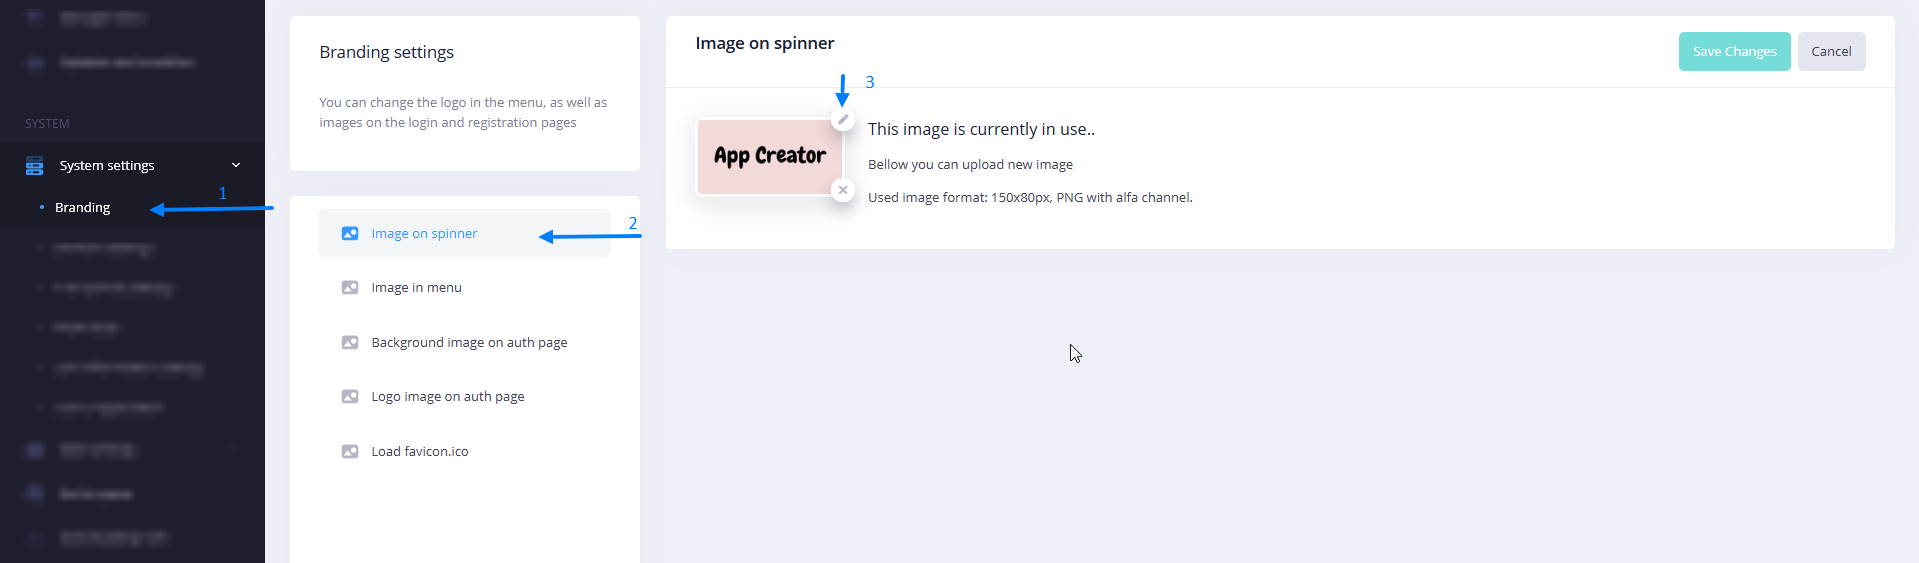
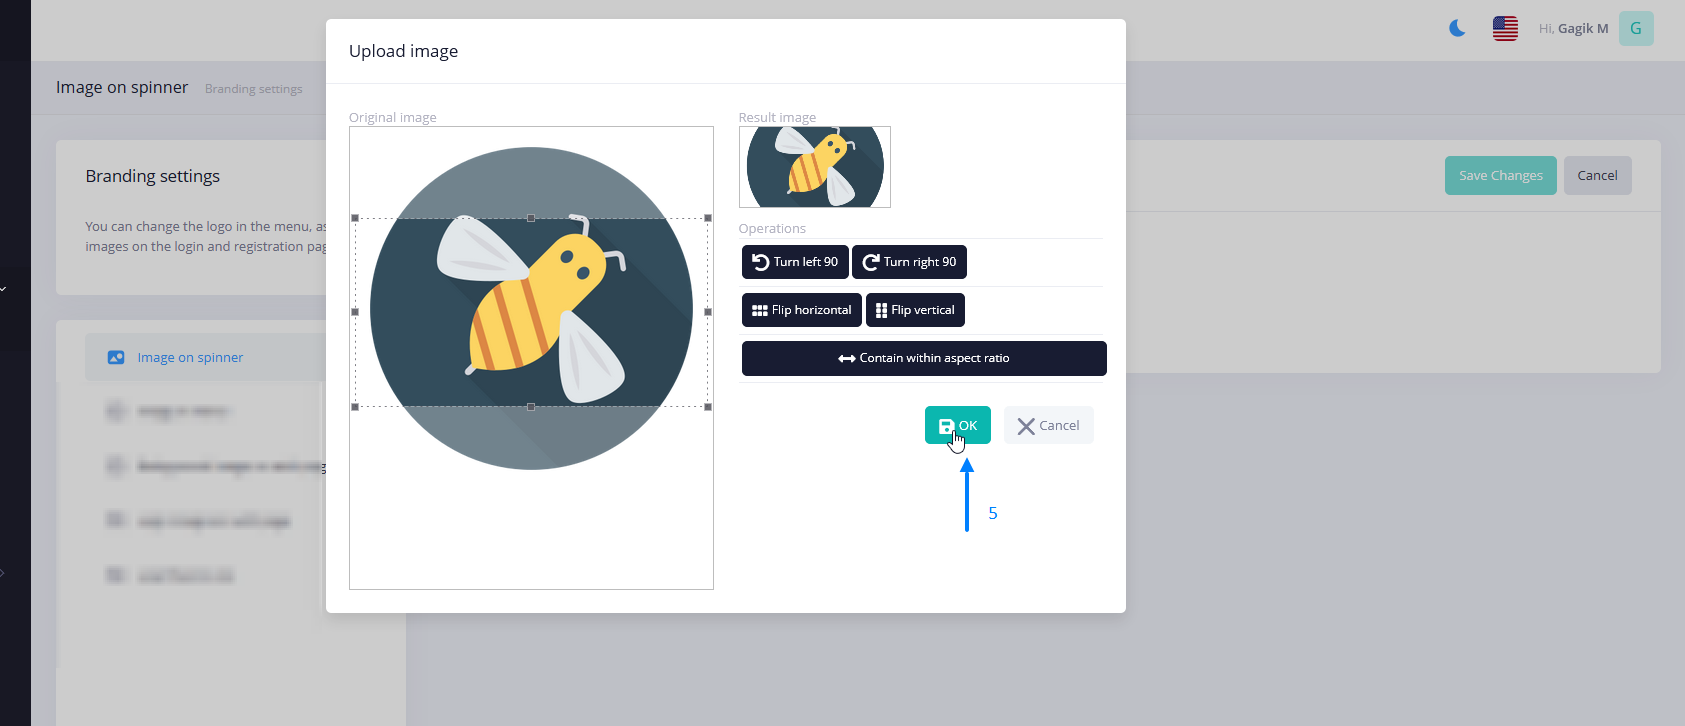
- 4. Next, you need to select the image you need from the disk of your device.
- 5. If necessary, cut it to the desired proportions and using the image editor built into the platform, then click “OK”
6. To complete the installation of the image, be sure to click “Save Changes”
NOTE! Required image format and resolution: 150x80px, PNG with alpha channel
Second step “Image in menu”.
To set the image that is displayed in the main menu from above, you must:
- 1. Located in the “System Settings” section on the “Branding” page – Select the “Image in menu” tab.
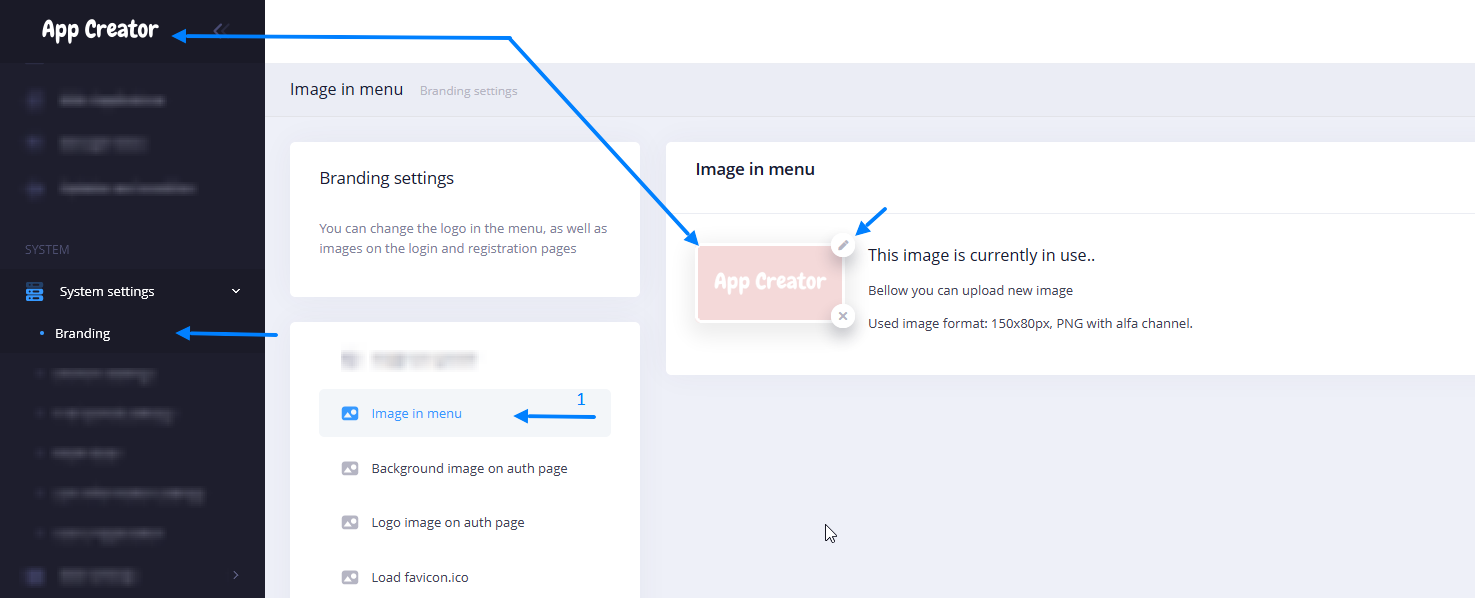
- 2. Next, you need to repeat steps 3 to 5 from the previous step (image on spinner).
- 3. To complete the installation of the image, be sure to click “Save Changes”.
Third step – Background image on auth page
And so for setting the background image, as well as the welcome message on the authorization page:
- 1. Located in the “System Settings” section on the “Branding” page – Select the “Background image on auth page” tab.
- 2. Click on the “pencil” icon (see screenshot) and then you need to select the image you need from the disk of your device and then, if necessary, crop it to the desired proportions using the image editor built into the platform (as in steps 3 to 5 of the first step)
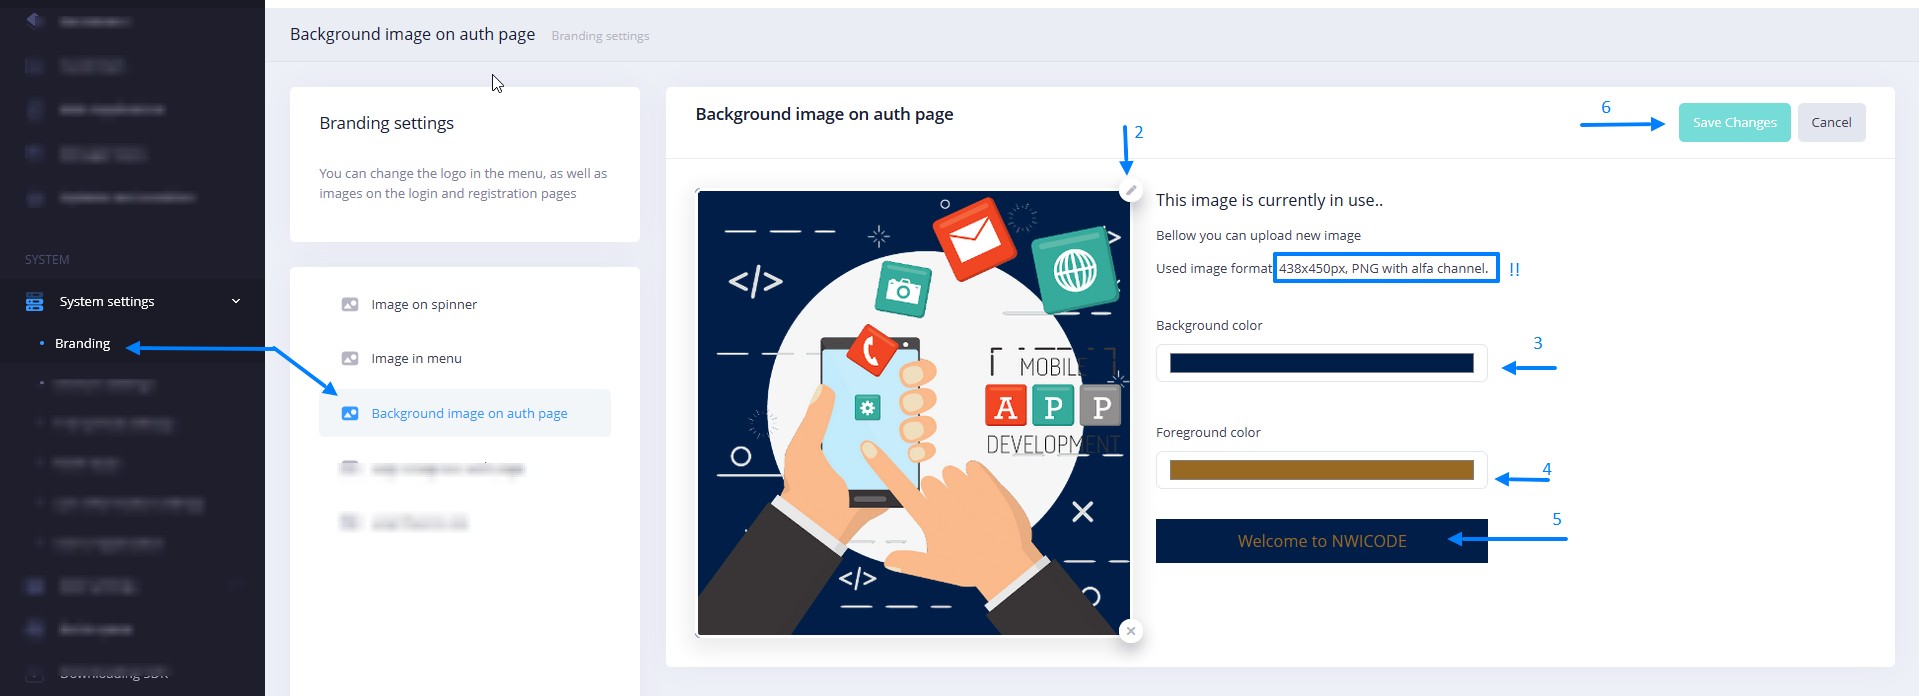
- 3. Specify the Background color fill that will fill the space behind the set early image.
- 4. Specify Foreground color (greeting text color)
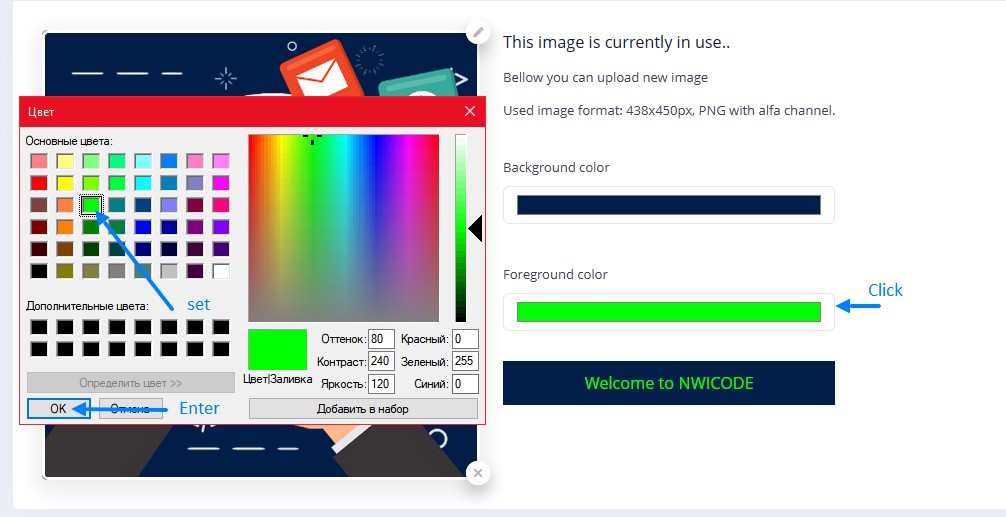
5. Enter your welcome text. To do this, go to the main menu item @“Translations”, and follow the instructions on the screenshot
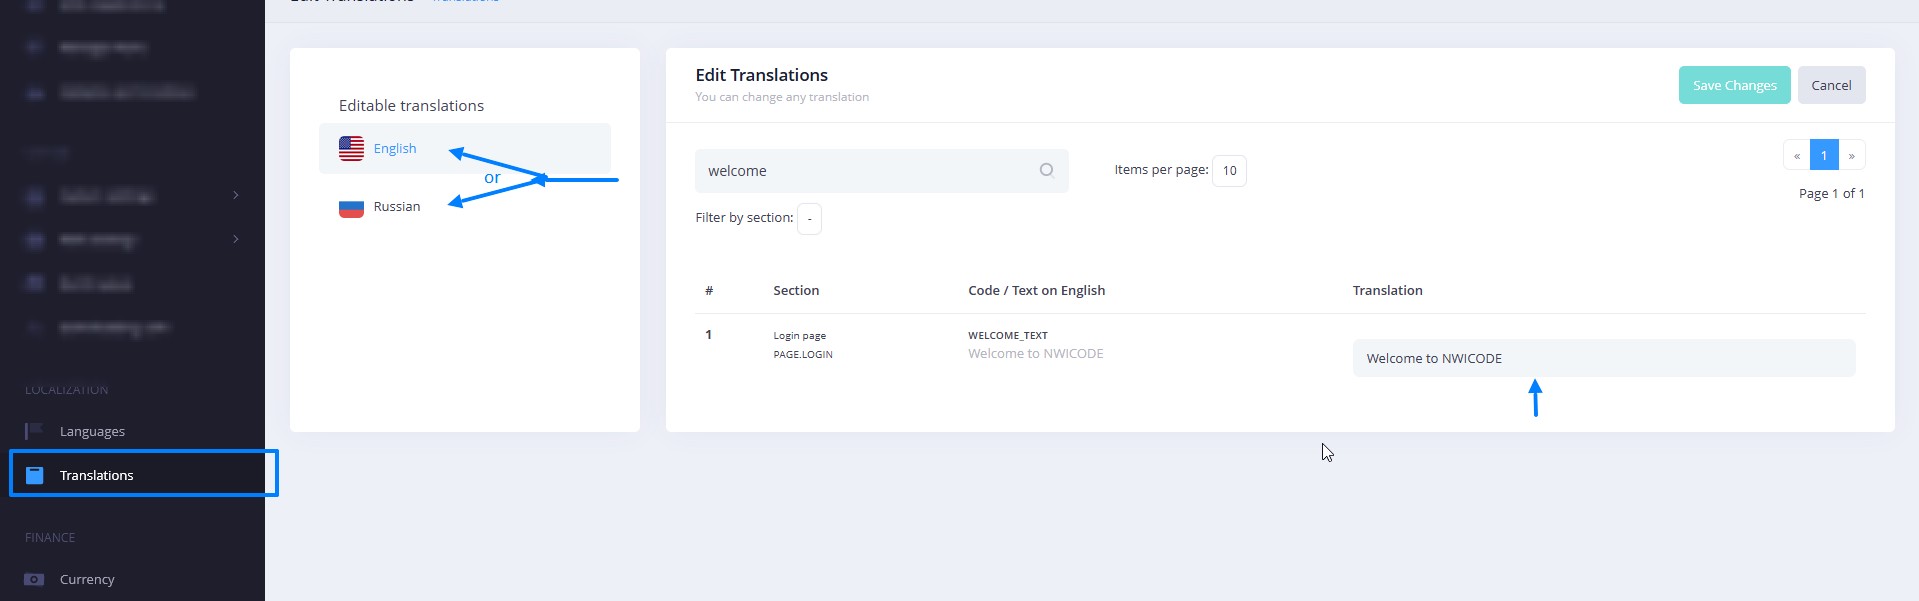
Note! To quickly find the desired phrase, use the search bar and enter part of the desired phrase into it. The filtering of the result occurs immediately
- 6. To complete the installation of the image, be sure to click “Save Changes”.
This stage is also completed, you can proceed to the next.
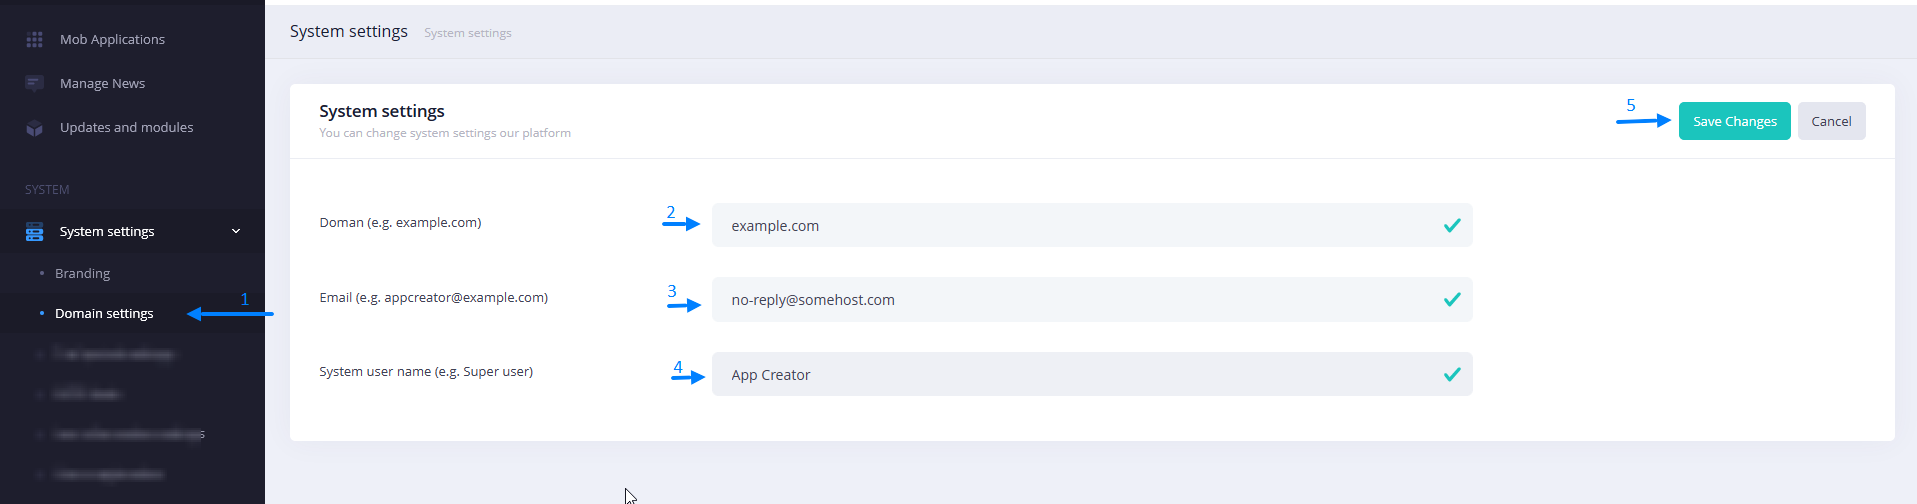
Domain settings
And so, to configure the parameters of the domain and administrator’s e-mail, as well as the system user name, you need:
- 1. From the “System Settings” drop-down menu, select “Domain Settings”.
- 2. In field 1, specify the main Domain where your platform is located.
- 3. In field 2, the system Email from which notifications will be sent to your clients and users.
- 4. In field 2 specify a system username that will also be seen by your clients and users.
- 5. After filling in the fields, be sure to click “Save Changes”.
Add your template
After you have created a new application, you need to download its archive in the admin panel
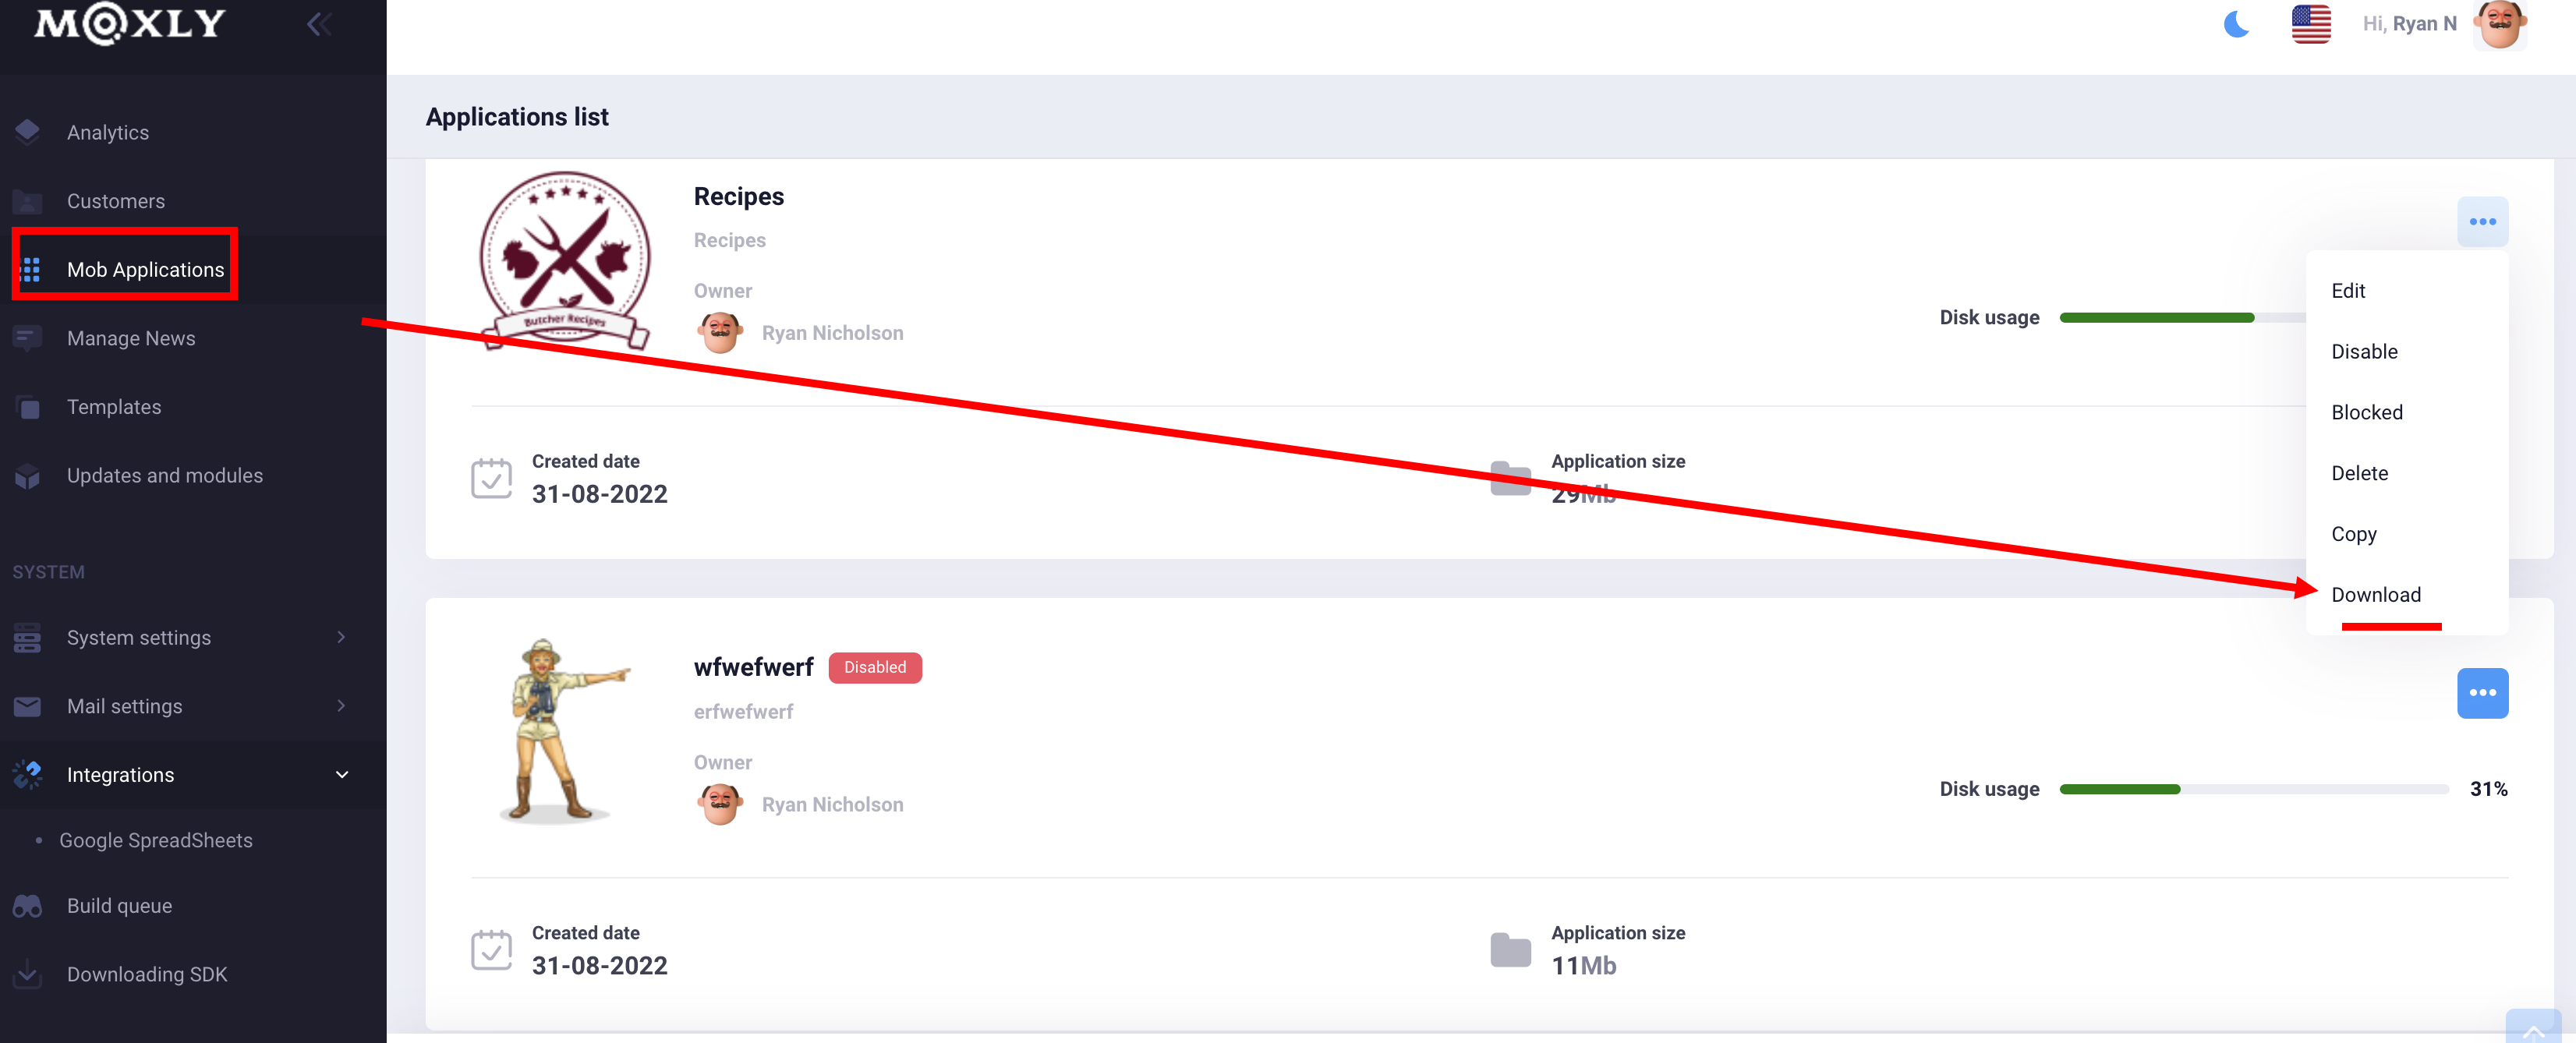
The resulting archive can be shared with clients or sold on the marketplace. This template is already available for use by clients when creating a new application
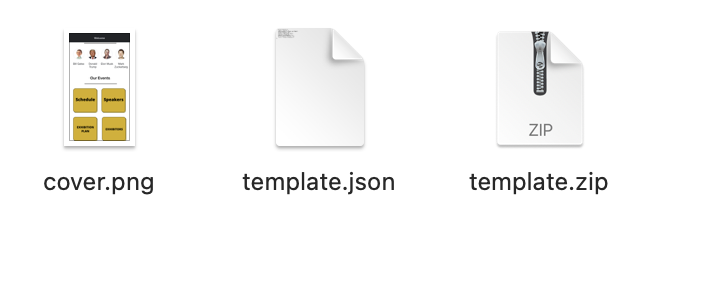
To use the template on the admin side, you need to package it by adding some files:
1. Cover.png - application cover
2. template.json - verification file
3. template.zip - archive with template
change the name and version in the json file
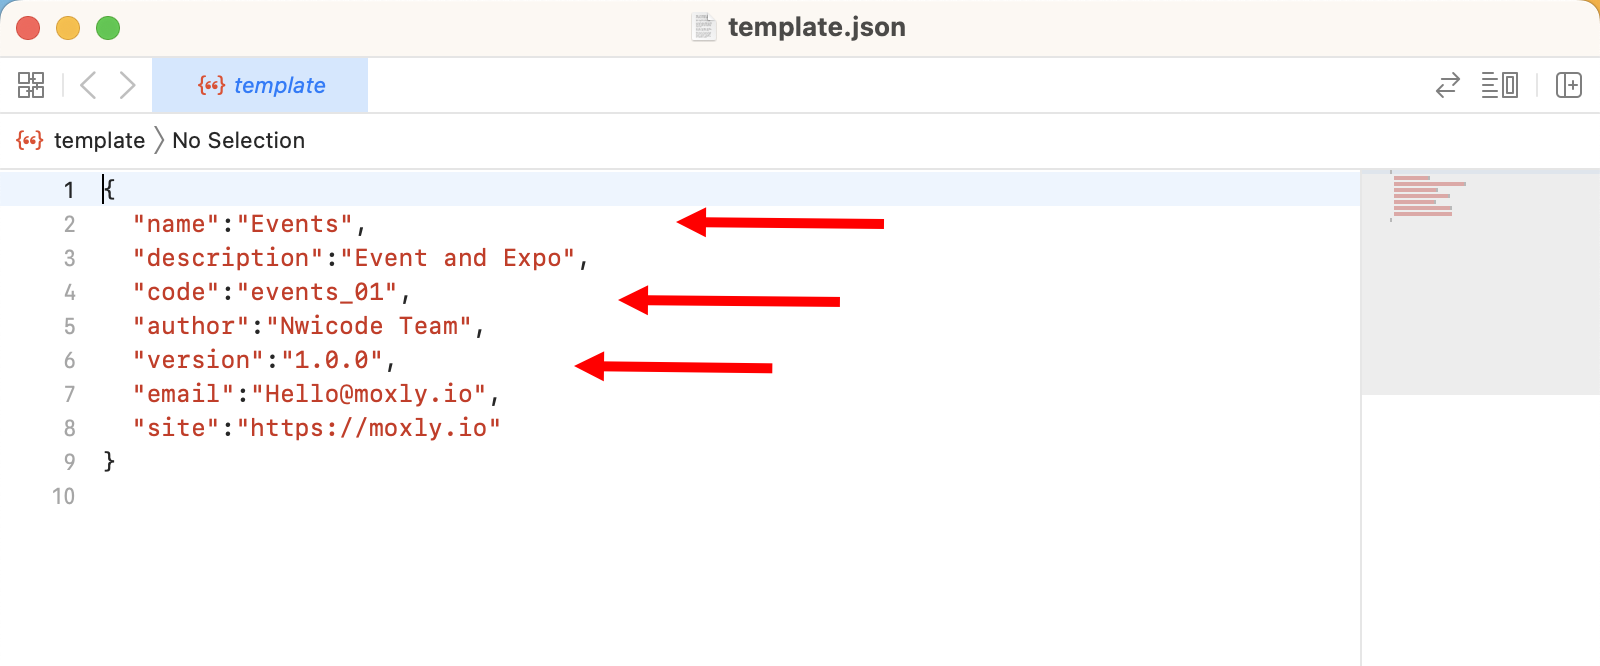
Now pack everything into one archive and add your template via the admin panel
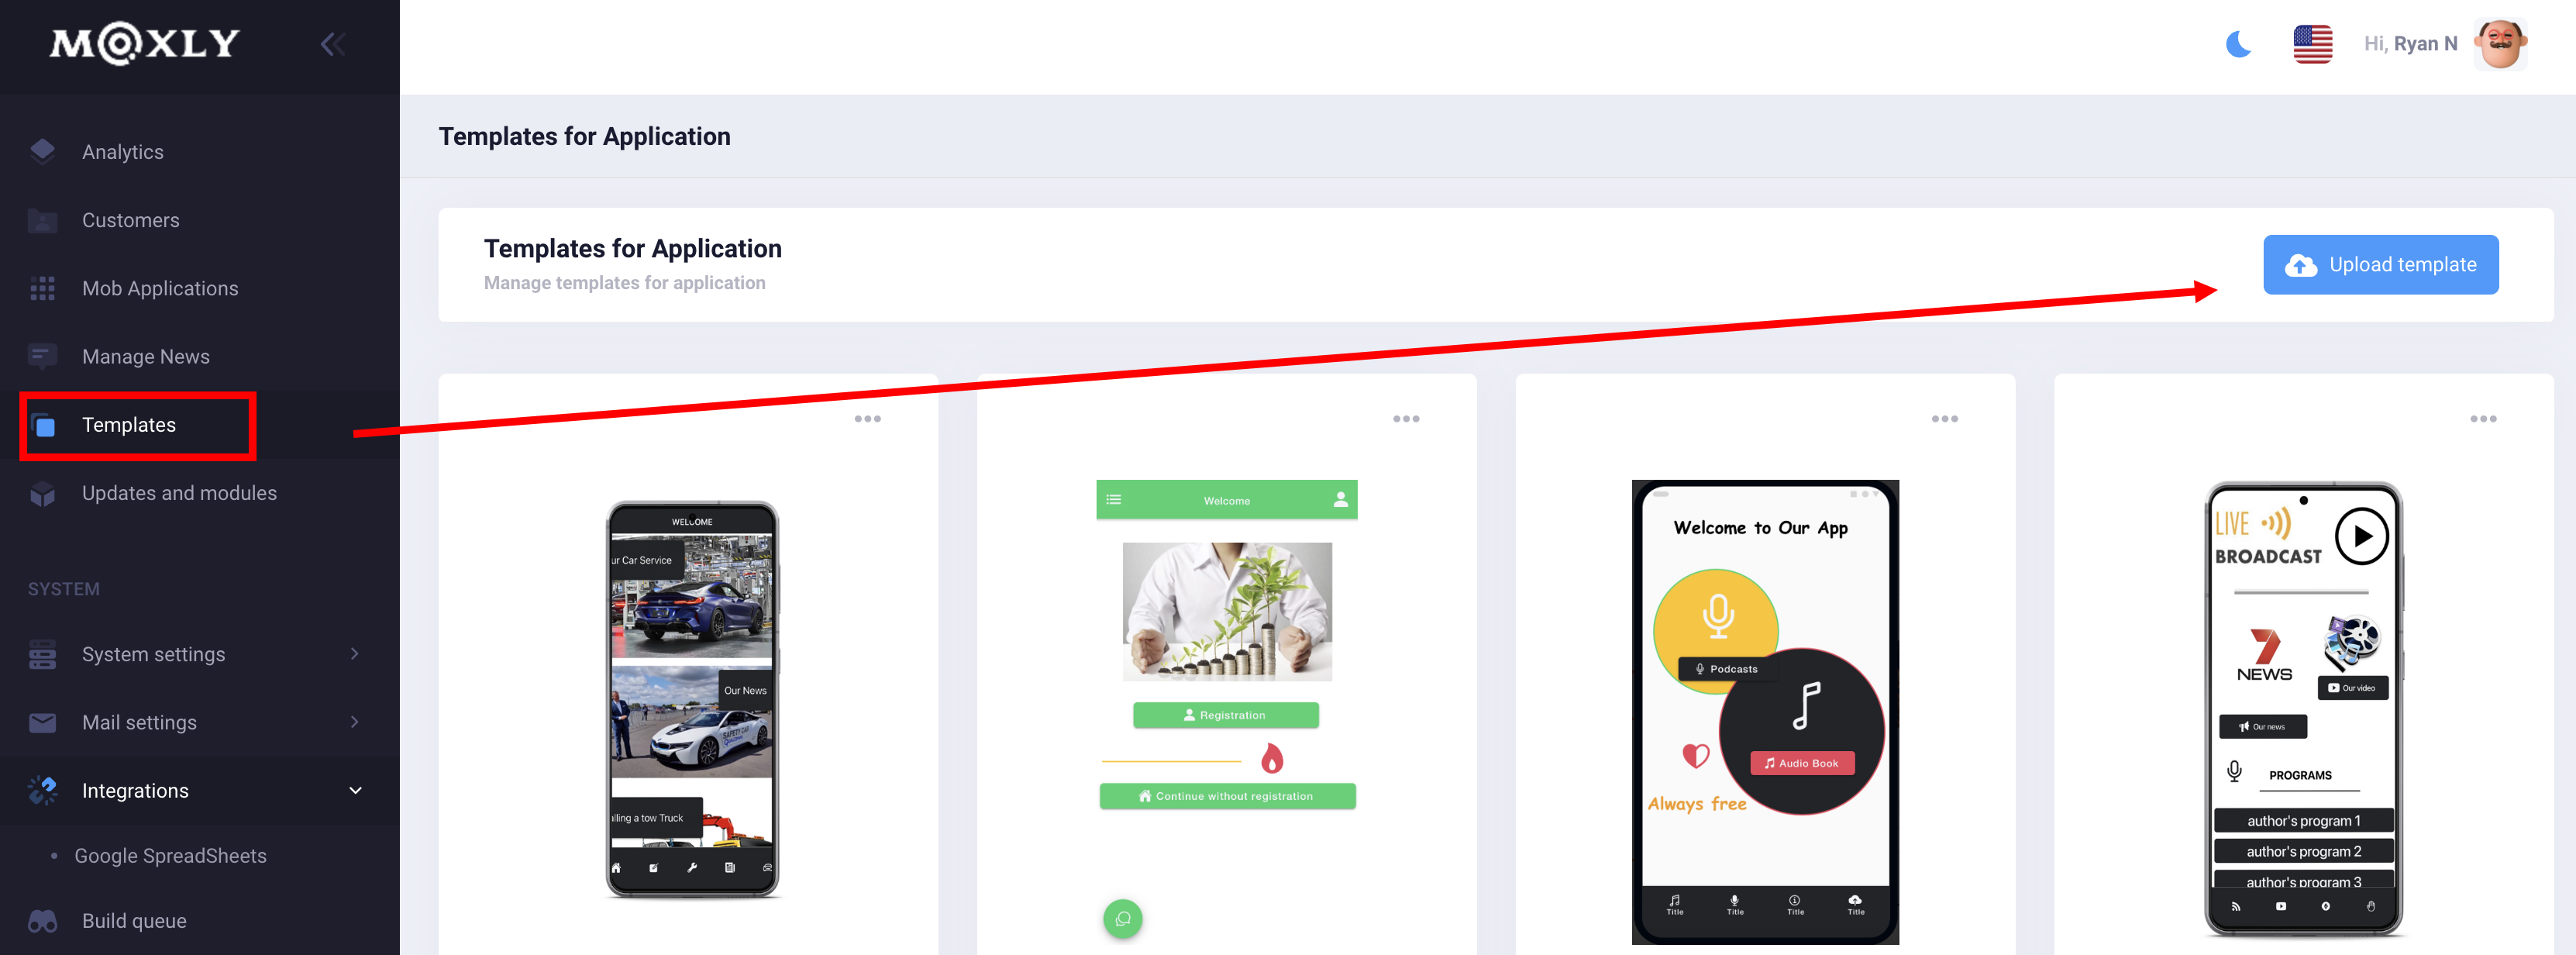
Download sample template here>>>
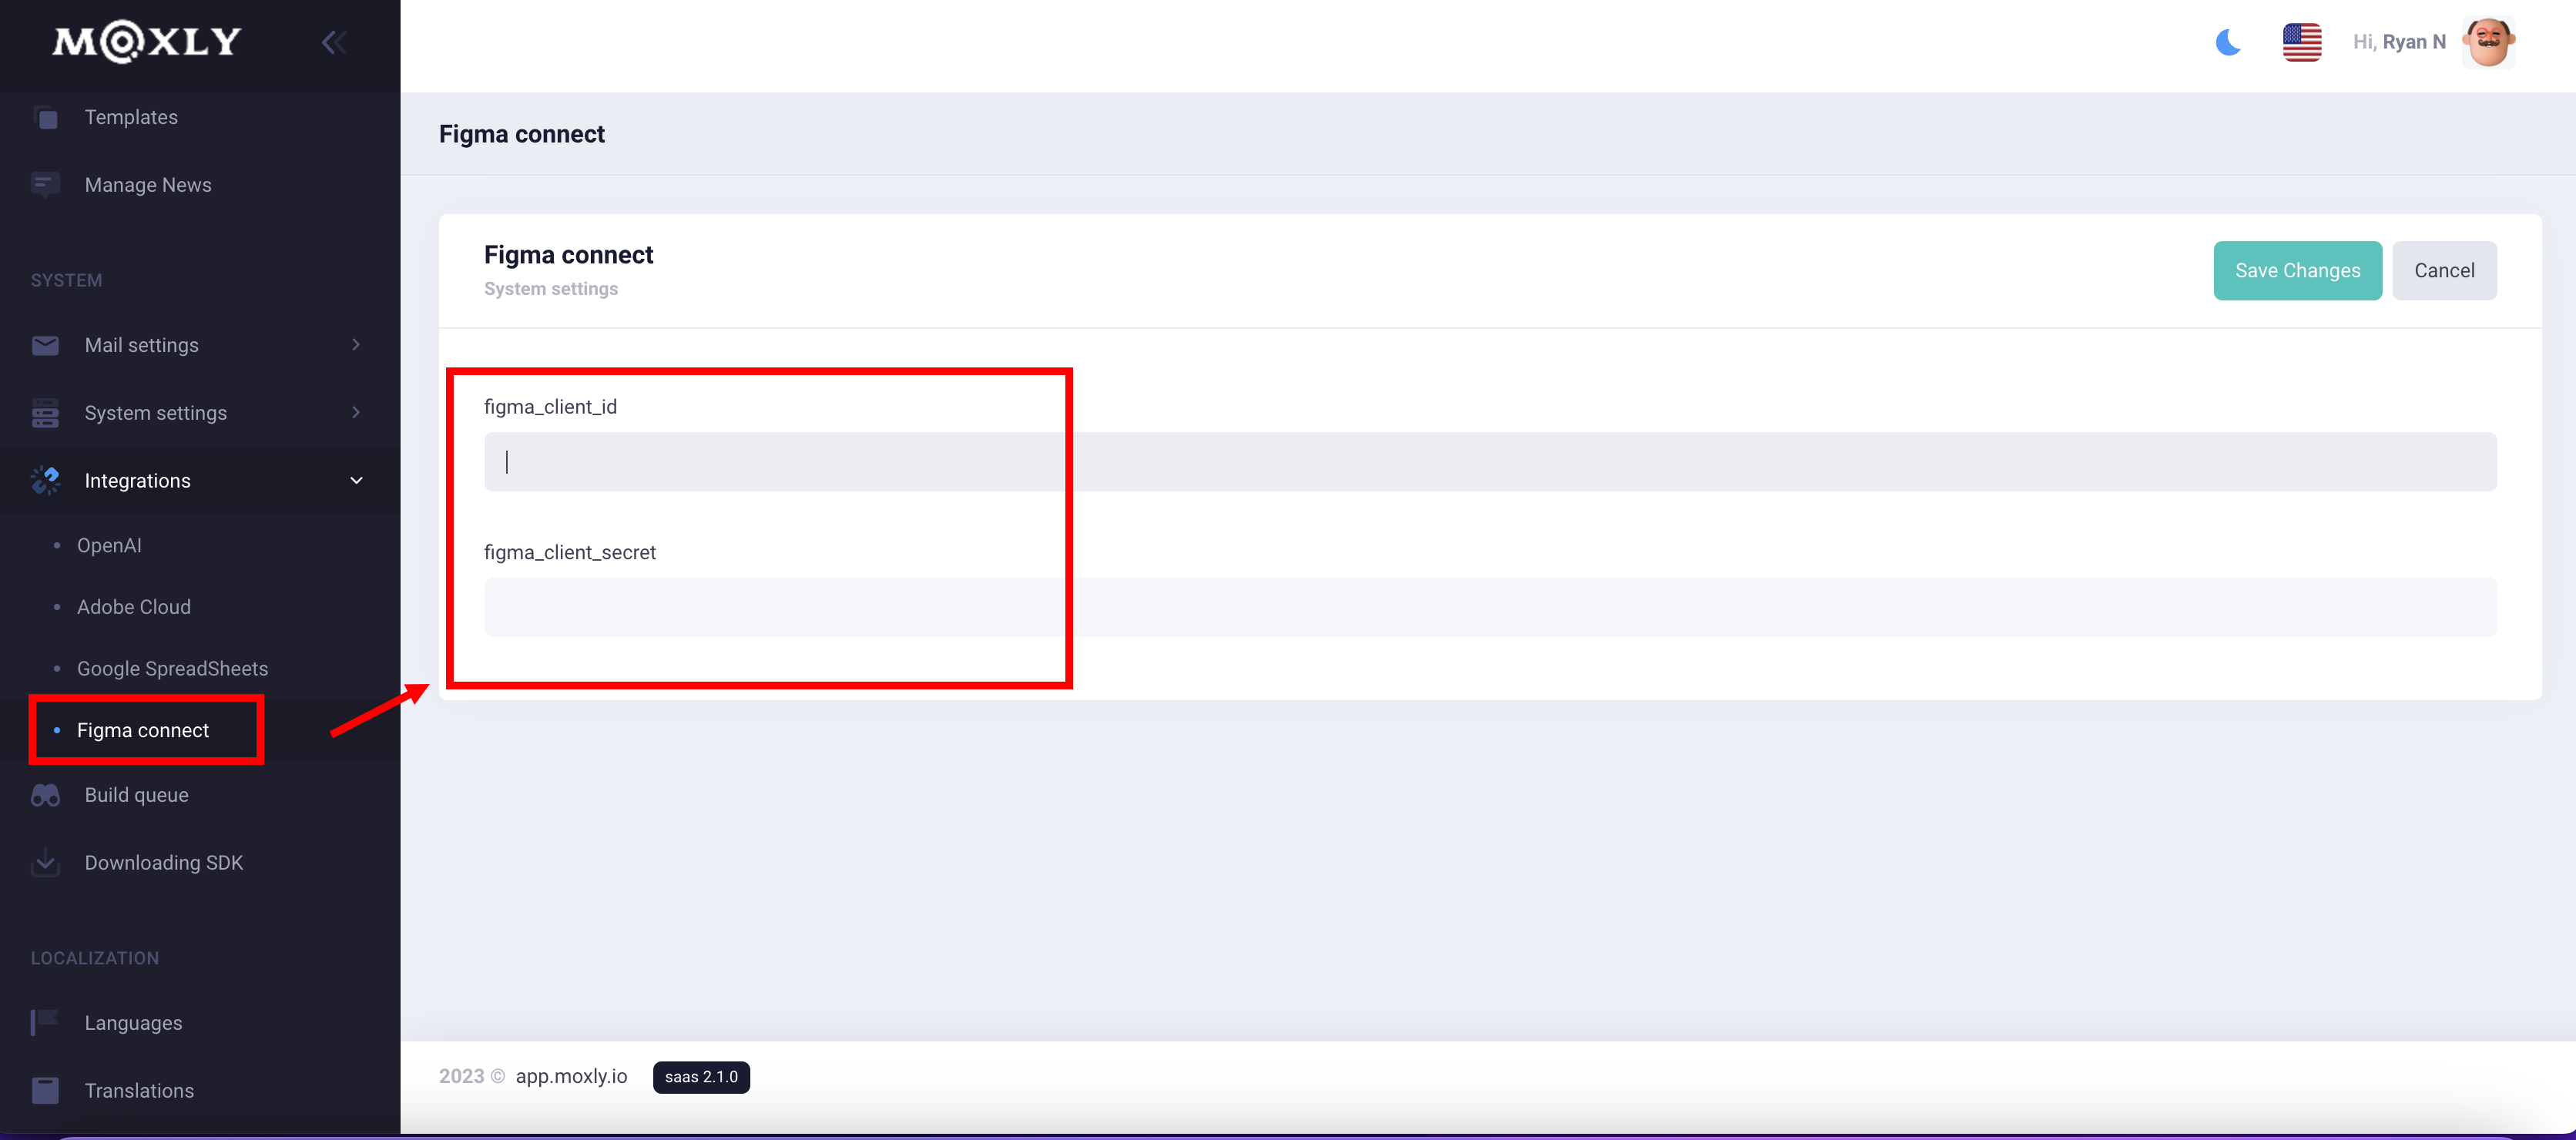
To integrate with Figma, get the keys
Go to the Figma website https://www.figma.com/developers/apps
add your application and add your address to the callback field https://yoursite.io/api/figma/callback
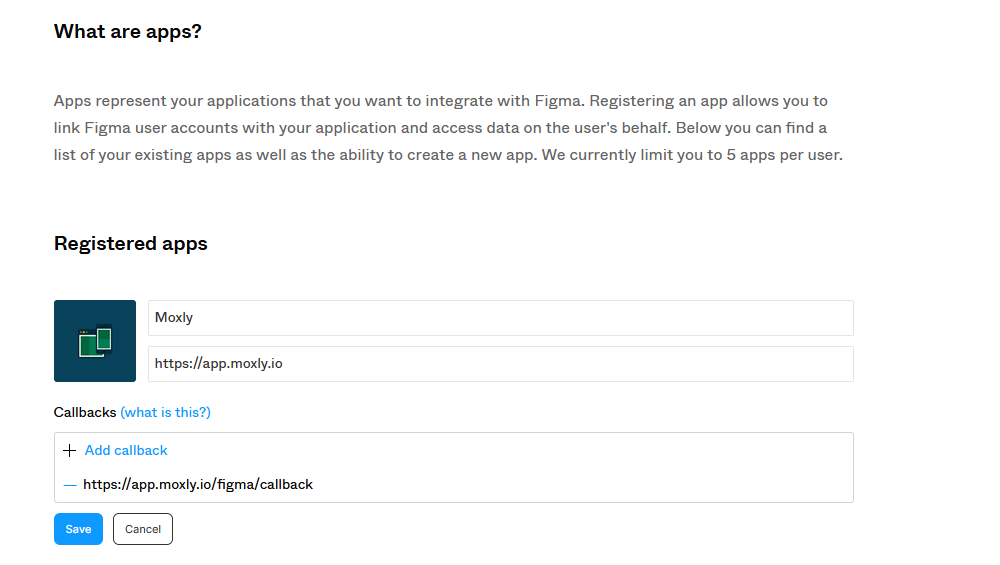
Go to the platform control panel and add your keys